
Every Dragonwilds Boss Compared: Weaknesses, Immunities and What to Bring
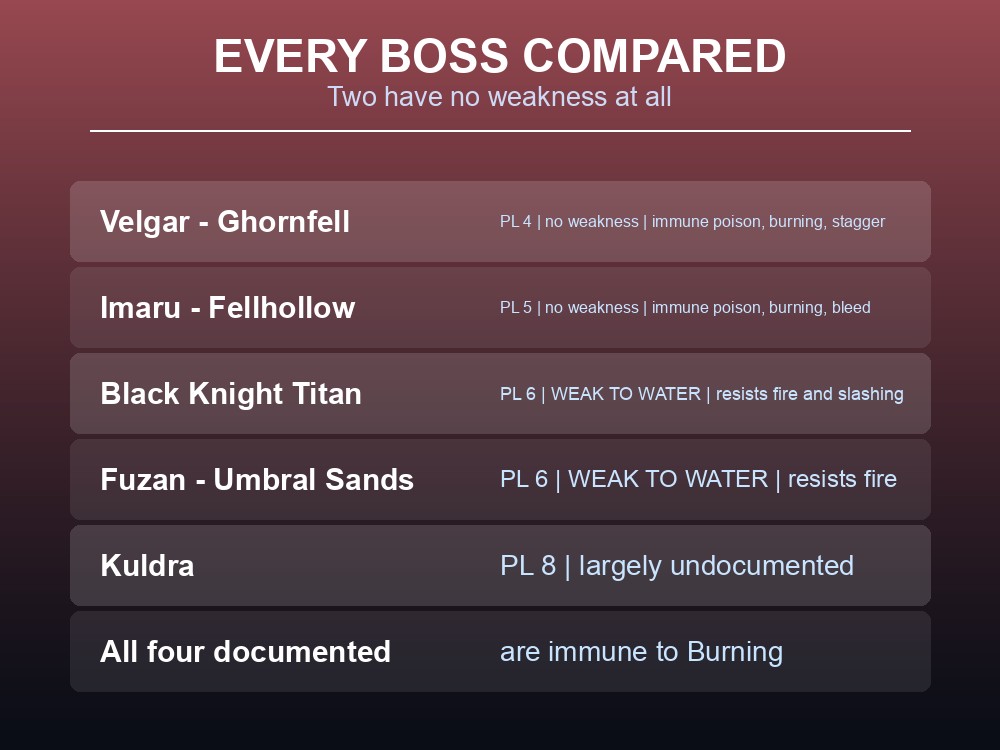
Two of Dragonwilds' five bosses have no weakness at all, and all four of the documented ones are immune to Burning. That means the single most common piece of endgame kit — fire arrows, weapon poison, weapon barbs — is dead weight in every boss fight in the game. This is the comparison table nobody publishes: every boss, its power level, what it resists, and the prep kit that works on all of them.
On sourcing. Jagex do not publish boss statistics. The details below come from the community RuneScape: Dragonwilds wiki, and can change with any patch. Kuldra's strategy page is largely unwritten, so her entry is deliberately thin.
The Comparison Table
| Boss | Region | Power level | Weak to | Immune to | Resists |
|---|---|---|---|---|---|
| Velgar | Ghornfell | 4 | Nothing | Poison, Burning, stagger | — |
| Imaru | Fellhollow | 5 | Nothing | Poison, Burning, Bleed | — |
| Black Knight Titan | Dowdun Reach | 6 | Water | Burning | Fire, slashing |
| Fuzan | Umbral Sands | 6 | Water | Poison, Bleed, Burning | Fire |
| Kuldra | — | 8 | Undocumented | — | — |
Four conclusions fall straight out of that table.
Leave the status-effect ammunition at home. Weapon poison, weapon barbs and fire arrows do nothing to any of them. That is a significant amount of crafting most players do before a boss and then waste.
Water is the answer twice. Both power level 6 bosses are weak to water, which makes water runes and Enchanted Iron Bolts — a 15% chance of water magic damage — the most transferable damage source in the late game.
Enchant Weapon: Fire is still worth casting on every one of them. Its +33% melee damage applies regardless; only the Burning on critical hits is wasted.
And the difficulty curve is regional. Power levels 4, 5, 6, 6, 8 track Ashenfall's regions in order, so a boss is always a check on whether you have geared up in the region you are standing in.
The Universal Prep Kit
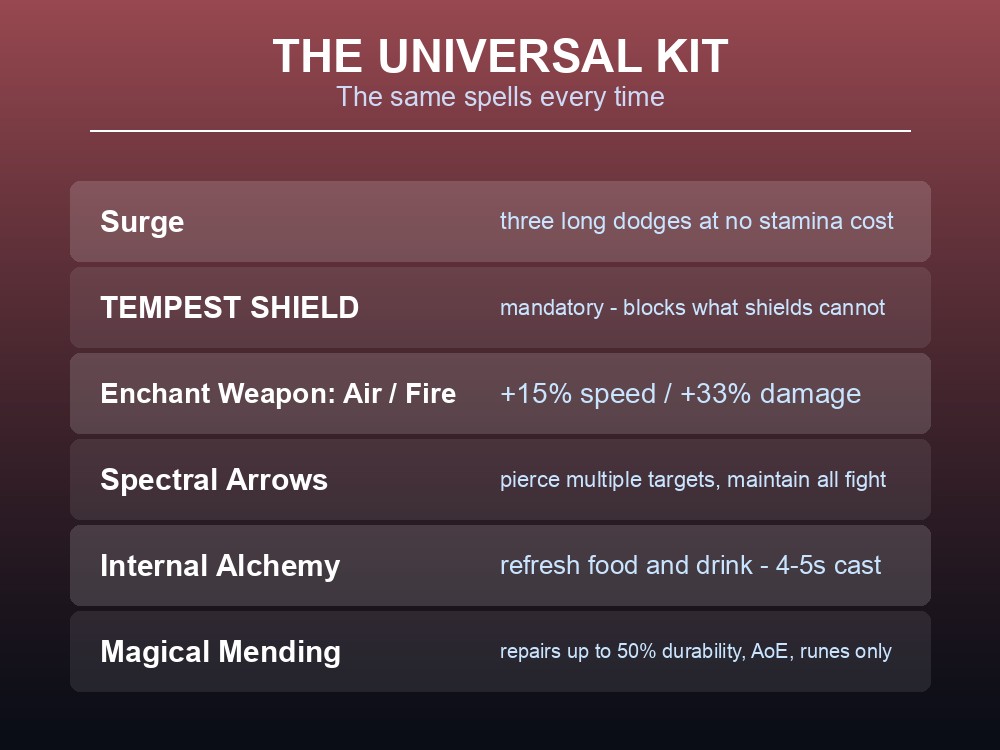
Every boss guide on the wiki recommends the same spell set, which makes it worth learning once:
| Spell | Why |
|---|---|
| Surge | Dodge three times at greater distance, costing no stamina |
| Tempest Shield | Blocks attacks a normal shield cannot, including unblockable ones |
| Enchant Weapon: Air | +15% attack speed, and increased damage |
| Enchant Weapon: Fire | +33% melee damage — the Burning is wasted, the damage is not |
| Spectral Arrows | Arrows pierce multiple targets; worth maintaining all fight for ranged |
| Internal Alchemy | Refreshes food and drink buffs — but costs 4–5 seconds of standing still |
| Magical Mending | Repairs dropped gear, up to 50% durability, AoE, costs only runes |
Tempest Shield is the one that is genuinely mandatory, not merely recommended. Three of the four documented fights have attacks that cannot be blocked without it.
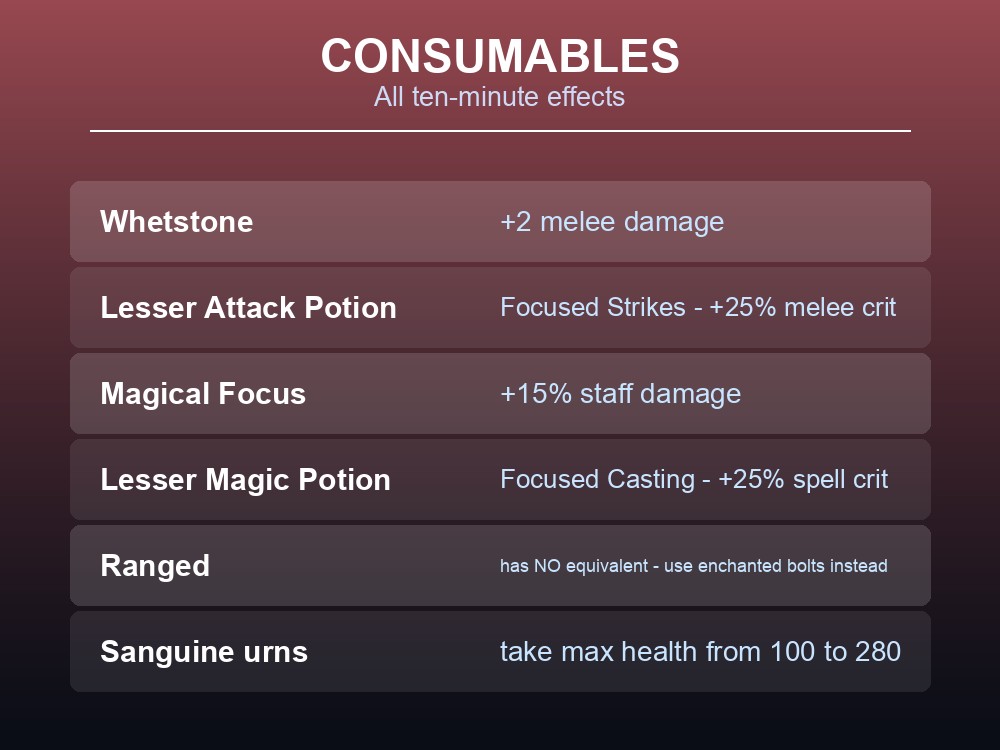
The consumables are equally consistent:
| Item | Effect | Duration |
|---|---|---|
| Whetstone | +2 melee damage | 10 minutes |
| Lesser Attack Potion | Focused Strikes — +25% melee crit chance | 10 minutes |
| Magical Focus | +15% staff damage | 10 minutes |
| Lesser Magic Potion | Focused Casting — +25% spell crit chance | 10 minutes |
Ranged has no equivalent damage consumable, which every guide notes explicitly. The ranged answer is enchanted bolts instead — and which bolt depends on the boss.
Sanguine urns are the health budget. Each raises maximum health by 10, and collecting every one currently in the game gives 280 total health against a base of 100. That is the single largest survivability upgrade available, and it is entirely exploration.
What Each Fight Actually Does
Velgar — Ghornfell, power level 4. A green dragon with Claw Slam, Claw Strike, Bite, Head Swing and a poison Dragon Breath cone. Every 25% of health lost, he flies up and rains poison barrages onto marked circles that can overlap and hit you twice. Poison is the whole fight — bring Lesser Antipoison and Fungal Fortitude food, or lose 4 health per second.
Imaru — Fellhollow, power level 5. A four-phase fight built on Wither. Her energy bolts, fire-breathing sweeps and rot spike stomps all fill the gauge. Phases 2, 3 and 4 see her go spectral and immune to all damage — and the only way to hurt her is to deliberately become Soul Rifted, kill the rotsworn thralls, knock her out of it, and reach a Purification Pool inside 40 seconds.
The Black Knight Titan — Dowdun Reach, power level 6. Two phases. Learn the two sword-planting tells: both feet planted means Earthquake, right knee bent means Stone Edge and a shockwave across the whole arena. At around 60% health the sword catches fire and every melee attack applies Burning.
Fuzan — Umbral Sands, power level 6. Eight phases, and the arena itself is the second opponent: sections of the ground become hot, a heat meter fills, and the Fight Cave approach adds waves before you even start. Fuzan summons KotHaar thralls, charges through walls, and in later phases marks a player for a tracking dragon fire attack — dodge repeatedly, or hold the Dragoncurse Shield with Antifire active.
Kuldra — power level 8. The highest power level boss in the game. Her strategy page is still a skeleton, with attack patterns, phases and difficulty differences all unwritten. Treat any specific Kuldra advice you find as unverified, including the claim that she has a weakness at all.
Rematches, Difficulty and Doing This as a Group
Every boss has a Normal and a Hard mode, set by the world difficulty rather than chosen at the door. The wiki's description of hard mode for Imaru is representative: mechanics trigger earlier and thralls appear sooner — it compresses the fight rather than adding new moves.
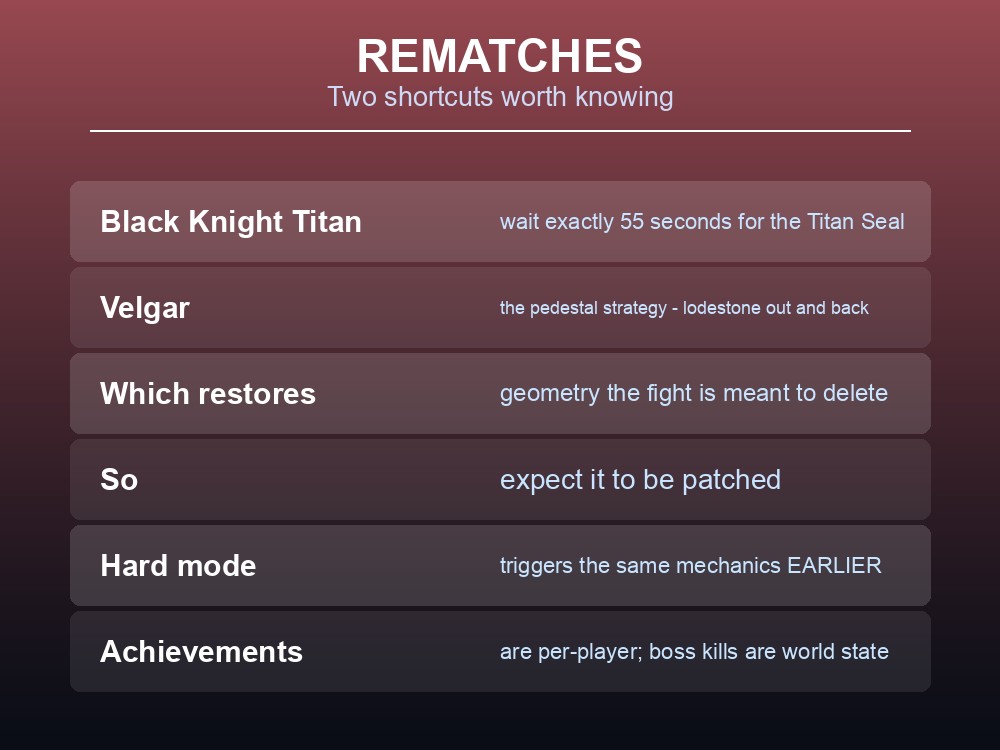
Two rematch mechanics are worth knowing before you need them:
- The Black Knight Titan re-summons. Stay in the arena for exactly 55 seconds after the kill and a Titan Seal appears in the centre of the room.
- Velgar has a documented pedestal strategy. Standing on the horn holder avoids close combat and ground spikes entirely — you only take poison damage. The pedestal vanishes when the fight starts, so the trick is to place a lodestone in front of the boss entrance, start the encounter, teleport out by pausing and pressing X, then teleport back and re-enter. The pedestal returns and stays. It reads like a bug being exploited, so expect it to be patched.
Three habits for a shared server:
- Bring everyone. Achievements are per-player, boss defeats are world state — a player who joins after the kill gets neither.
- Split the combat styles. Every guide lists a melee, ranged and magic preset, and the amulet choice differs per style — Strength, Accuracy or Magic, each paired with the Amulet of Defence.
- Unlock the lodestone first. Both the Bastion approach for the Black Knight Titan and the Fight Cave entrance for Fuzan are explicitly worth a lodestone before the attempt, not after.
Practical tips
- All four documented bosses are immune to Burning — no fire arrows, poison or barbs.
- Velgar and Imaru have no weakness; both power level 6 bosses are weak to water.
- Velgar is also immune to stagger — parries lose their edge.
- Cast Enchant Weapon: Fire anyway for the +33% damage.
- Tempest Shield is mandatory, not optional, in three of the four fights.
- Sanguine urns take you from 100 to 280 max health.
- Whetstone, Magical Focus and the Lesser potions all run 10 minutes.
- The Titan re-summons after 55 seconds in the arena.
- Kuldra is power level 8 and largely undocumented — distrust specifics.
Running your own RuneScape: Dragonwilds server
Boss attempts take several tries and everybody present, which is exactly what a world hosted on somebody's PC cannot reliably provide. A gamever Dragonwilds server keeps Ashenfall available around the clock for up to six players, updates automatically so client and server versions never drift, and takes one-click backups before disruptive changes.
Conclusion
Dragonwilds' bosses climb the power levels with the regions — Velgar at 4 in Ghornfell, Imaru at 5 in Fellhollow, the Black Knight Titan and Fuzan at 6 in Dowdun Reach and Umbral Sands, and Kuldra at 8 — and the single most useful fact across all of them is that every documented boss is immune to Burning, making fire arrows, weapon poison and weapon barbs wasted preparation. Velgar and Imaru have no weakness at all; both power level 6 bosses are weak to water, which makes water runes and Enchanted Iron Bolts the most portable late-game damage. The prep kit is identical every time — Surge, Tempest Shield, both Enchant Weapon spells, Spectral Arrows, Internal Alchemy and Magical Mending, plus the ten-minute Whetstone, Magical Focus and Lesser Attack or Magic Potion — and Tempest Shield is mandatory because three of the four fights include attacks a normal shield cannot stop. Each fight then poses a different problem: Velgar is a poison endurance test, Imaru requires you to deliberately Soul Rift, the Titan is a two-phase tell-reading exercise, and Fuzan is eight phases fought on ground that is itself hostile.
Want everyone online for attempt number five? Rent a Dragonwilds server at gamever.io — instant setup, one-click backups and updates, and 24/7 uptime. Start with a free trial and use promo code WELCOME.