
Salvage in Palworld 1.0: Ocean Barrels, Loot Tables & the Magnet
Most Palworld players never touch salvaging, which is a mistake — the higher tier of it hands out Coralum Ore at 6 – 11 per barrel with a 100% rate, plus Giant Pal Souls, Ultimate Spheres and weapon schematics. It is one of the better loot sources in the game and it requires no combat at all. The catch is that the entry requirements are unusual and nothing in the game explains them clearly. Here is the whole system.
How Salvaging Works
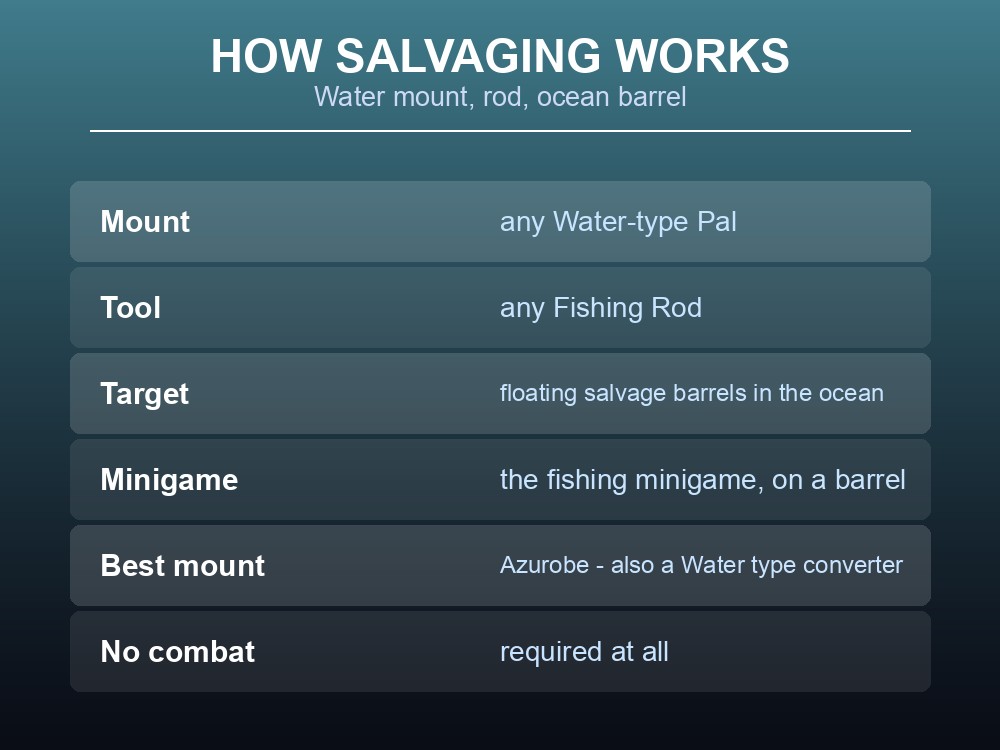
The basic loop: "mount a Water-type Pal, equip a Fishing Rod, and interact with Floating Salvage Barrels in the ocean."
| Requirement | Detail |
|---|---|
| Mount | Any Water-type Pal — you must be on the water |
| Tool | Any Fishing Rod |
| Target | Floating Salvage Barrels in the ocean |
| Minigame | "Keep the moving green bar behind the salvage icon until the circle fills up" |
It is the fishing minigame applied to a barrel rather than a fish, so if you can fish you can salvage.
Water mounts that work: Azurobe is the obvious pick since it is also a type converter (Water, +5~20% Attack), so the slot does double duty. Surfent, Jormuntide and other water travellers all serve.
The Two Ranks
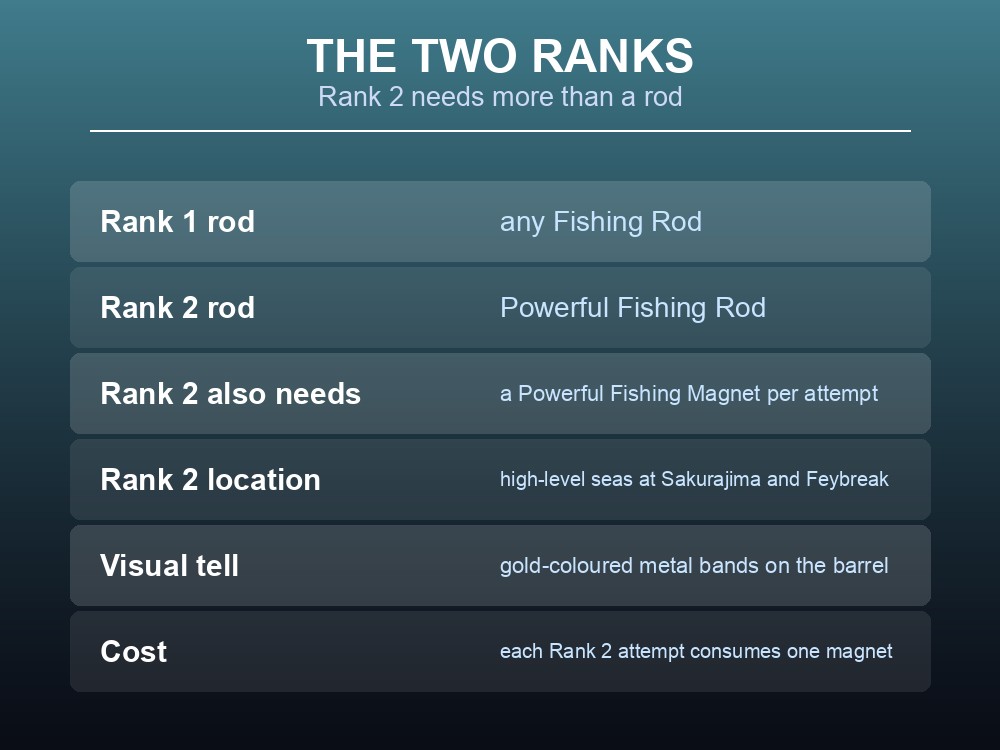
Rank 2 requires more than a rod, and this is what most guides omit:
| Rank 1 | Rank 2 | |
|---|---|---|
| Rod | Any Fishing Rod | Powerful Fishing Rod |
| Consumable | — | Powerful Fishing Magnet — one per attempt |
| Where | Ordinary ocean | High-level seas around Sakurajima and Feybreak |
| Barrel look | Plain wooden | Gold-coloured metal bands |
Look for the gold bands. That is the visual tell that separates a Rank 2 barrel from a Rank 1 one, and it is the only reliable way to know before you cast.
Each Rank 2 attempt consumes one Powerful Fishing Magnet, which makes them a real cost rather than a free pickup. Budget accordingly — this is not something you grind casually.
The Loot Tables
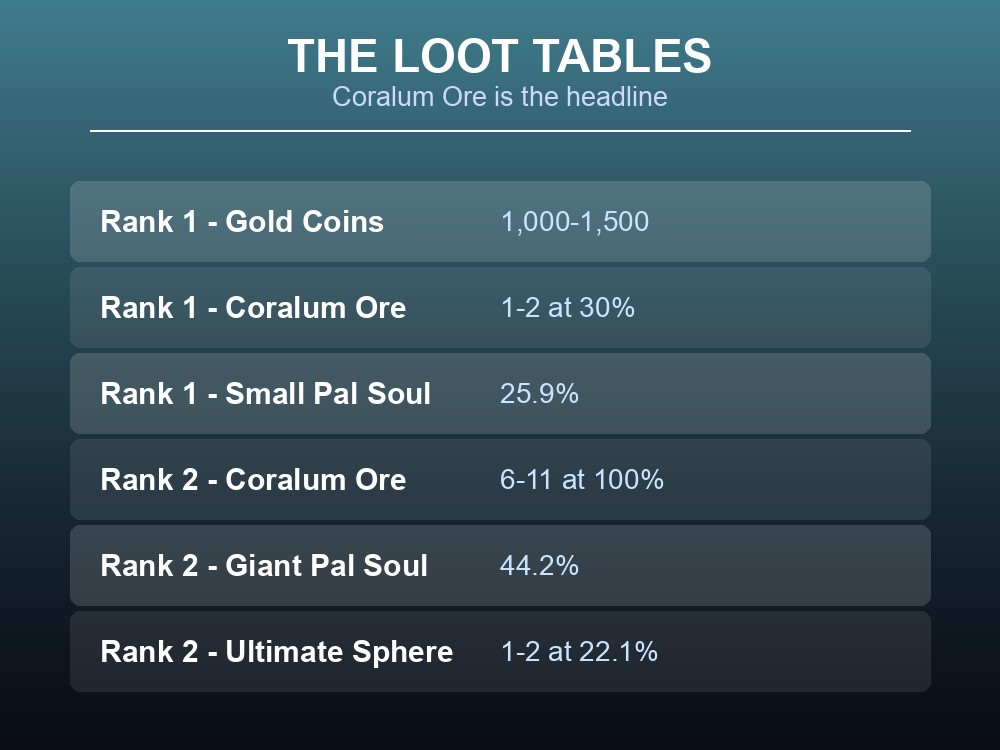
Salvage Rank 1:
| Item | Rate |
|---|---|
| Gold Coins (1,000 – 1,500) | very common |
| Coralum Ore (1 – 2) | 30% |
| Small Pal Soul | 25.9% |
| Silver Key | 12.9% |
Salvage Rank 2:
| Item | Rate |
|---|---|
| Coralum Ore (6 – 11) | 100% |
| Giant Pal Soul | 44.2% |
| Ultimate Sphere (1 – 2) | 22.1% |
| Gold Key | 17.7% |
| Armor and weapon schematics | below 3% each |
The Coralum Ore line is the reason to do this. At 6 – 11 per barrel at a 100% rate, Rank 2 salvaging is among the most reliable Coralum sources in the game — and Coralum Ore feeds Coralum Ingot, which the Advanced Workshop (Technology 62) wants 50 of and the Ancient Furnace (Technology 66) wants 100 of.
Giant Pal Souls at 44% are the second prize. They feed condensing, which is the unavoidable route to a maxed Pal at 4, 8, 12 and 24 duplicates for +5% through +20%.
The schematics are a lottery. Below 3% each, but schematics set the rarity of the gear you craft, which is a permanent multiplier on that item's stats — so the occasional hit is worth more than its rate suggests.
Gold Coins at 1,000 – 1,500 per Rank 1 barrel are quietly decent income for an activity with no combat risk. For comparison, one Successful Bounty Token converts to 2,000 gold.
Doubling It With Jellroy
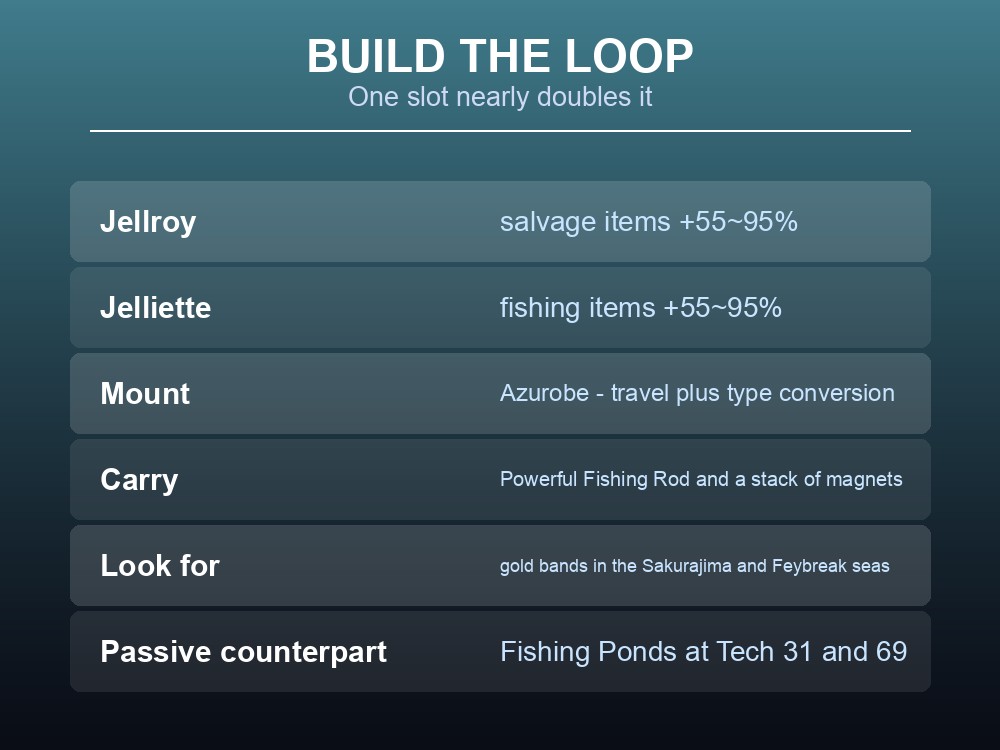
There is a Pal whose entire purpose is this activity. Jellroy, in your party, increases "items obtained from salvaging by 55~95%".
That is close to doubling, from one party slot, on an activity that already gives Coralum Ore at 100%. If you intend to salvage at all, Jellroy is not optional — it is the difference between 6 – 11 Coralum per barrel and something approaching twice that.
Its sibling covers the other water activity: Jelliette increases "items obtained from fishing by 55~95%". If you are out on the water with a rod anyway, the two are natural travelling companions — one boosts the barrels, the other boosts the fish.
Build the loop properly and salvaging becomes genuinely efficient:
- Azurobe as the mount — Water travel and Water type conversion.
- Jellroy in the party for the +55~95%.
- Jelliette as well if you are fishing between barrels.
- A Powerful Fishing Rod and a stack of Powerful Fishing Magnets for Rank 2.
- Head for the high-level seas around Sakurajima or Feybreak and look for gold bands.
One structural note. Palworld's Fishing Ponds at your base — Fishing Pond (Technology 31) and Large Fishing Pond (Technology 69) — are the passive counterpart to all this. They produce while you are elsewhere, and since v1.0.3 the Large Fishing Pond also yields World Tree Holy Water. Salvaging is the active version; the ponds are the version that works while you are offline.
Practical tips
- You need a Water-type mount and a fishing rod — that is the whole entry requirement for Rank 1.
- Rank 2 needs a Powerful Fishing Rod plus a Powerful Fishing Magnet per attempt.
- Gold metal bands on the barrel mark a Rank 2 target.
- Rank 2 gives Coralum Ore 6 – 11 at 100% — one of the best Coralum routes in the game.
- Carry Jellroy for +55~95% salvage yield. It nearly doubles everything above.
- Azurobe is the ideal mount — water travel and a Water type conversion in one slot.
- Schematics drop below 3% but set gear rarity permanently, so the hits matter.
Running your own Palworld 1.0 server
Salvage barrels are world content — they are there when the world is running and nowhere when it is not. A dedicated Palworld 1.0 server keeps the Sakurajima and Feybreak seas available whenever you have an hour, and keeps the passive counterpart running too: Fishing Ponds producing around the clock while nobody is logged in. Full crossplay lets a group work the water together, and one-click backups protect a schematic you pulled at 3%.
Conclusion
Salvaging needs only a Water-type mount and a fishing rod to start, and uses the fishing minigame on floating ocean barrels. Rank 1 yields 1,000 – 1,500 Gold Coins, Coralum Ore at 30%, Small Pal Souls and Silver Keys. Rank 2 — which requires a Powerful Fishing Rod, consumes a Powerful Fishing Magnet per attempt, and is found in the high-level seas around Sakurajima and Feybreak on barrels with gold metal bands — is far richer: Coralum Ore at 6 – 11 with a 100% rate, Giant Pal Souls at 44%, Ultimate Spheres at 22% and weapon and armor schematics below 3%. Bring Jellroy for +55~95% salvage yield and Azurobe as a mount that also converts your damage type, and this becomes one of the best no-combat loot routes in the game.
Want the seas available whenever you are? Rent a Palworld server at gamever.io — instant setup, one-click backups and updates, full crossplay and 24/7 uptime. Start with a free trial and use promo code WELCOME.