
How to make a simple TNT cannon in Minecraft?
Introduction to TNT Cannons in Minecraft
Constructing a TNT cannon is a prime illustration of how creativity and engineering are encouraged in the game Minecraft. A TNT cannon is an apparatus that can be used for mining, warfare, or just plain enjoyment that shoots TNT a long way using explosive power. It is imperative to comprehend the fundamental principles of a TNT cannon and the significance of the components we will be utilizing before delving into the construction intricacies.
Components of a TNT Cannon
Slime Blocks (2) : Slime blocks are unique in Minecraft due to their ability to stick to other blocks and move them. In our TNT cannon design, they are crucial for the mechanism that launches the TNT.
Sticky Pistons (2) : Sticky pistons are used to push and pull blocks, including slime blocks. They are vital in creating the moving parts of the cannon.
Dispenser : This block is used to dispense the TNT. The positioning and timing of the dispenser are crucial for the cannon's efficiency.
Redstone Repeater : Redstone repeaters are used to control the timing of the circuit. Proper timing is essential for synchronizing the launch and explosion of the TNT.
Button : A button acts as a trigger for the entire mechanism, initiating the TNT launch sequence.
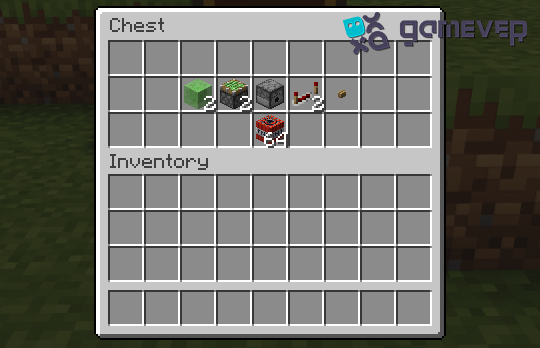
Step-by-Step Guide to Building Your TNT Cannon
Step 1: Preparing the Base
Start by selecting a suitable location for your TNT cannon. It should be in an open area, away from valuable structures, as TNT can be destructive.
Step 2: Building the Frame
Place the sticky piston and redstone repeater as shown in the picture. Then double-right-click on the redstone repeater.
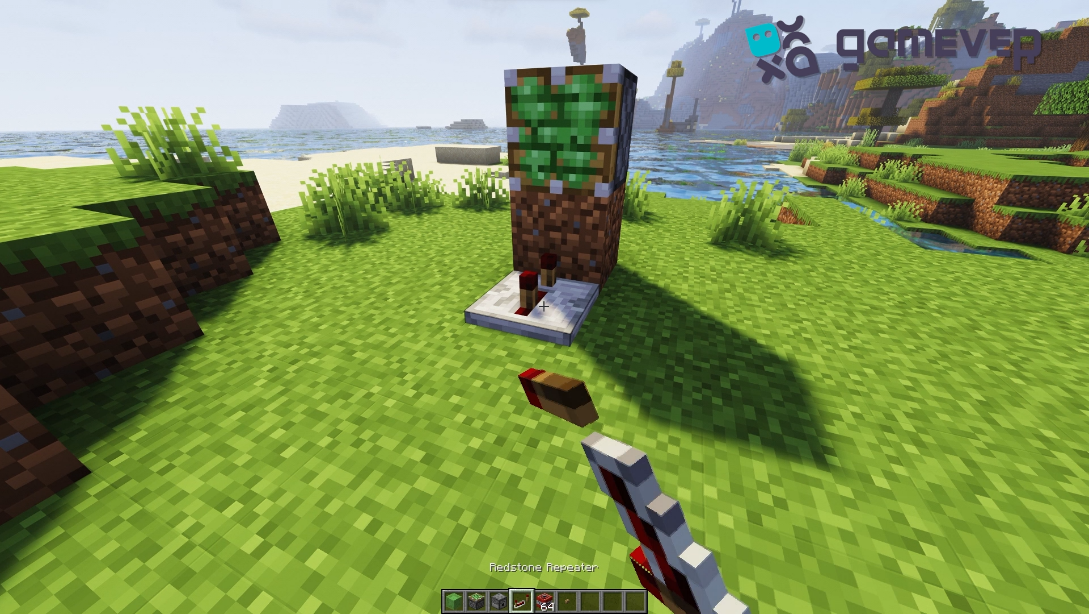
Step 3: Installing the dispenser and repeater
Place the Redstone repeater next to dispenser and right-click on it three times.
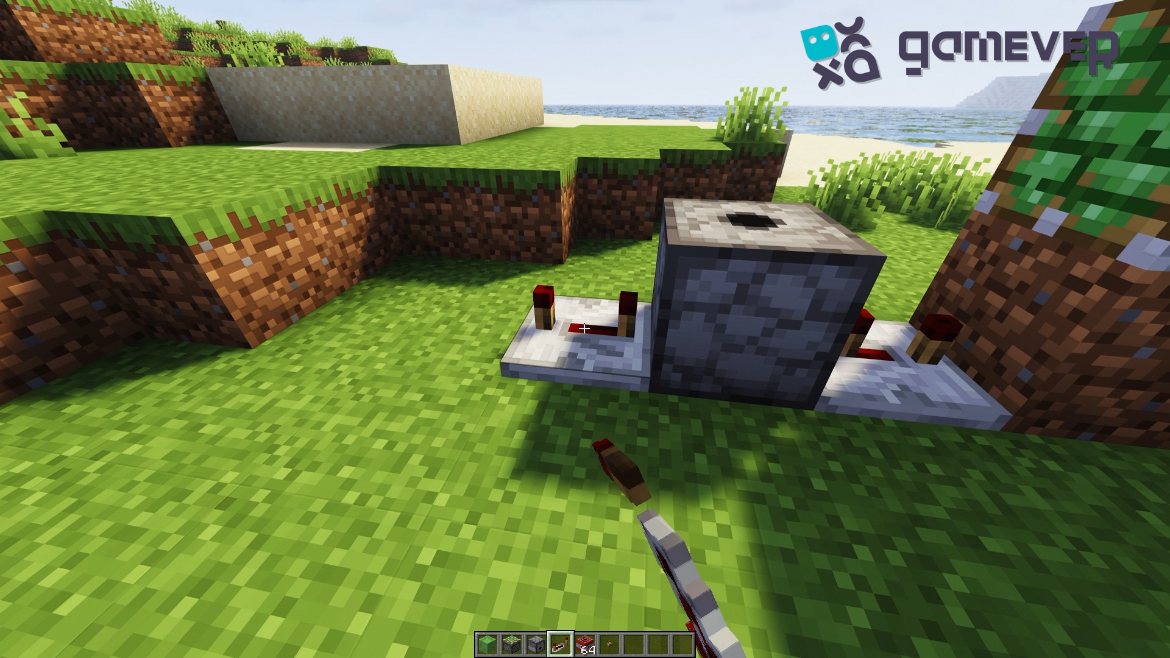
Step 4: Almost done
Then place sticky piston as shown in the picture, and place two slime blocks on all pistons.
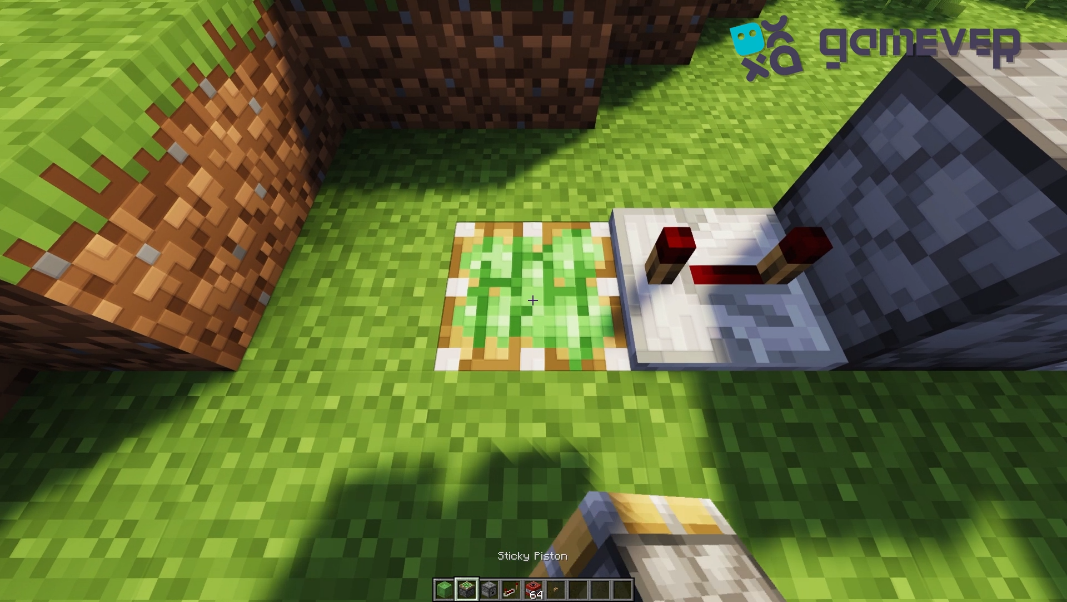
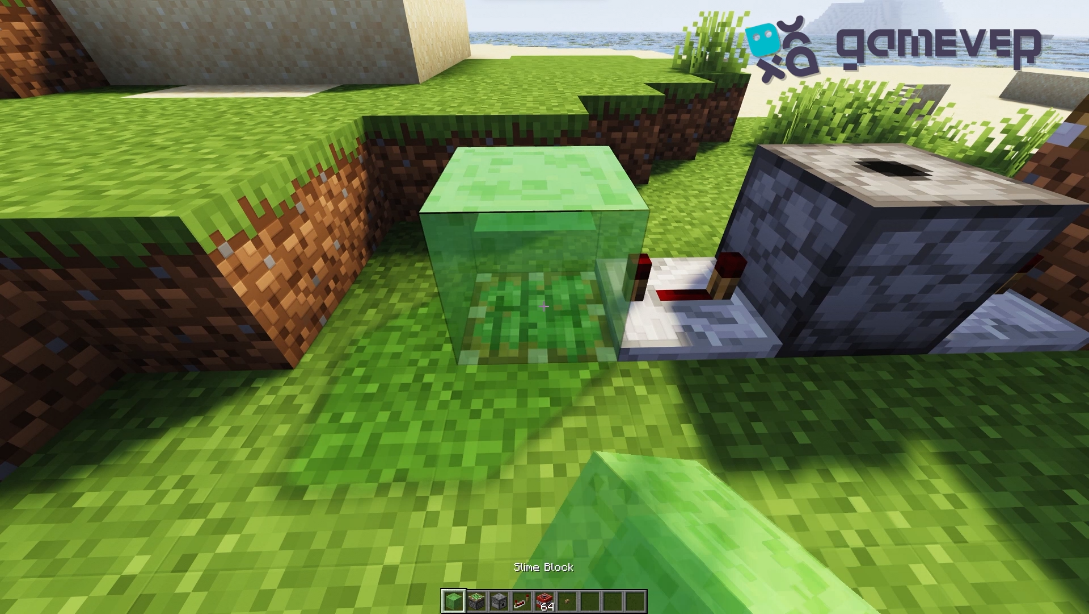
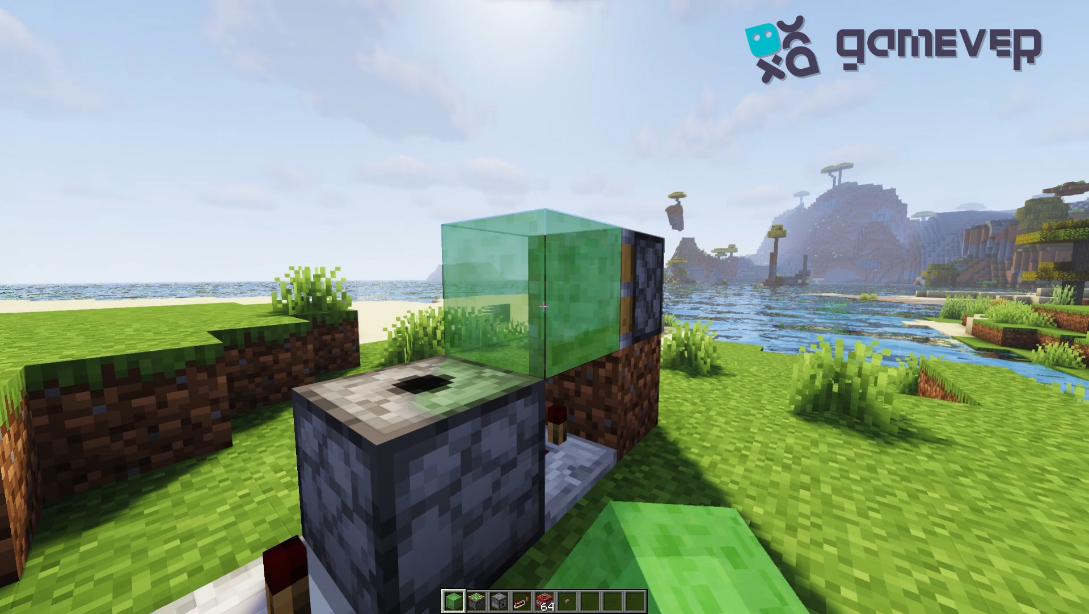
Step 5: Finishing Creation
Finally, place the button on the dispenser, and your cannon is ready!
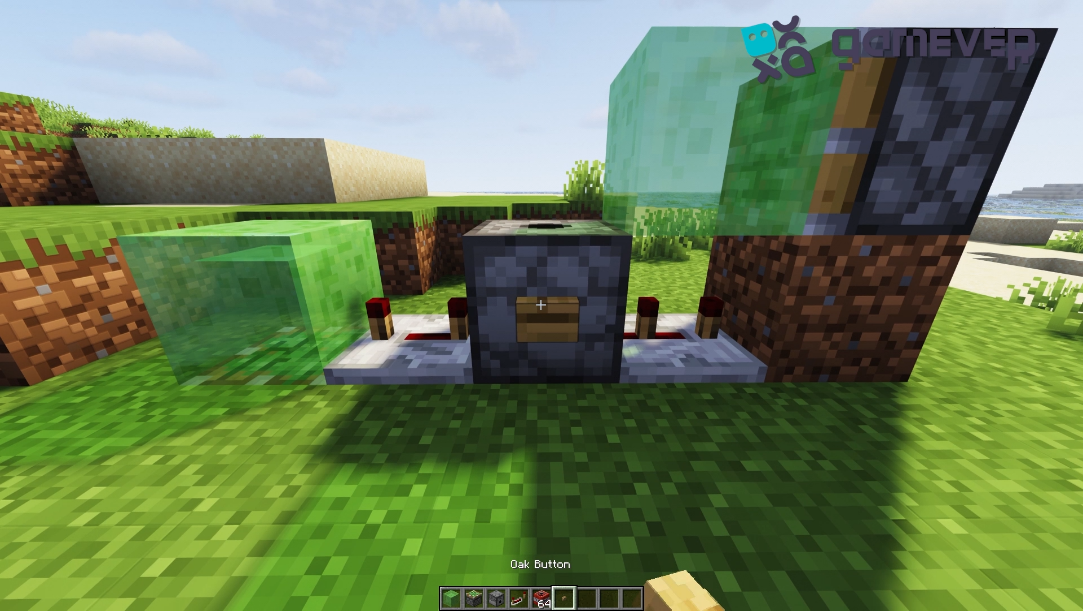
Step 6: Testing Your Cannon
Before using it in gameplay, test your cannon with a single TNT to ensure all parts are working correctly.
Safety Precautions
When dealing with TNT in Minecraft, it's important to take certain safety measures to prevent accidental damage to your world or structures. Always test new designs in a controlled environment, and keep a safe distance when firing the cannon.
Conclusion
Not only is building a TNT cannon in Minecraft a lot of fun, but it's also a terrific opportunity to learn more about redstone engineering and game dynamics. You may improve your Minecraft experience by building a useful and eye-catching TNT cannon using this method.
If you want to experience more from your Minecraft adventures, you should think about playing on Gamever servers. With Gamever, you can hire a server to play with your friends and enjoy a smooth and entertaining multiplayer experience. Become a member of the Gamever community now to fully utilize the potential of your TNT cannon designs!