
The Dragonwilds HUD: What Every Element Means and the Keys That Open It
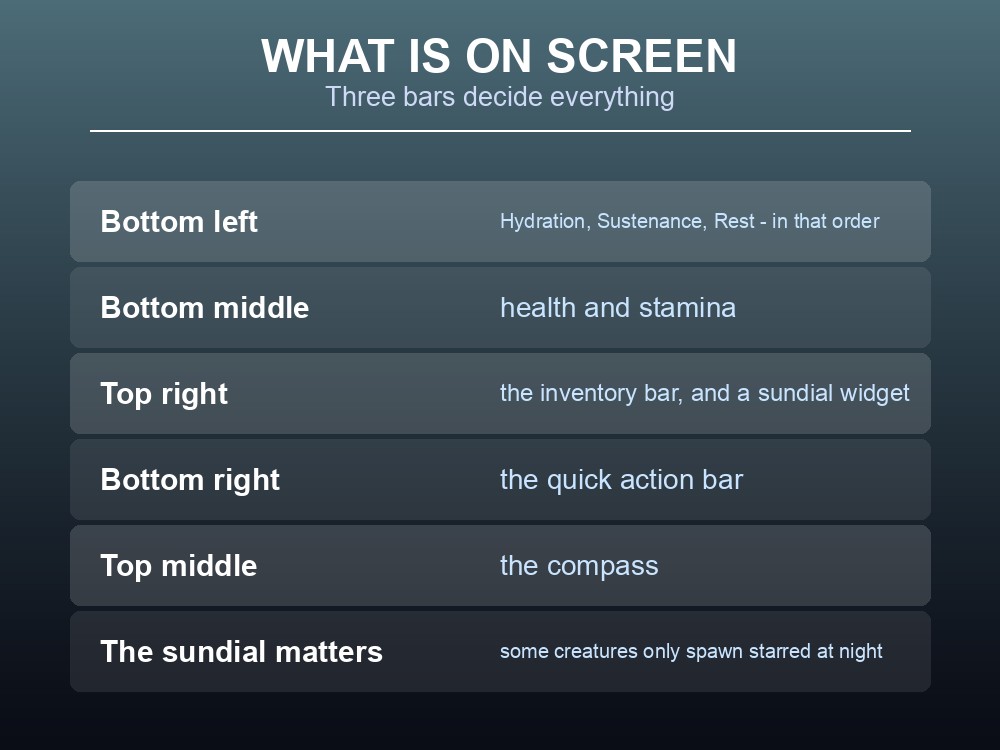
The three small bars in the bottom-left corner of Dragonwilds are the most consequential thing on your screen, and the game never explains them. They are Hydration, Sustenance and Rest — and each governs a completely different system: one drives your health regeneration, one drives your stamina regeneration, and one sets your maximum stamina. Getting them confused is why players eat when they should drink. Here is the whole interface, with the default keys.
On sourcing. The layout and bindings below come from the community RuneScape: Dragonwilds wiki, and can change with any patch.
What Is On Screen
| Element | Where |
|---|---|
| Status bars — Hydration, Sustenance, Rest | Bottom left, in that order |
| Health and stamina | Bottom middle |
| Inventory bar | Top right |
| Quick action bar | Bottom right |
| Aiming reticle | Centre |
| Compass | Top middle |
| Sundial widget | Top right — shows the time of day |
The sundial is easy to overlook and worth watching. Time of day gates real things: spawners check it, and higher-starred variants of some creatures only appear at night.
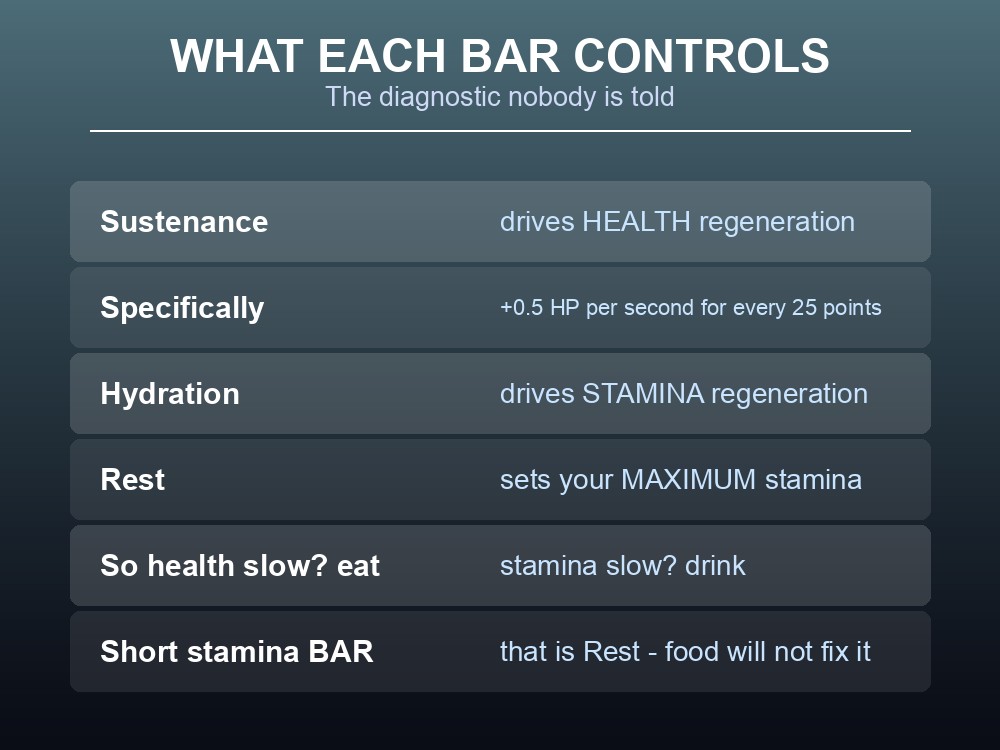
The three status bars, left to right, are Hydration, Sustenance and Rest — and their order on screen is not their order of importance. What each one does:
| Bar | Controls |
|---|---|
| Sustenance (Hunger) | Health regeneration — +0.5 HP/sec per 25, capped at 2.0/sec |
| Hydration (Thirst) | Stamina regeneration |
| Rest | Maximum stamina, via the Fatigue debuff below 50 |
So the diagnostic is: health recovering slowly means eat; stamina recovering slowly means drink; a short stamina bar means Rest, and neither food nor water will fix that last one.
The Default Keys
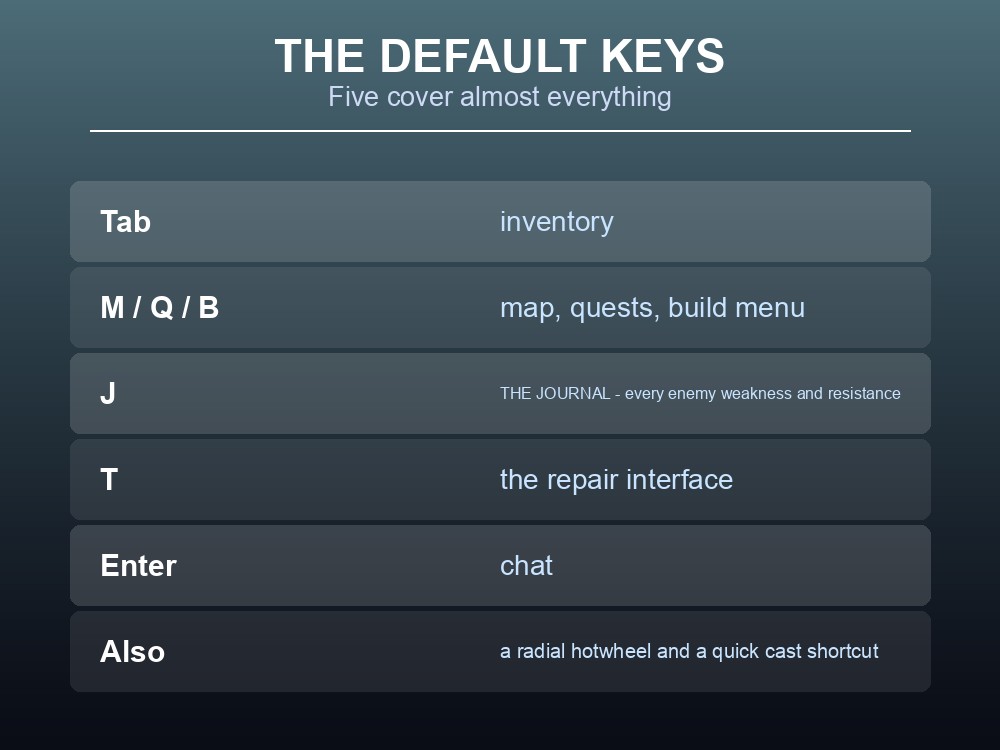
| Key | Opens |
|---|---|
| Tab | Inventory |
| M | Map |
| Q | Quests |
| B | Build Menu |
| J | Journal |
| Enter | Chat |
| T | Repair interface |
J is the one worth learning. The Journal records every enemy you have killed with its weaknesses and resistances, every resource gathered, every recipe learned and every lore scrap found — and almost nobody opens it. It is the in-game answer to "what beats this thing".
T opens the repair interface, after which you interact with a structure to repair it. All structures have durability and can be destroyed by monsters — goblin raids specifically — so repair is maintenance, not an edge case.
Key bindings are grouped by activity in Settings: Movement, Combat, Interaction, Inventory Item Management, Building, Crafting and Quest Dialogue. Rebinding works across the board, though the L key was broken until 0.10.2.
And there is a radial hotwheel for both controller and keyboard, added to "speed up selecting primary items", along with a quick cast shortcut for either a spell or an item.
The Map and the Compass
The map holds more state than it looks. Your save file records revealed landmarks and all manually placed pins — and both are character data, not world data.
That has a consequence people meet the hard way: a new character on a familiar world starts blind. Your exploration and your pins do not transfer. On a shared server, each player maps the world independently — and the same applies to vault locations, which "all players will need to discover… in order for them to appear on your map."
So map knowledge is genuinely per-player, and telling someone "it is marked on the map" does not help them.
Two map bugs worth recognising, both fixed: lodestone teleports at the map edges used to be one-way because they failed to display, and map markers used to guide you to the wrong location on respawn.
The compass at the top of the screen is the other half of navigation, and it matters more than usual because Dragonwilds does not put a marker on everything — landmarks are revealed by visiting them.
Interface on a Shared Server
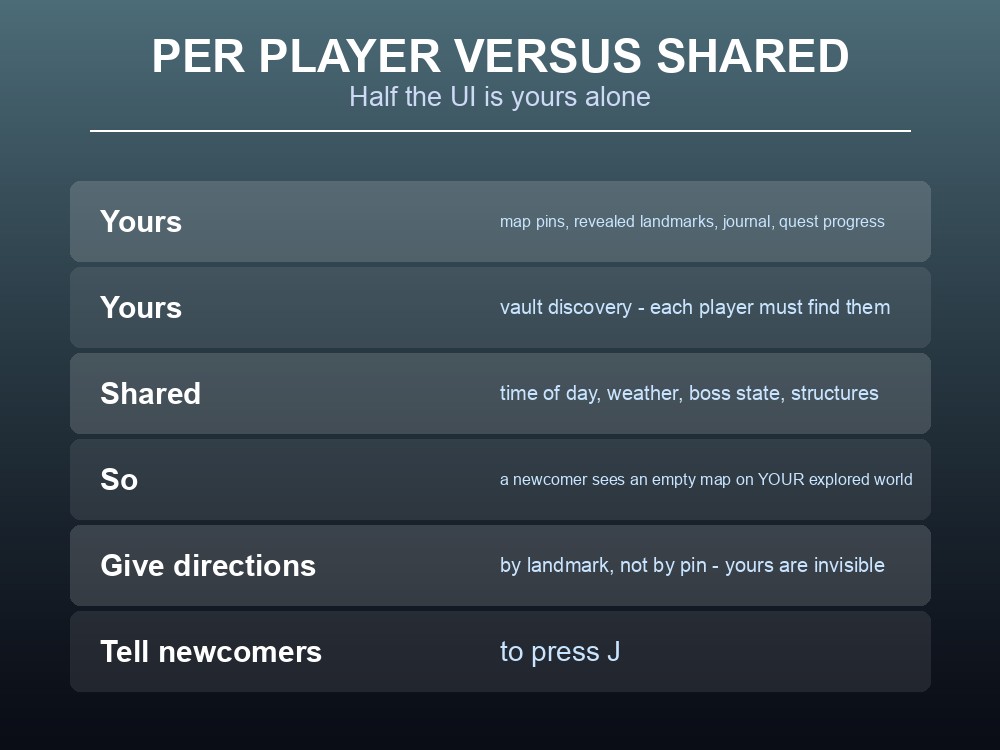
Almost every interface element reflects your own state, which is worth stating explicitly because it shapes how a group communicates:
| Per player | Shared by the world |
|---|---|
| Status bars, health, stamina | Time of day |
| Map pins and revealed landmarks | Weather |
| Journal contents | Boss and quest world-state |
| Vault discovery | Structures and chests |
| Quest progress | Region unlocks |
So a group at mixed progress sees genuinely different interfaces on the same world — different journals, different maps, different quest lists — while the world around them is identical.
Two practical habits follow:
- Give directions by landmark, not by pin. Your pins are invisible to everyone else.
- Tell newcomers to press J. Their Journal is empty, and it is the fastest way for them to learn what they are fighting.
One accessibility note that catches people: Font Size must be set from the main menu — changing it inside a world applies to Language instead.
Practical tips
- Bottom left, left to right: Hydration, Sustenance, Rest.
- Sustenance drives health regen; Hydration drives stamina regen; Rest sets maximum stamina.
- Tab inventory, M map, Q quests, B build, J journal, Enter chat, T repair.
- Press J — the Journal holds every enemy's weaknesses and resistances.
- Map pins and revealed landmarks are character data — a new character starts blind.
- Every player must discover vaults themselves to see them on their map.
- The sundial matters — some creatures only spawn starred at night.
- Set Font Size from the main menu, not in a world.
Running your own RuneScape: Dragonwilds server
Map knowledge, journals and quest progress are per-player, but the world they describe is shared — which only works when everyone can reach that world on their own schedule. A gamever Dragonwilds server keeps Ashenfall available around the clock for up to six players, updates automatically so client and server versions never drift, and takes one-click backups before disruptive changes.
Conclusion
Dragonwilds puts your status bars bottom-left in the order Hydration, Sustenance, Rest, and each drives a different system: Sustenance controls health regeneration at +0.5 HP/sec per 25 points, Hydration controls stamina regeneration, and Rest sets your maximum stamina through the Fatigue debuff. Health, stamina and the reticle sit centrally, the inventory bar top right, the quick action bar bottom right, with a compass and a sundial along the top. The default keys are Tab, M, Q, B, J, Enter and T — and J, the Journal, is the one worth learning, since it records every enemy's weaknesses and resistances. The thing to remember on a shared world is how much of the interface is per-player: map pins, revealed landmarks, journal contents, vault discovery and quest progress all live with your character, so a newcomer sees an empty map and an empty journal on a world your group has fully explored.
Want one shared world behind six separate maps? Rent a Dragonwilds server at gamever.io — instant setup, one-click backups and updates, and 24/7 uptime. Start with a free trial and use promo code WELCOME.