
Icarus Server Settings: ServerSettings.ini Reference

Your gamever Icarus server is already installed and running — you don't build a dedicated server from scratch. What you do instead is tune it, and Icarus splits that job across two places: a short Settings page in the control panel for the handful of fields you change most, and a config file, ServerSettings.ini, in the File Manager for everything else. This guide explains exactly which setting lives where, how to edit the .ini safely, and the few keys worth knowing — including the blank-admin-password trap that can hand your server to a stranger.
What the panel exposes
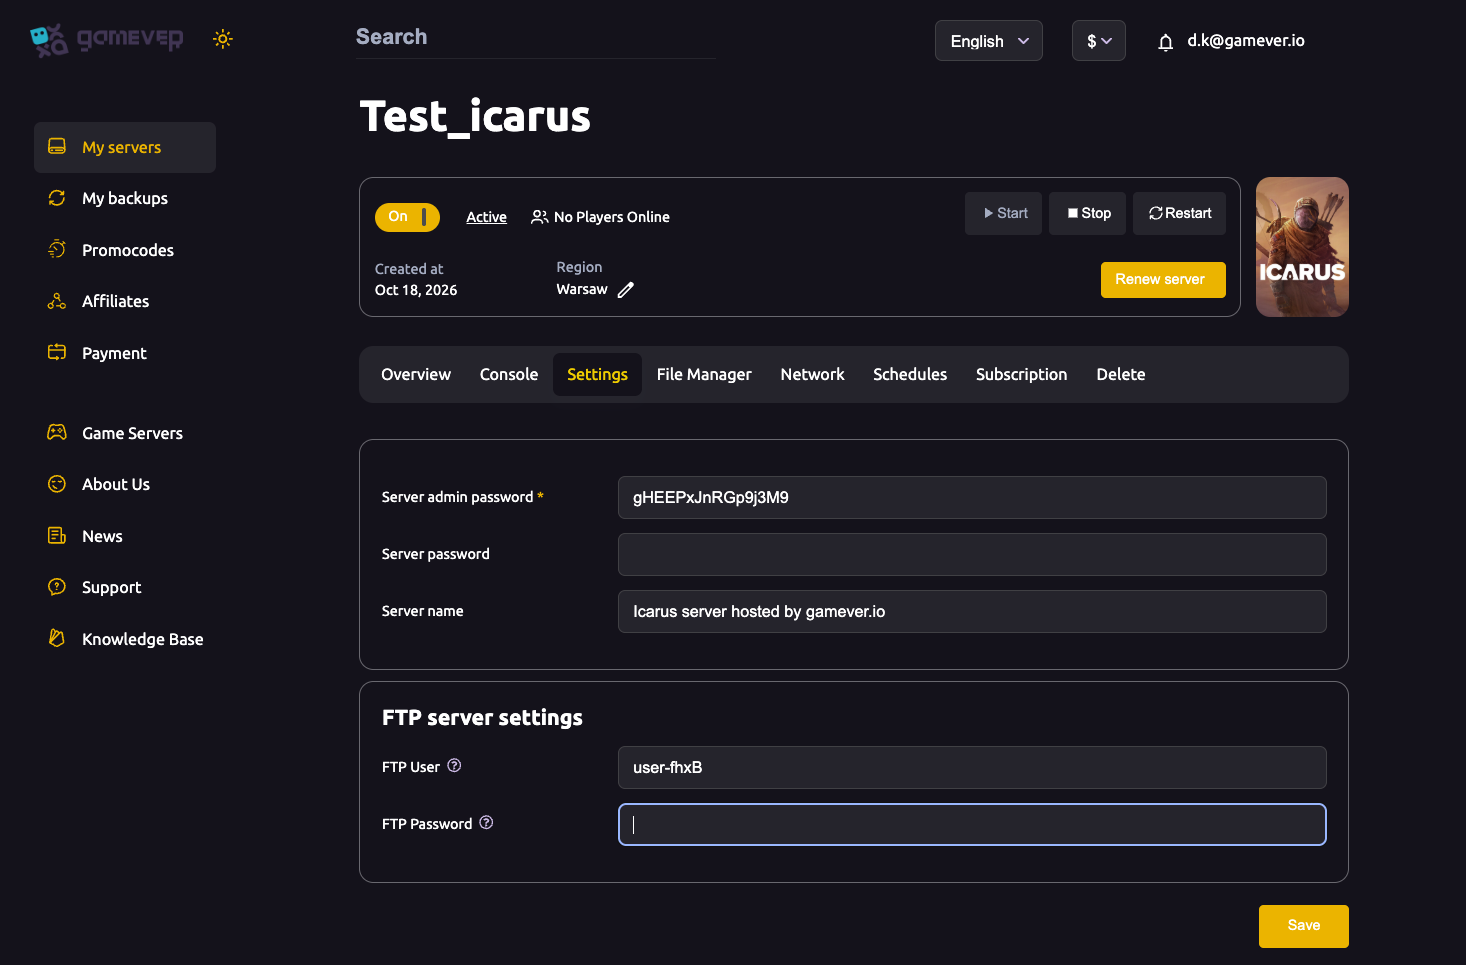
Most day-to-day changes never need a config file. Open the Settings tab and you'll find the fields that matter most, plus your FTP login:
| Field | What it does |
|---|---|
| Server admin password | The admin password used in-game. Blank = any joiner can claim admin — a security trap. Always set it. |
| Server password | The join password. Leave it blank for an open server, or set one to make the server private. |
| Server name | The name shown in the server browser, e.g. "Icarus server hosted by gamever.io". This is the supported way to name the server. |
Below those sits FTP server settings — an FTP User and FTP Password you'll use to reach the config files over an FTP client. After changing any field here, click Save, then Restart from the Overview tab so the server picks them up.
Two things the panel does not do: it never asks you to set or forward a port (the panel assigns Icarus's UDP game port and Steam query port for you — read your own values on the Network tab), and there's no RCON, because Icarus has none. Admin is done in-game instead (see below).
Where everything else lives: ServerSettings.ini
Anything the Settings tab doesn't expose is configured in a file. Open the File Manager tab and browse to:
/home/config/Saved/Config/WindowsServer/
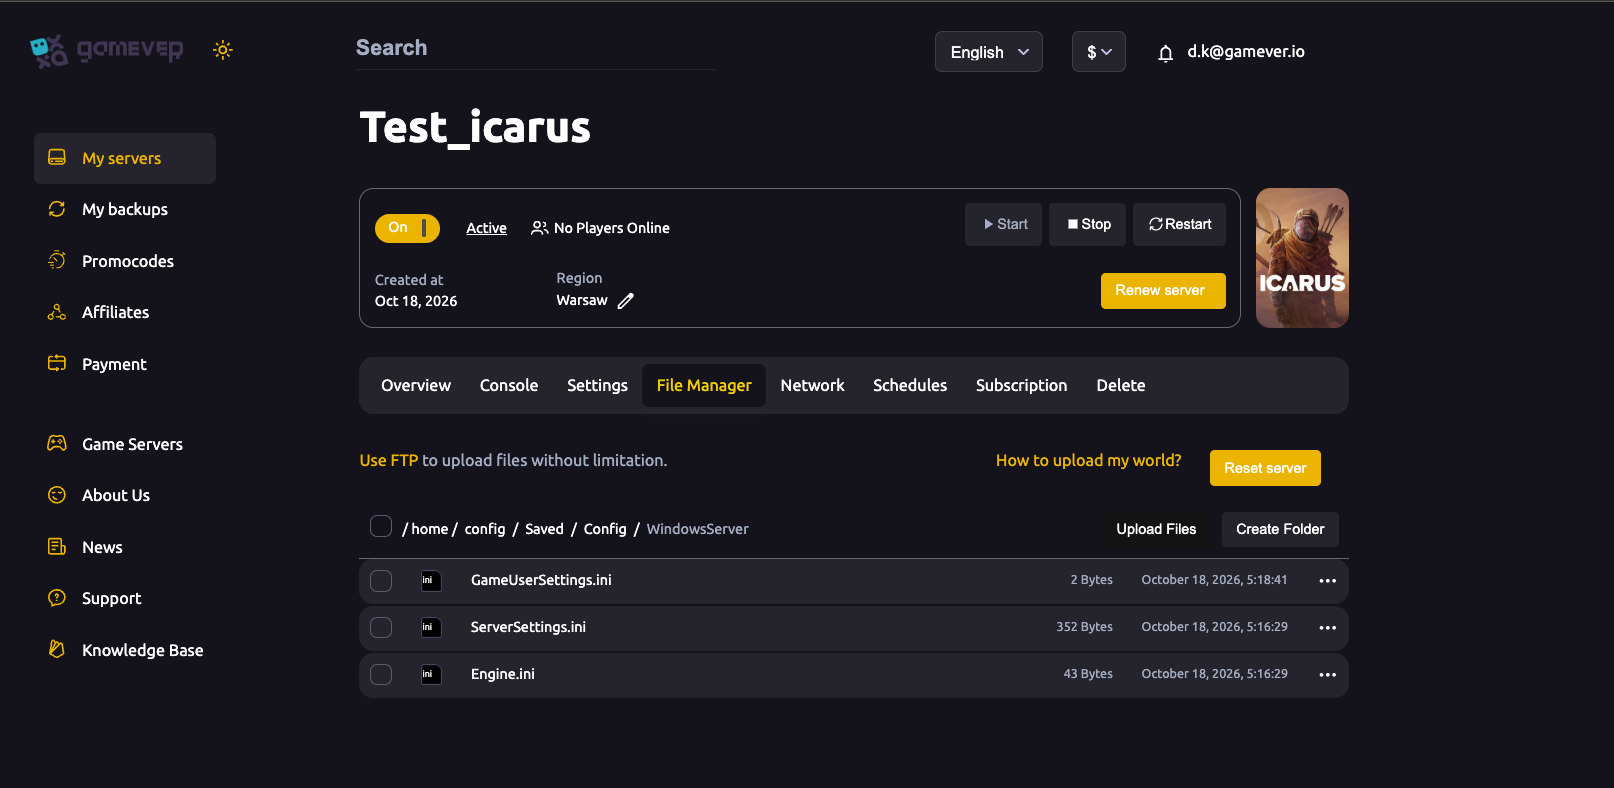
You'll find three config files there: ServerSettings.ini, GameUserSettings.ini and Engine.ini. The one you'll touch most is ServerSettings.ini, whose settings sit under this section header:
[/Script/Icarus.DedicatedServerSettings]
Editing ServerSettings.ini safely
Icarus only reads these files at boot, so edit them with the server stopped — changes made to a running server can be overwritten when it next shuts down. The safe sequence:
- Stop the server from the Overview tab.
- Open File Manager, navigate to
/home/config/Saved/Config/WindowsServer/, and editServerSettings.iniin place — or download it over FTP (login under Settings → FTP server settings), edit locally, and upload it back. Keep a copy of the original first. - Make your change under the
[/Script/Icarus.DedicatedServerSettings]header. - Save the file.
- Start the server. Watch the Console tab for a clean boot.
The keys worth knowing
These three are the ones most server owners come here for. Each goes on its own line under the [/Script/Icarus.DedicatedServerSettings] header, as Key=Value:
| Key | Default | What it controls |
|---|---|---|
| MaxPlayers | 8 | The player slot count. Set it at or below your plan's cap. See changing max players for the full walk-through. |
| JoinPassword | (blank) | The password required to join. Blank means the server is open to anyone. |
| AdminPassword | (blank) | The admin password. Leave it blank and anyone who joins can claim admin — set a real value here or in the panel's Server admin password field. |
AdminPassword and JoinPassword mirror the panel's Server admin password and Server password fields, so for those two you can simply use the Settings tab and skip the file entirely. The config file is the place to set them when you prefer editing the .ini directly, and it's where MaxPlayers lives because the panel has no slot field. We've deliberately listed only the keys we can state with confidence — Icarus has changed these over several updates, so if a guide mentions a key you don't see here, confirm it against RocketWerkz's current notes before relying on it rather than pasting it in blind.
A note on naming: the .ini's own SessionName has historically been unreliable for naming the server in the browser. Use the panel's Server name field instead — that's the supported path.
Logging in as admin
Because there's no RCON, Icarus admin is handled from inside the game. Join your server, open the chat window, and log in with your admin password:
/AdminLogin <AdminPassword>
Once authenticated you can use Icarus's admin commands. For the exact command list, check RocketWerkz's current documentation — the set changes between updates.
Additional Tips
- Never leave AdminPassword blank. An empty admin password is the single biggest security mistake on an Icarus server — set it before you share the IP.
- Stop the server before editing the file. Icarus reads config at boot and can stomp changes made live.
- Keep a backup of ServerSettings.ini. Download a copy over FTP before editing, so a bad line is a one-click restore. For full saves, use My backups in the left sidebar.
- Name the server from the panel, not the file. The Server name field is the reliable route;
SessionNamein the.inihas a poor track record. - Match MaxPlayers to your plan. Setting it higher than your plan's slot cap won't add seats — keep it at or below the cap.
- Don't paste unverified keys. If you can't confirm a setting against official Icarus documentation, leave it out rather than guess.
Conclusion
Icarus settings live in two tidy places: the panel's Settings tab for the admin password, join password and server name, and ServerSettings.ini under /home/config/Saved/Config/WindowsServer/ (section [/Script/Icarus.DedicatedServerSettings]) for MaxPlayers and anything the panel doesn't expose. Stop the server, edit, Save, start — and above all, never leave the admin password blank. For a deeper look at the two password fields, see passwords, and for slot counts specifically, see changing max players.
Rent your Icarus server at gamever.io — a clean Settings tab, full File Manager and FTP access, and backups a click away in the sidebar. Free trial, promo code WELCOME.