
How To Whitelist my 7 Day to Die server?
Welcome to the world of game servers, where the magic of online gaming comes to life! In this guide, we will embark on a journey to unravel the secrets of whitelists and why they are an essential tool for maintaining order and security within game servers.
Whitelists for 7 Day to Die serve multiple purposes, but their primary objective is to maintain a safe and enjoyable gaming environment. By carefully selecting who can enter the server, administrators can prevent unwanted players, trolls, or griefers from disrupting the gameplay experience.
Whitelists allow server administrators to curate the player base, ensuring that only dedicated and respectful individuals can join. This helps maintain a high standard of gameplay, as players are more likely to adhere to rules and contribute positively to the overall gaming experience.
Whitelists differ from blacklists, which focus on blocking or restricting specific entities deemed untrustworthy or malicious. Whitelists, on the other hand, focus on granting access to known and trusted entities.
How to Enable Whitelist?
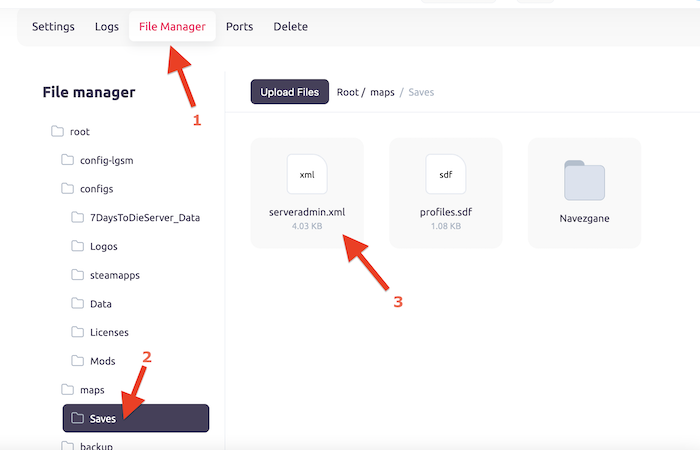
Step 1: Find serveradmin.xml file
The first step is to open filemanager on the dedicated 7 Days to Die server that you want to become an admin on. You need to download serveradmin.xml file located in /Root/maps/Saves.
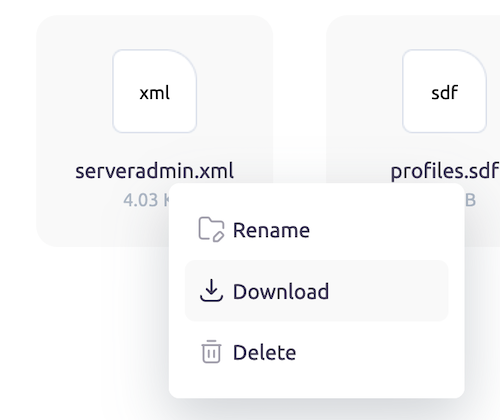
Right click on the file and click "download".
Step 2: Open this file in text-editor
Next, you will need to add players SteamID to the serveradmin.xml file. To do this, open the file in a text editor such as Notepad. Look for the section that contains the <whitelist> section.

Step 3: Add whitelisted player
Add player’s SteamID to this list, making sure to follow the format of the other SteamIDs in the list:
<user userid="3333232342342342432"/>
You can find the player's Steam ID on his Steam profile page:


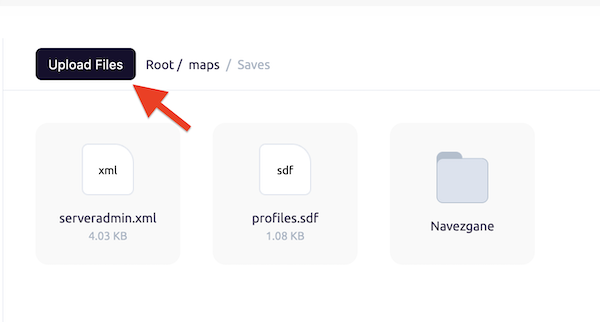
Step 3: Upload serveradmin.xml to the Server
Once you have added your SteamID to the serveradmin.xml file, save the file and upload it to the server. You can do this using an FTP client or through the server's control panel. Make sure to upload the file to the correct directory.
Step 4: Restart the Server
After uploading the serveradmin.xml file, you will need to restart the server for the changes to take effect. You can do this through the server's control panel or by using a command in the console.
By following this guide, you have successfully whitelisted your 7 Days to Die server, allowing only trusted players to join. Remember to regularly update and maintain your whitelist to keep your gaming experience safe and enjoyable. Now, gather your friends and embark on exciting adventures in the post-apocalyptic world of 7 Days to Die!