
How to Use Traders and Buried Supplies in 7 Days to Die
Traders are the fixed, indestructible compounds where you buy, sell, and pick up quests with Duke's Casino Tokens, and 7 Days to Die currently has five of them, each built around a specialty. The wiki states the basics plainly: "All Traders are open from 04:05 - 21:50. They offer various items depending on their speciality. They restock every three days, as shown in the interface while talking to them." Traders were added in Alpha 15; as of Version 1.0, each Trader is tied to a specific biome rather than being interchangeable. This guide covers the five Traders, buying/selling, quests, and the closest thing the source documents to a "secret stash." One note up front: the wiki's Traders page never uses the phrase "Secret Stash" — the only comparable mechanic it documents is the dug-up cache from the Buried Supplies quest, covered below.
Meet the Five Traders
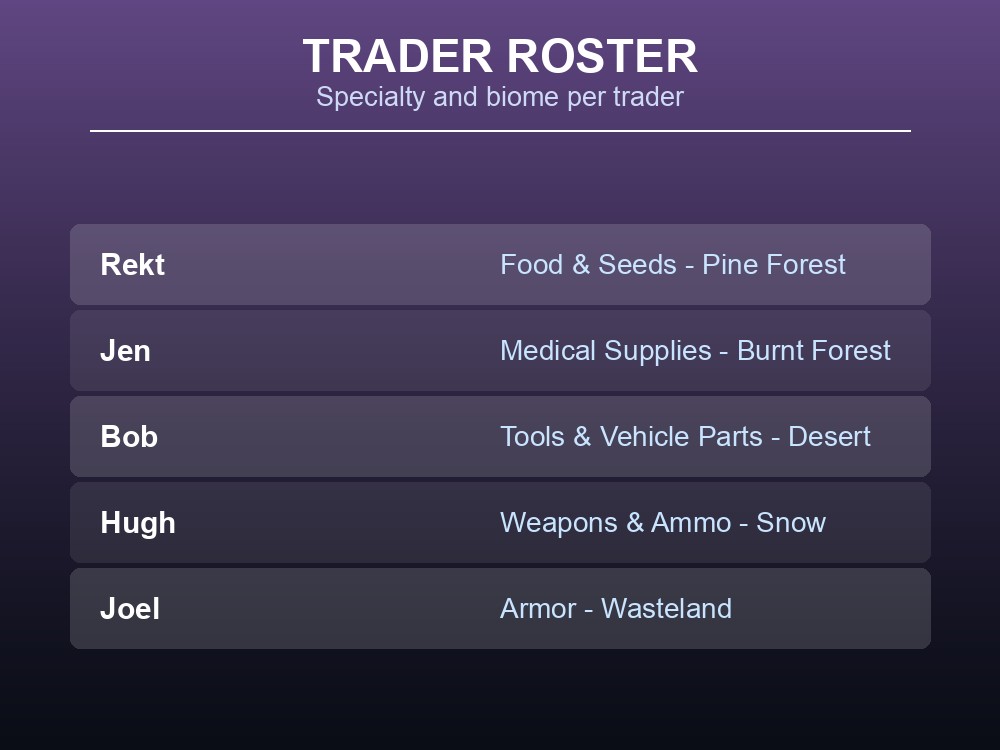
Per the wiki's trader table: Rekt (Food and Seeds, Pine Forest, 428 E 644 N in Navezgane), Jen (Medical supplies, Burnt Forest, 190 E 144 S), Bob (Tools and Vehicle parts, Desert, 941 E 1566 S), Hugh (Weapons and Ammo, Snow, 957 W 1717 N), Joel (Armor, Wasteland, 1586 W 1215 S). These coordinates are for the fixed Navezgane map only — on Random World Generation maps, "A Trader will spawn on the outskirts of every town and city, except abandoned Old West towns. The more towns and cities generated on a map, the more Traders there are," and each is "Biome-specific as of 1.0." Random-world coordinates are undocumented here.
Every compound shares the same rules. "Approaching a Trader's compound will automatically add their location to the Map with their name." Compounds are "indestructible... you can loot containers. The compound cannot be used as the base as the player cannot place or destroy any blocks and is kicked out at closing time." Traders are also, per the wiki, "currently... the only location where Player Rentable Vending Machines can be found and rented."
Trading Hours, Dukes, and Bartering
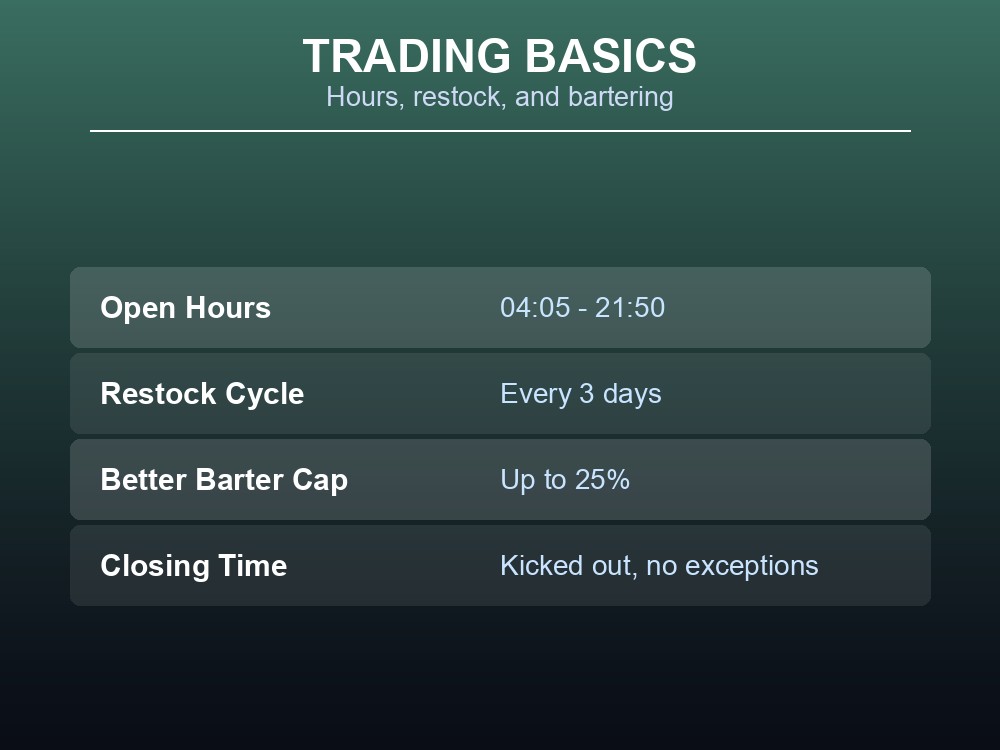
All transactions run on Dukes. Per the wiki: "To buy an item select it in the Trader's inventory and then press 'Buy'. To sell an item select it in your inventory and press 'Sell'. The price of the item is displayed in the top right corner of the menu in both cases." On top of the base price, "Better Barter affects the cost or sale price of an item up to 25% when maxed" — the per-level scaling toward that 25% cap is undocumented here. Hours are the same 04:05–21:50 window, stock restocks every three days, and you're forced out — "kicked out at closing time" — regardless of what you're doing.
Early guidance is built in: "Early in the game, the tutorial challenge directs you to the nearest Trader for safety and loot opportunities. Other Traders can be found by accepting quests to find another Trader." That route is the Open Trade Routes quest, unlocked after clearing a quest tier, which sends you to one specific named Trader next (the wiki's example: Trader Jen, not Trader Bob, is directly reachable from Trader Rekt).
Quests, Tiers, and the Buried Supplies "Stash"
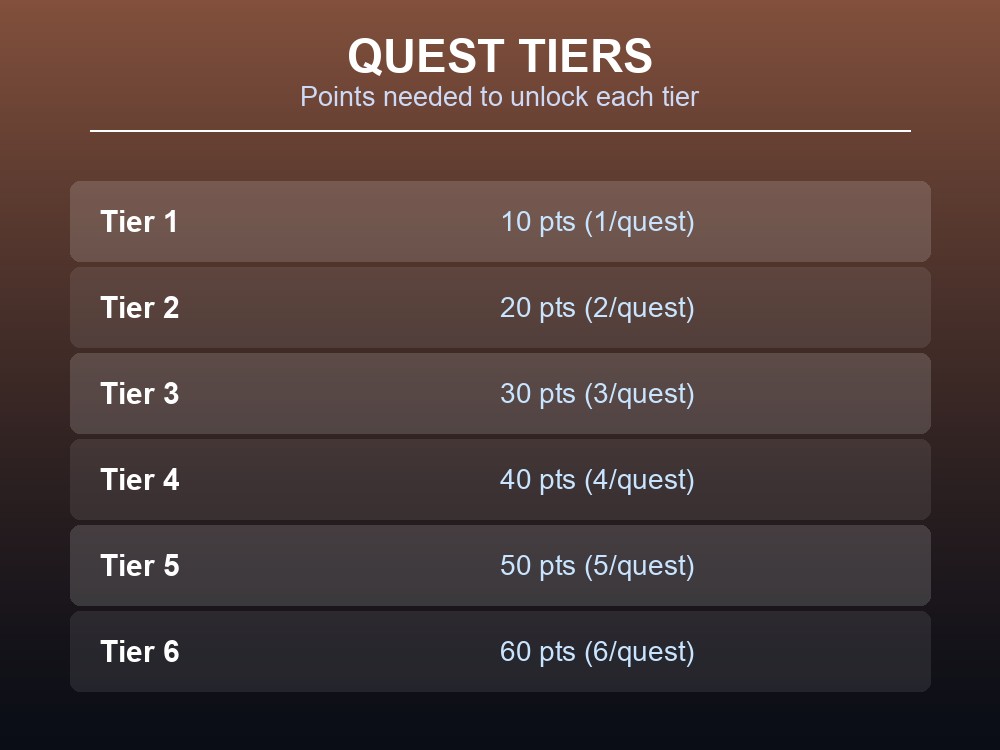
Quests ("also known as Jobs") open via "Do you have any jobs?". "The quest tier matches the tier (number of red skulls) of the Point of Interest that the player is sent to (Tier 6 using Tier 5 POIs)" — higher tiers mean bigger, harder buildings. Progress costs points: Tier 1 needs 10 (1/quest), Tier 2 needs 20 (2/quest), Tier 3 needs 30 (3/quest), Tier 4 needs 40 (4/quest), Tier 5 needs 50 (5/quest), Tier 6 needs 60 (6/quest). The wiki's own combinations for Tier 3's 30 points show the trade-off works both ways: 10 Tier 3 quests, or 6 Tier 3 + 6 Tier 2 (18+12=30), or 30 Tier 1 quests (30×1=30). As of Version 1.0, "quest tier progression is no longer Trader-specific, so progress with one Trader will carry over to the others."
A daily Quest Limiter (base three) caps how many completed quests count toward tier progress each day; the in-game debuff reads "Daily quest progression has been reached. You may continue to take and complete quests, but they will not count towards your quest tier progression." A finished quest rewards "Experience, Duke's Casino Tokens, and a choice of one out of five possible items," and the Daring Adventurer perk "adds 10 to trader stage per level" plus 5% more Dukes per level, with level 4 unlocking a choice of two rewards. Fetch-quest rewards scale cleanly by tier, from Tier 1 (2500 XP / 100 Dukes) to Tier 6 (20000 XP / 3000 Dukes).
As for a "secret stash": the term doesn't appear on the source page. The closest documented mechanic is Buried Supplies — "digging for a buried stash inside a radius, indicated by a dashed yellow circle on the ground. Every 10 blocks dug shrinks the radius by 1 meter and has a chance to spawn a small number of Zombies. Opening the stash spawns a larger group of Zombies nearby. Inside the stash are White River Supplies and some other items. Only the White River Supplies are needed to finish the quest." Its Intro version, given to new players first, is the one clearly specified: Stone Shovel on accept, 3-meter radius shrinking every 5 blocks dug, no Zombies while digging, only 1–2 on opening, 500 XP, and it unlocks Tier 1 quests. The wiki's own properties table for Tiers 1–3 of Buried Supplies didn't extract into cleanly column-matched rows, so those specific per-tier radius/zombie/reward numbers beyond the Intro version are undocumented here rather than guessed at.
Practical tips
- Traders are open 04:05–21:50 only; you'll be forced out at closing time regardless.
- Stock resets every three days — pace your Dukes if saving for something specific.
- Max out Better Barter before big trades; it's worth up to 25% either direction.
- Mix quest tiers freely to hit a tier's point total; lower tiers just need more of them.
- Watch the daily Quest Limiter (base 3) — extra completions still work, they just stop counting toward tier progress that day.
- Quest-tier progress now carries across all five Traders as of 1.0.
Running your own 7 Days to Die server
Trader restock timers, the daily Quest Limiter, and the biome-specific Trader layout are all server-side state a group needs to stay in sync on, which is easier when the world never resets between sessions. A gamever 7 Days to Die server keeps that Random World Generation map persistent 24/7 so Trader locations, restock cycles, and shared quest-tier progress stay exactly where the group left them, with one-click backups before anyone touches barter- or quest-limit-adjacent settings. Renting one takes minutes, and new servers get a free trial with promo code WELCOME.
Conclusion
Five biome-specific Traders — Rekt, Jen, Bob, Hugh, and Joel — sell their specialty inventory for Dukes on a 04:05–21:50 clock that restocks every three days. Bartering can swing prices up to 25% with a maxed perk, and quests are the other half of the loop: six tiers, gated by points (10, 20, 30, 40, 50, 60), no longer locked to a single Trader as of 1.0, and capped daily by a base-three Quest Limiter. The source doesn't back a mechanic literally called "Secret Stash" — what it documents in detail instead is the Buried Supplies quest's dug-up cache, the closest real match and the one covered here.