
How to Upload an Existing Soulmask World Save to Your Server
Already have a Soulmask world you love — a single-player tribe you grew locally, or a save from an older host — and want it running on your gamever server? You don't need to start over. Because your server is a managed box you rent from us, the whole job is a file transfer through the control panel: drop your world save into the right folder with the File Manager or FTP, and the server loads it on the next boot. This guide walks through where the save lives, how to get it onto the server safely, and the one rule that matters most — stop the server before you touch the files.
Before you start: find your save
Soulmask stores a world as a single database file, world.db. Where it sits depends on where you're copying it from:
| Source | Where the save lives |
|---|---|
| Single-player / local PC | %LocalAppData%\WS\<SteamID>\2646460\AutoGames\<GameInviteCode>\ — press Win + R and paste %LOCALAPPDATA%\WS\ to jump straight there. Inside you'll find world.db (and a GameXishu.json settings file). |
| Another dedicated server / host | Under that server's WS/Saved/Worlds/Dedicated/ tree — download world.db from its File Manager or over FTP. |
Copy the world.db out to your own PC first so you have a clean source file to upload. If you're moving a local single-player world, note that the on-disk layout differs from a server's — you're extracting just the world.db from the AppData folder, not the whole directory.
Where the save goes on your gamever server
Your File Manager opens at the server root, /home/server/. The world save belongs under the WS/Saved/Worlds/ path. On a standard server running the base map (Cloud Mist Forest), the exact folder is:
/home/server/WS/Saved/Worlds/Dedicated/Level01_Main/world.db
If you run the Shifting of Sands DLC map instead, the server uses a separate map folder — DLC_Level01_Main — so the save sits at WS/Saved/Worlds/Dedicated/DLC_Level01_Main/world.db. The folder name tracks the map your server is set to load, so match the destination to your Server Map setting. If the Dedicated/Level01_Main folders don't exist yet, start the server once and stop it again to generate them, then upload into the folder it created.
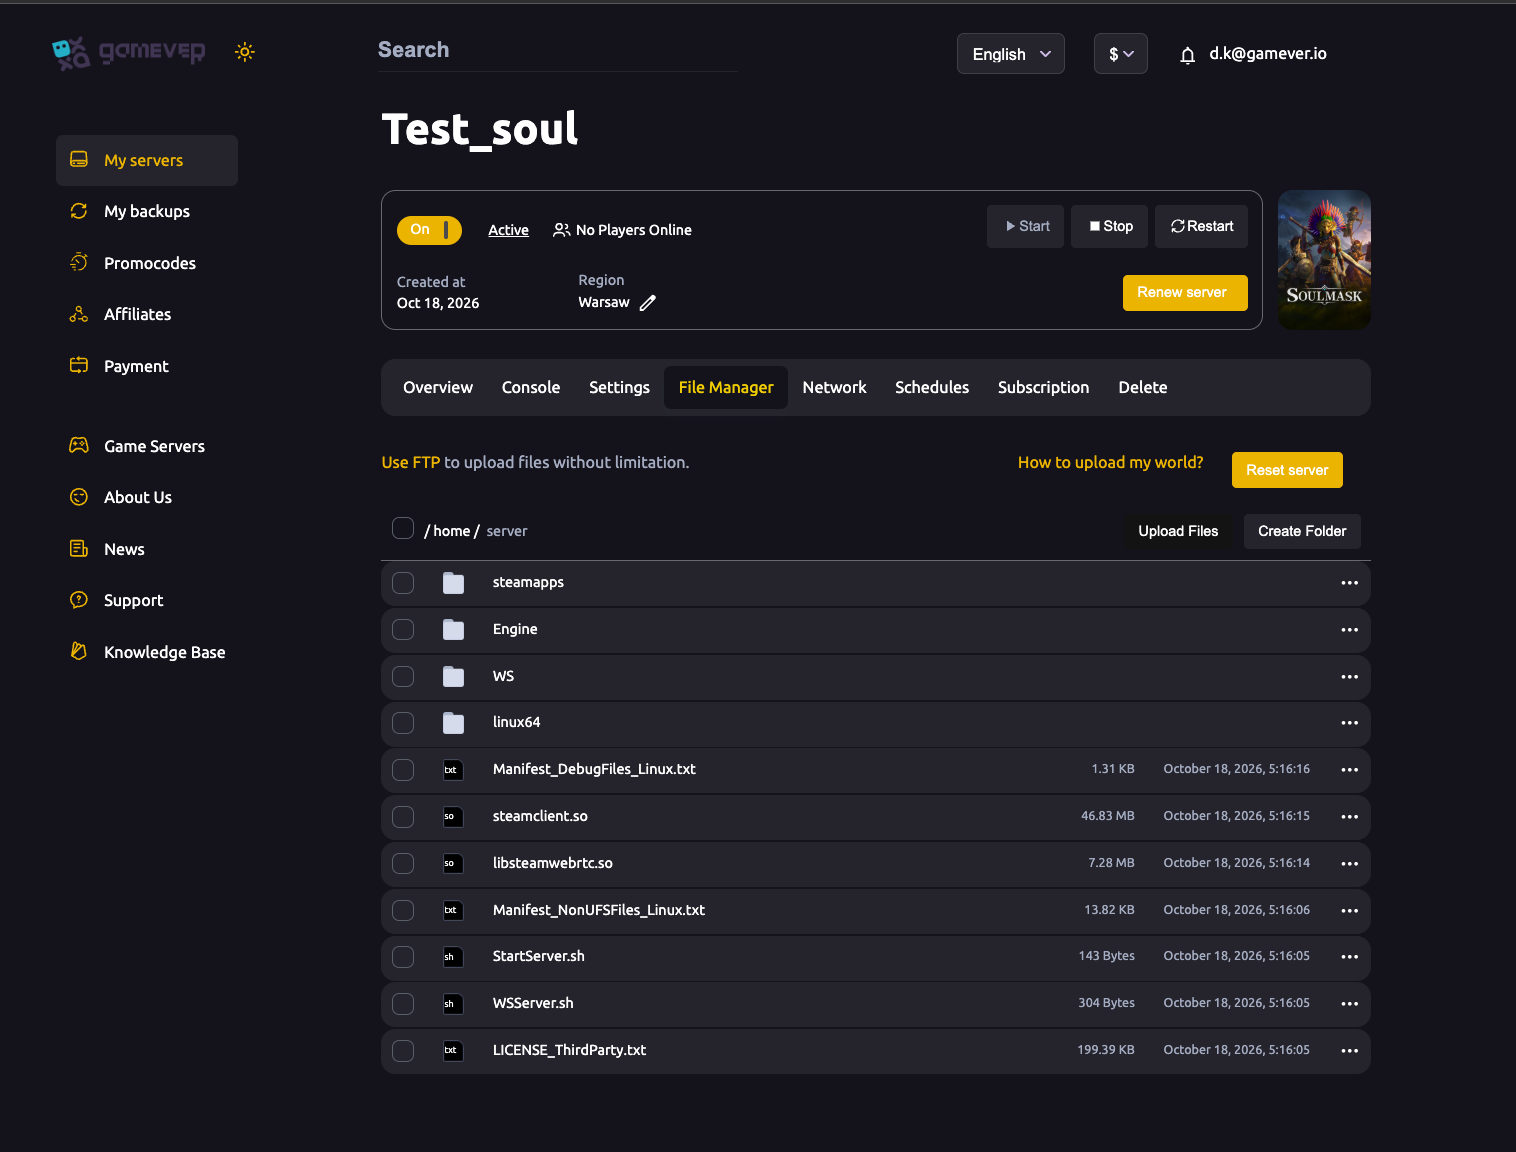
Option A — upload with the File Manager
The web File Manager handles everyday single-file jobs without any extra software:
- Stop the server from the Overview page. The server holds
world.dbopen while running; replacing it live can fail or corrupt the upload. - Back up the current world first (see below) so you can roll back if the import misbehaves.
- In the File Manager, browse to
WS/Saved/Worlds/Dedicated/Level01_Main/(or your DLC map folder). - Use Upload Files to send your
world.db, replacing the existing one. - Start the server from Overview and watch the Console to confirm the world loads cleanly.
The File Manager shows a "Use FTP to upload files without limitation" note — for a large world, or if the web upload stalls, use FTP instead.
Option B — upload over FTP
FTP is the better route for big saves and bulk transfers. Your login lives in the panel:
| What | Where to find it |
|---|---|
| FTP username & password | Settings → FTP server settings sub-tab (e.g. user user-vAZm). |
| FTP host & port | The Network tab (shown as the FTP address, e.g. IP:28600). |
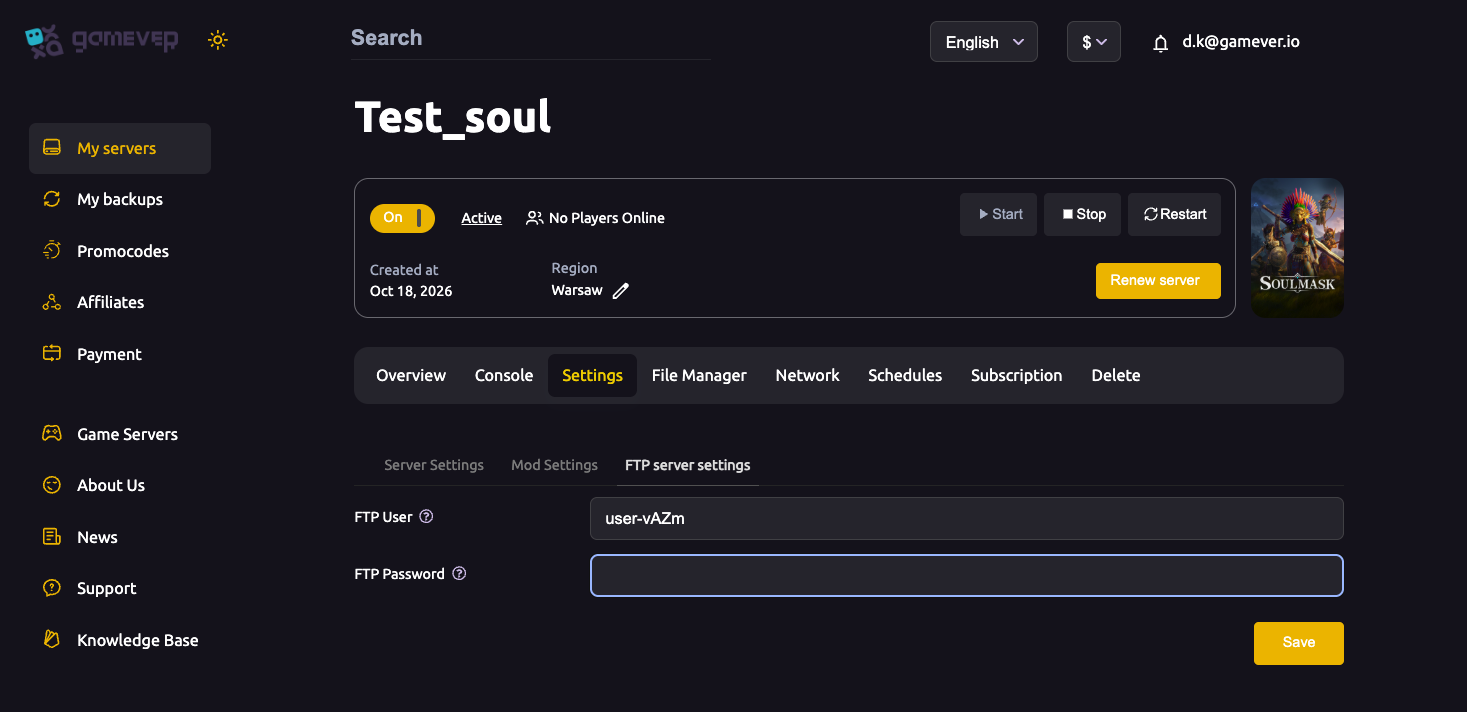
Put those into any FTP client (FileZilla, WinSCP), connect, then:
- Stop the server (Overview).
- Navigate to
/home/server/WS/Saved/Worlds/Dedicated/Level01_Main/. - Upload your
world.db, overwriting the one on the server. - Start the server and check the Console.
The path and the stop-upload-start rhythm are identical to the File Manager route — FTP just removes the browser size limit.
Additional Tips
- Always stop the server first. This is the single rule that prevents a corrupted import. Upload only while the server is stopped, then start it.
- Back up the current world before overwriting. Take a backup from My backups in the left sidebar, or simply download the existing
world.dbto your PC first. If the new world doesn't load, put the old file back. - Match the destination to your map. Base map →
Level01_Main; Shifting of Sands DLC →DLC_Level01_Main. Uploading into the wrong folder means the server never sees your world. - Keep the filename exactly
world.db. If your copy came out named something likeworld_2.db, rename it back toworld.dbso the server recognises it. - Gameplay settings are separate.
world.dbis the world itself; difficulty and multiplier settings live in their own files and in the panel Settings — moving the world doesn't carry those over, so re-check your server settings after the import. - Test, then invite. Join the imported world yourself and confirm your base and progress are intact before telling the tribe it's live.
Conclusion
Bringing an existing Soulmask world onto your gamever server is a straight file swap: find world.db on your PC or old host, stop the server, back up the current world, upload the file into WS/Saved/Worlds/Dedicated/Level01_Main/ with the File Manager or FTP, then start the server and watch the Console. Match the map folder, keep the filename exact, and you'll be playing your old world on managed hardware in minutes. For keeping it safe afterwards, see backups and restore; if you'd rather start fresh instead, see resetting or wiping the world.
Rent your Soulmask server at gamever.io — full File Manager and FTP access so your worlds are always yours to move, plus one-click backups before every change. Free trial, promo code WELCOME.