
How to Tame a Gallimimus in ARK
The Gallimimus is one of ARK's fastest land mounts, and the wiki's own dossier calls it a creature that "eschews strong defenses for the ability to outrun pretty much anything." Taming one is a knockout (KO) job, not a passive feed, and its combination of high speed and low base Health makes the approach trickier than it looks. This guide walks through what the wiki actually documents: the behavior that makes it hard to pin down, its preferred food and kibble, the Level 1 taming table (food quantities, taming time, and torpidity math), and its base stats, saddle level, and breeding timers. Anywhere the source page doesn't give a figure, this guide says so instead of guessing.
Domestication and the Knockout Method
The wiki's domestication table lists the Gallimimus as Tameable: Yes, Rideable: Yes, Breedable: Yes, Torpor Immune: No, with Taming Method: Knockout — you drop it with tranquilizers rather than feeding it while it's conscious. Its own behavior section explains why that's harder than it sounds: "Gallimimus is a very skittish, shy species. Constantly on alert for carnivores, it never walks slowly, preferring to move around at a moderate trotting speed. When injured, it will run extremely fast away from its attacker, but is slowed down in water." The in-game dossier, written from survivor Helena Walker's perspective, adds the flavor version of the same point: "When someone asks me what the fastest creatures on the island are, Gallimimus is always a contender... I've even seen wild Gallimimus outrun speed-trained Utahraptors!" Once it's boxed in or knocked down, the wiki also warns it "will lose torpor very quickly after getting knocked down," so have Narcotics and food staged before you land the shot that drops it.
Favorite Food and Preferred Kibble
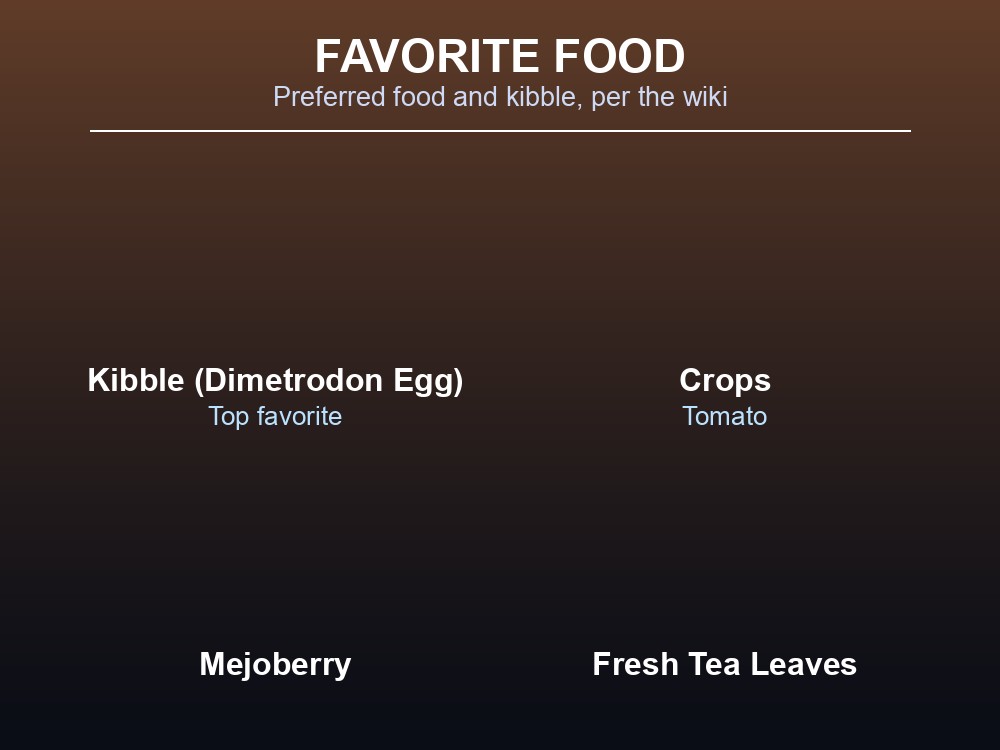
The page's Domestication table lists Preferred Kibble as Simple Kibble, alongside Kibble (Dimetrodon Egg), and Preferred Food as Crops, specifically calling out Tomato. A separate "Favorite Food" list on the same page names, in the order given: Kibble (Dimetrodon Egg), Crops, Mejoberry, and Fresh Tea Leaves. Note that the article's own infobox leaves its kibble field blank — the kibble information above comes from the page's Domestication table, not the infobox, which simply doesn't carry it. If you're crafting Simple Kibble specifically for this tame, the page gives the exact recipe: "1 × Cooked Fish Meat, 1 × Small Egg, 5 × Fiber, 5 × Mejoberry, 2 × Rockarrot, 1 × Water."
Level 1 Taming Table: Food, Quantity, and Time
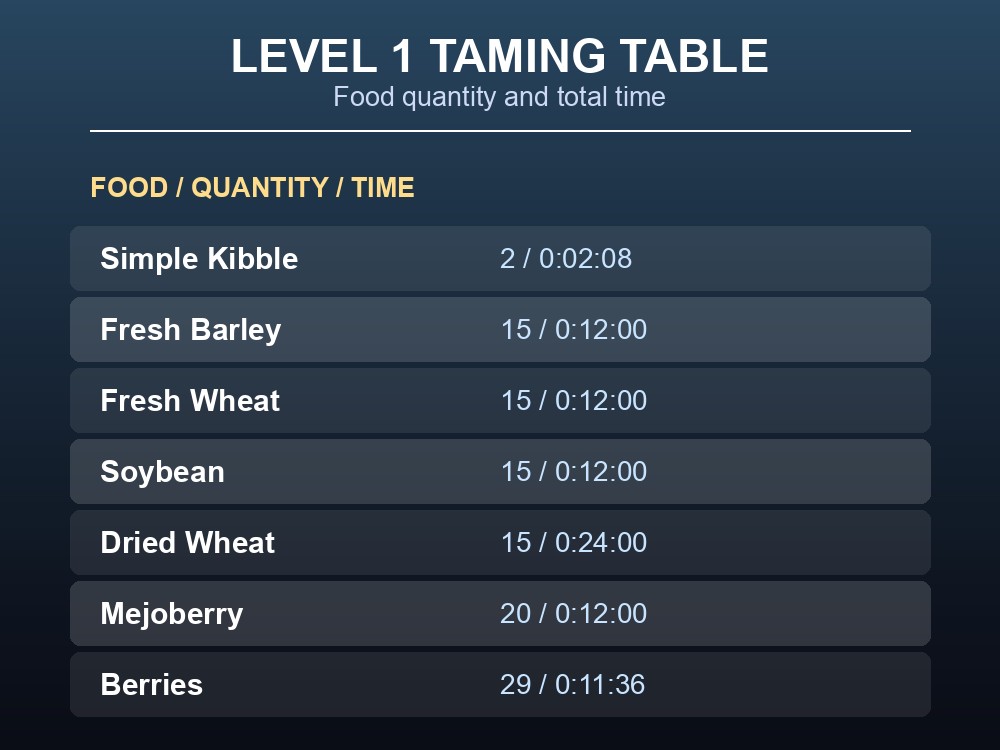
For a Level 1 Gallimimus specifically, the wiki's taming table gives quantity and total time per food:
| Food | Quantity | Time |
|---|---|---|
| Simple Kibble | 2 | 0:02:08 |
| Fresh Barley | 15 | 0:12:00 |
| Fresh Wheat | 15 | 0:12:00 |
| Soybean | 15 | 0:12:00 |
| Dried Wheat | 15 | 0:24:00 |
| Mejoberry | 20 | 0:12:00 |
| Berries | 29 | 0:11:36 |
Doing the arithmetic on the two ends of that list: Berries need 29 items against Simple Kibble's 2 (29 ÷ 2 = 14.5× more items by count), and take 11:36 against Simple Kibble's 2:08 — 696 seconds versus 128 seconds is roughly 5.4× longer to complete the tame. The source table has extra numeric columns between quantity and time that weren't labeled clearly enough to state with confidence, so this guide reports only quantity and time.
The same Level 1 row lists six bare KO figures — "× 42; × 18; × 5; × 3; × 2; × 1" — without labeling which weapon or ammo each number is for, so this guide doesn't assign them to specific gear. The torpidity math is clearer: at Level 1, torpidity depletes at 4.18/s, fully draining in 00:01:40; at Level 150, it's 14.41/s and 00:04:49. That's 14.41 ÷ 4.18 ≈ 3.45× faster depletion at Level 150, yet the higher-level tame still stays unconscious roughly 289 ÷ 100 ≈ 2.89× longer overall, since the total torpidity pool scales up faster than the rate does. The Level 150 row's top KO figure, 418, is 418 ÷ 42 ≈ 9.95× the Level 1 figure — again, not assigned to any specific weapon here.
Base Stats, Saddle Level, and Breeding
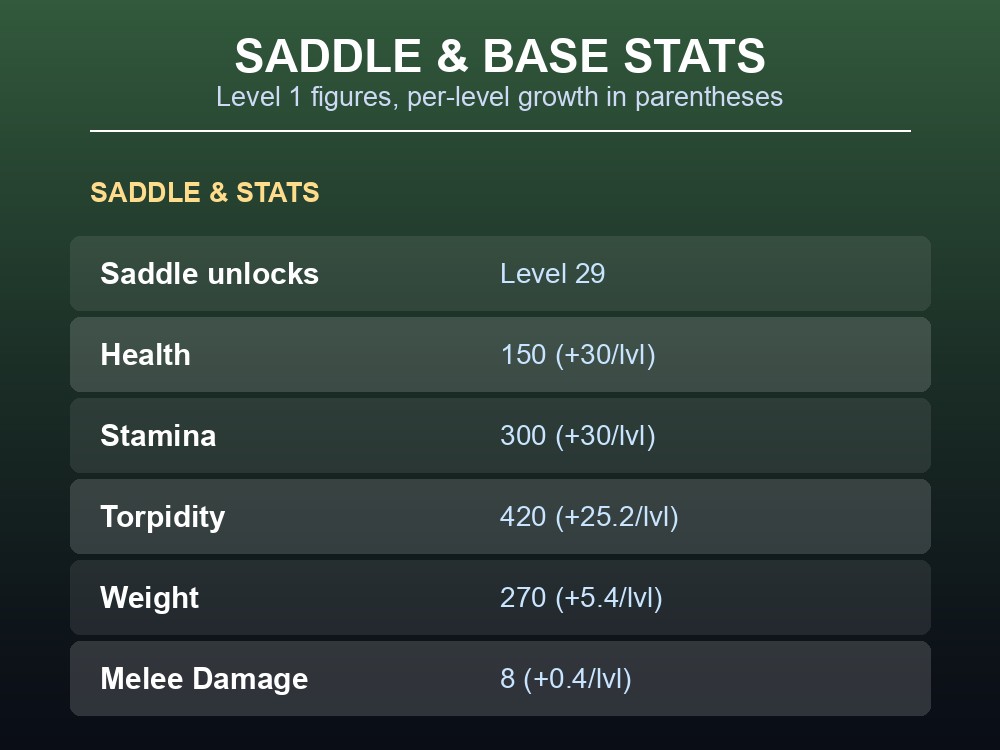
The wiki's Domestication table lists the saddle as Gallimimus Saddle (Level 29). Base stats at Level 1, wild, with per-level increase in parentheses: Health 150 (+30), Stamina 300 (+30), Oxygen 150 (+15), Food 1000 (+100), Weight 270 (+5.4), Melee Damage 8 (+0.4), Torpidity 420 (+25.2). Movement Speed is listed as a flat 100% base with no wild per-level increase given.
For breeding, the page lists an incubation temperature range of 24–28°C / 75–82°F (26°C / 79°F in an Egg Incubator), an Incubation Time of 1h 25m 42.446s, Baby Time of 2h 38m 43.809s, Juvenile Time of 10h 34m 55.238s, Adolescent Time of 13h 13m 39.047s, and a Total Maturation Time of 1 day, 2 hours, 27 minutes, 18.094 seconds — a full extra day on top of the hours, so don't plan a Gallimimus breeding project around a single overnight window. Breeding Interval is listed as 18h – 2d.
Bring a Bear Trap, not just a rifle — the wiki notes a Gallimimus is "quite easy to knock out because of its relatively low Torpidity" once it's caught, but warns to "use a Longneck Rifle though because a Bow or Crossbow will easily kill it due to its low base Health." A tamed Araneo can also web it to slow it down before you tranq it, but set every tame (including the spider) to Passive first, since the web attack itself can finish the Gallimimus off. It's immune to regular bolas, and while chain bolas fired from a ballista will trap it, the source warns that's risky given "the relatively high damage chain bolas manage to inflict, and the low base health of the dino." Keep Narcotics and Simple Kibble staged before you drop it — torpor falls fast once it's down.
Running your own ARK server
A Gallimimus tame is quick, but the prep — building a trap, farming Rockarrot and Mejoberry for Simple Kibble, keeping an Araneo on standby — goes smoother on a dedicated, always-on world than a public server where your trap or crop plots can vanish between sessions. A private ARK server keeps your Bear Trap standing, your Simple Kibble stockpiled, and your new Gallimimus exactly where you parked it, without random griefing mid-tranq.
Conclusion
Taming a Gallimimus comes down to what the wiki actually documents: it's a Knockout tame on a skittish, fast, low-Health creature, best approached with a Bear Trap and a Longneck Rifle rather than a Bow or Crossbow; Simple Kibble and Crops (especially Tomato) are its preferred food; the Level 1 food table runs from 2 Simple Kibble up to 29 Berries; and a saddle unlocks at Level 29. What isn't in the source — which weapon each bare KO figure refers to, the exact meaning of the taming table's middle columns, and higher-level shot counts beyond the raw numbers quoted above — isn't guessed here either.
Ready to tame your own Gallimimus without losing your trap to a server restart? Spin up your own ARK server and get taming. Use promo code WELCOME for your first month free.