How to install mods for your Minecraft Forge Server
First things first, you need to download mods you wish to install on your gaming server. If we are talking about Minecraft, we would recommend you use this link - https://www.curseforge.com/minecraft/mc-mods
But don’t forget to make sure the mods you have downloaded are compatible with the version of server you have launched.
After deciding, which mods you wish to install and downloading them, you need to open your server menu, and then, click on the “File manager” tab. By clicking on it, the next window will appear:
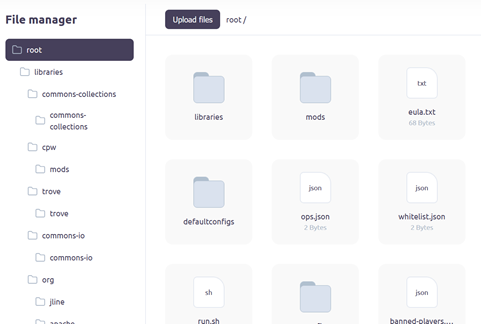
File manager tab
In the next step, you need to select “mods” folder inside Gamever file manager.

Mods folder selected in Gamever file manager
Then, you need to click on the button “Upload files” in the upper left corner of the file manager.
By clicking on it, your systems file explorer will appear, and after that, you need to find a folder where your downloaded mods are located on your system. When located, please, make sure you selected all required files to be downloaded on your server. And don’t forget to press “open” button (in your file explorer) when you are done.
After that, your selected files will be uploaded (may require some time) and you need to reboot your server afterwards by clicking “On” button and then confirmating with “Power Off” button.
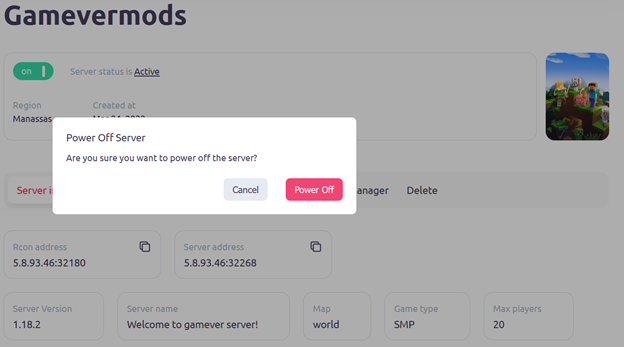
When rebooted, your mods should be successfully installed on your Minecraft Forge server.
Additional information for MacOs users.
Make sure your Minecraft client is closed, then at the top of your Mac, click the Go tab and then “Go to Folder…”.
After that - Type in ~/Library/Application Support/minecraft and click “Go”.
Enter the mods folder and then drag in the mods.
Open Minecraft and click Play, and the mods should now be loaded.