
How to Craft and Use the Forge in 7 Days to Die 1.0
Welcome to your go-to guide for crafting and mastering the Forge in 7 Days to Die 1.0! If you’ve made it past your first Blood Moon, you know that basic scrap metal and wood won’t cut it when it comes to gearing up against the zombie apocalypse.

Crafting the Forge
Before you get started, make sure you’ve hit level 5 in the Workstations crafting skill. The Forge requires the following materials:
- 50 Cobblestone Rocks: Grab these from construction sites or craft them by combining Small Stones and Clay Soil.
- 1 Wood Log: Craft these from Wood in your inventory.
- 10 Leather: Get this from breaking down leather furniture or skinning animals.
- 3 Duct Tape: Find this in household loot or craft it from Glue and cloth scraps.
- 3 Short Iron Pipes: Salvage these from pipes and rusted vehicles, or make them in a Forge.
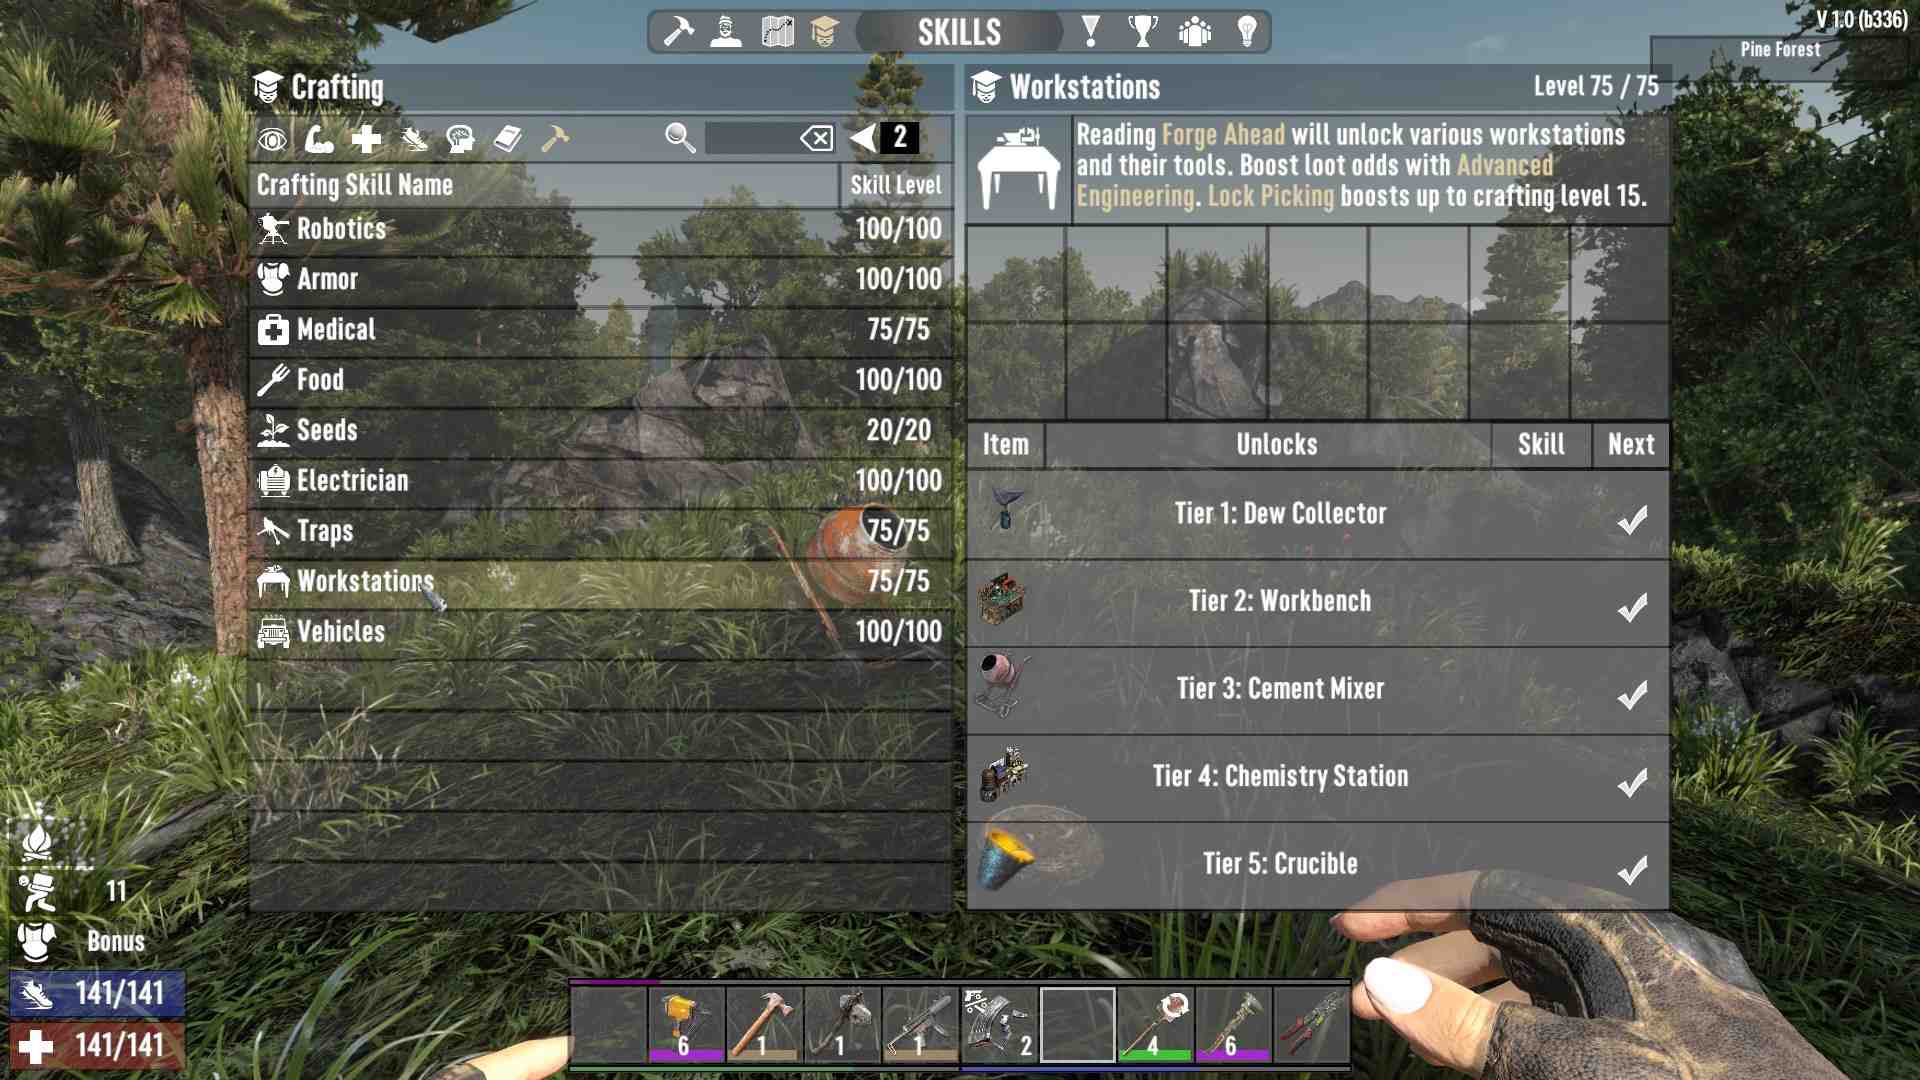
Make sure you’ve got these materials before moving forward. You can improve your Workstation crafting skill by finding and reading issues of the Forge Ahead skill book, which the Advanced Engineering perk helps you locate.
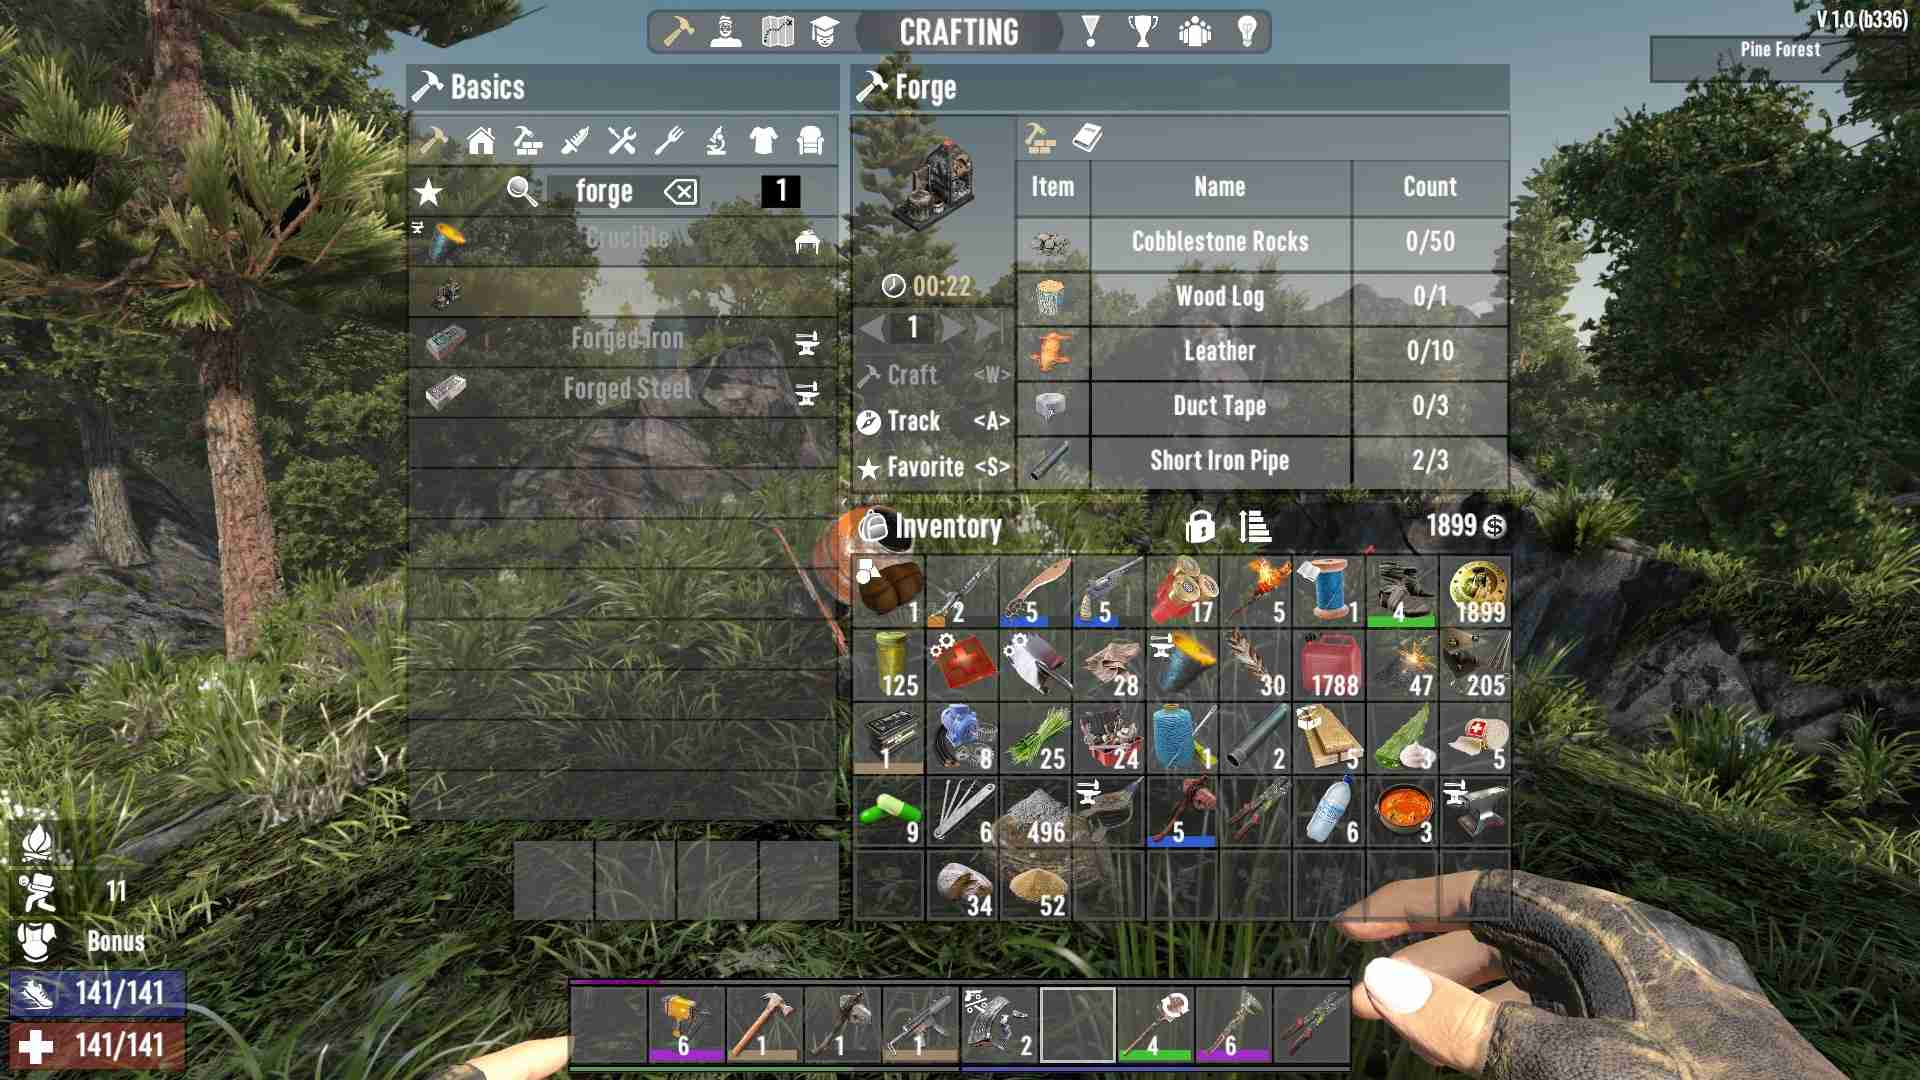
Once you’ve crafted your Forge, it’s time to fire it up. The Forge has three fuel slots where you can load flammable materials like wood or coal. Remember, the Forge will burn items from the leftmost slot first. You can only add or remove fuel when the Forge is not burning, so make sure to turn it off when you need to add more fuel.
Smelting with the Forge
The smelting window in the Forge has two slots where you load items for smelting. This process will melt them down and add their raw materials to the Forge’s stock. Different items take different times to smelt and produce various raw materials.
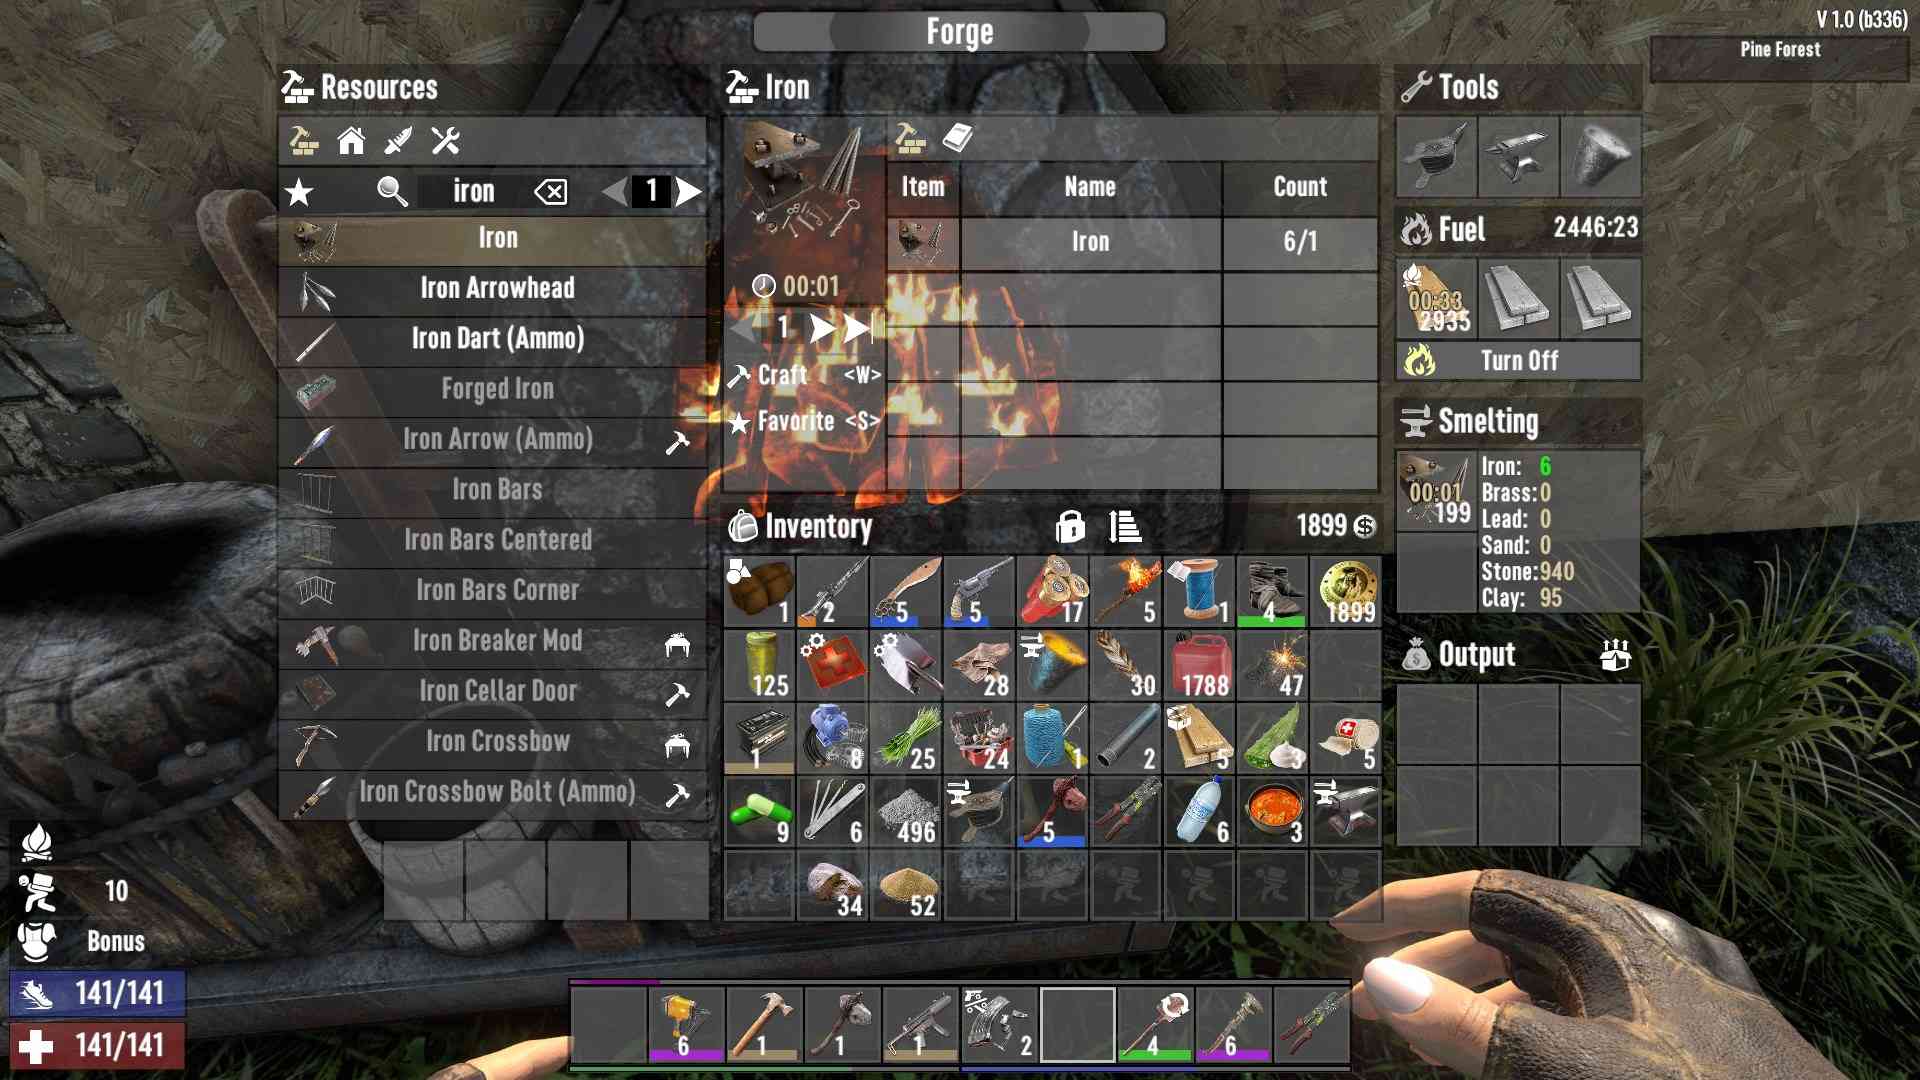
To forge something, select the recipe from the list on the left side of the Forge’s interface. The required materials will be highlighted in red (not enough) or green (sufficient). The Forge can only create items using smelted stock materials. Press the labeled button to start crafting, and the Forge will handle the rest!
Upgrading Your Forge
Anvil Upgrade
An anvil is a game-changer for speeding up your crafting process by 50%. You’ll need level 25 in Workstation crafting to make one, and it requires:
- 1250 Iron
- 125 Clay

Advanced Bellows Upgrade
The Advanced Bellows keep the Forge hotter, boosting smelting speed by 50%. To craft these, you need level 20 in Workstation crafting and:
- 6 Wood
- 20 Leather
- 2 Short Iron Pipes
- 5 Duct Tape
- 5 Nails
Crucible Upgrade
The Crucible is necessary for creating Forged Steel. It doesn’t speed up your Forge, but it’s essential for advanced recipes. You’ll need level 75 in Workstation crafting and:
- 100 Forged Iron
- 20 Mechanical Parts
- 1200 Small Stones
- 20 Oil
- 900 Clay Soil
Craft Advanced Bellows and put into Upgrade slot of the Forge.
Tips and Tricks for Using the Forge
- Use Coal for Efficient Fueling: Coal is the most efficient fuel for your Forge.
- Turn Off the Forge When Not in Use: Forges keep burning until they run out of fuel, so save resources by turning it off.
- Avoid Drawing Zombies: The Forge’s flames can attract zombies. Keep it away from windows and other attractants.
- Forge and Smelt While You Work: Your Forge can operate while you’re busy with other tasks.
The Forge in 7 Days to Die is a critical part of your survival strategy. It’s not just about making stronger metal; it’s about unlocking a world of crafting possibilities. Whether you’re smelting materials or crafting advanced gear, the Forge will be your best friend in this zombie-infested world.