How become admin on dedicated 7 Days to Die server
Becoming an admin on a dedicated 7 Days to Die server can be a great way to take control of your gaming experience and help manage the server. Here's a step-by-step guide on how to become an admin on a dedicated 7 Days to Die server:
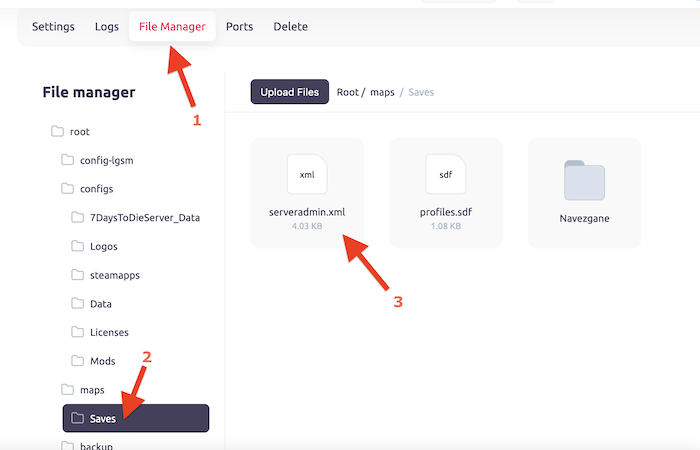
Step 1: Find serveradmin.xml file
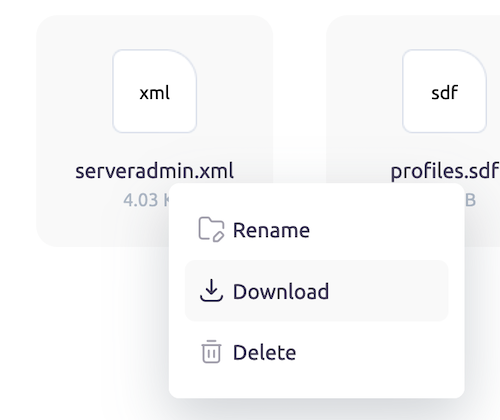
The first step is to open filemanager on the dedicated 7 Days to Die server that you want to become an admin on. You need to download serveradmin.xml file located in /Root/maps/Saves.
Right click on the file and click "download".
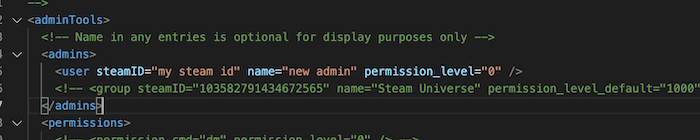
Step 2: Open this file in text-editor
Next, you will need to add your SteamID to the serveradmin.xml file. To do this, open the file in a text editor such as Notepad. Look for the section that contains the list of admins. Add your SteamID to this list, making sure to follow the format of the other SteamIDs in the list.
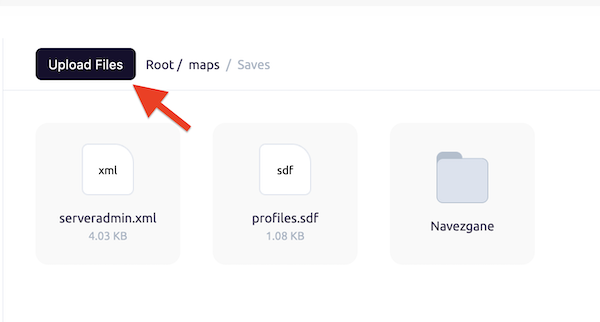
Step 3: Upload serveradmin.xml to the Server
Once you have added your SteamID to the serveradmin.xml file, save the file and upload it to the server. You can do this using an FTP client or through the server's control panel. Make sure to upload the file to the correct directory.
Step 4: Restart the Server
After uploading the serveradmin.xml file, you will need to restart the server for the changes to take effect. You can do this through the server's control panel or by using a command in the console.
Step 5: Conclusion
Congratulations! You are now an admin on the dedicated 7 Days to Die server. You can now enjoy admin privileges such as kicking and banning players, changing server settings, and more. Remember to use your powers responsibly and help create a fun and fair gaming experience for all players on the server.
In conclusion, becoming an admin on a dedicated 7 Days to Die server is a great way to take control of your gaming experience and help manage the server. By following these steps, you can become an admin and enjoy all the benefits that come with it. Good luck and have fun!