
Getting Started with Your Satisfactory Server on gamever

Welcome to your gamever Satisfactory server. Satisfactory works a little differently from most survival games — you join and manage the game itself through the in-game Server Manager, while gamever's panel handles the server: power, settings, files, backups and ports. This guide is the quick tour and a checklist of what to do first, with links to deeper guides for each step.
The Overview tab
When you open your server you land on Overview:
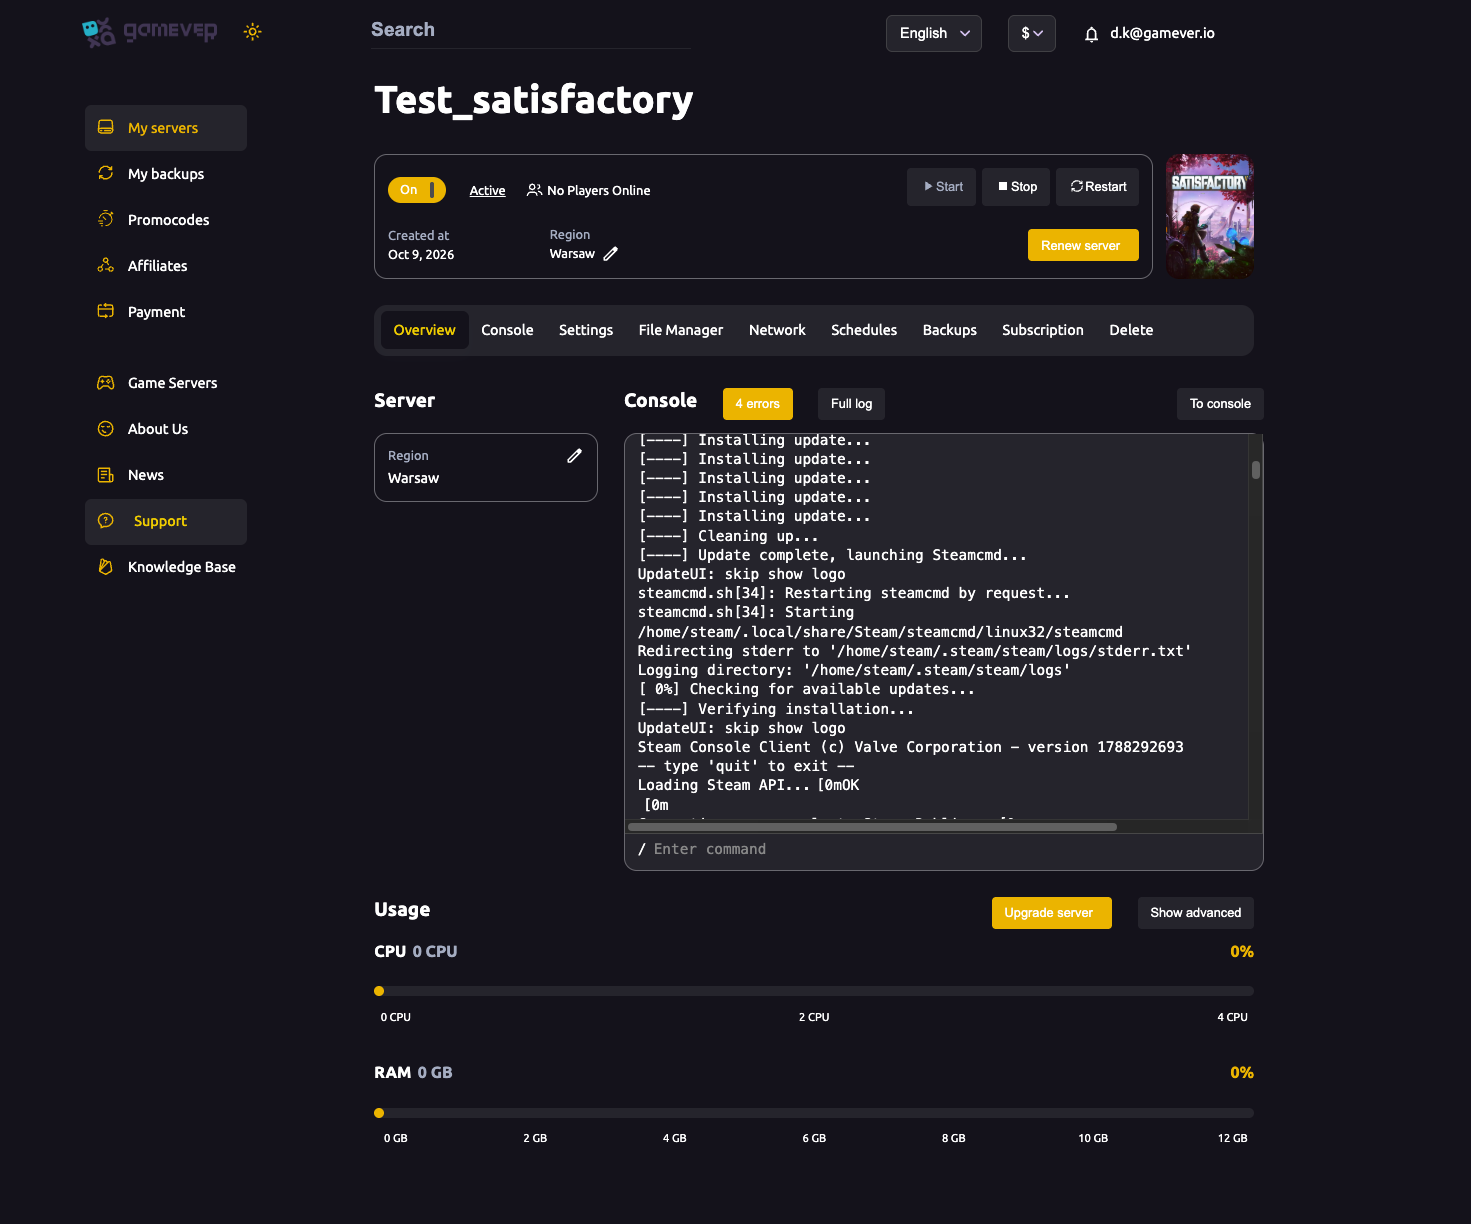
- On/Off, Start / Stop / Restart — power controls for the server.
- Active / players online — current status.
- Region and Created at — where it runs and when it started; Renew server extends your rental.
- Console — a live server log with an Enter command box and Full log.
- Usage — live CPU and RAM meters, plus Upgrade server if you need more power.
Along the top is the tab bar: Overview · Console · Settings · File Manager · Network · Schedules · Backups · Subscription · Delete.
What each tab is for
| Tab | Use it to |
|---|---|
| Console | Watch the live log and run server commands. |
| Settings | Server name, FICSMAS, streaming, Auto Pause, version/branch, network tuning, FTP — see server settings. |
| File Manager | Browse and edit config files, saves and mods. |
| Network | Your server address and ports — see ports & connection. |
| Schedules | Automated restarts and tasks. |
| Backups | Automatic and on-demand backups — see backup & restore. |
| Subscription / Delete | Billing and server removal. |
Your first-time checklist
- Wait for Active. On first boot the server runs SteamCMD to install/update (you'll see "Installing update…" in the Console). Give it a few minutes until Overview shows Active.
- Connect and claim it. Copy the Server address from the Network tab, add it in the in-game Server Manager, and claim it with an Admin Password — full steps in connect and claim.
- Set a join password and player limit if you want a private server — see password & max players.
- Tune the panel settings — name, Auto Pause and network — in server settings.
- Create a new game or upload an existing save — bring your single-player factory across with upload a save.
- Take a backup once it's running well, from the Backups tab.
Good to know up front
- No server browser — everyone joins by the server address in the Server Manager.
- Admin Password = full control — set it carefully and share only with co-admins.
- Auto Pause freezes the factory when empty to save resources; turn it off for 24/7 production.
- It auto-updates to the latest stable build by default — flip to experimental only if your whole group does too (updating & branches).
- Mods go through the Satisfactory Mod Manager and must match on server and clients (install mods).
Additional Tips
- Be patient on first boot — the Console's "Installing update" is normal; wait for Active.
- Bookmark the Network tab — the Server address is what you and your friends need.
- Back up before any big change — updates, mods, save swaps.
- Watch Usage on Overview with a full group; Upgrade server if CPU/RAM run hot.
- Use the Console to run commands and spot errors fast.
Conclusion
Your gamever Satisfactory server is ready the moment it reaches Active: claim it in the in-game Server Manager, set your passwords, tune a couple of panel settings, and create or upload a world. The panel handles power, files, backups and ports; the game handles sessions and admin. Work through the checklist above and your factory is online 24/7 for the whole team.
Rent your Satisfactory server at gamever.io — instant setup, auto-updates, backups and a browser console, all in one panel. Free trial, promo code WELCOME.