
Farming in Dragonwilds: Every Crop, Plot, and How Growth Works

Farming in Dragonwilds unlocks with a single quest, then runs on documented numbers the rest of the way. Growing Pains, from the Wise Old Man in Bramblemead Valley, opens up farming plots — and every crop after that follows a base disease chance, a watering multiplier, a fertilizer multiplier, and a full harvest-yield formula. This guide covers the four plot tiers, the disease-and-watering math, and the arithmetic behind a maxed harvest.
Farming Plots, Seeds, and Regions
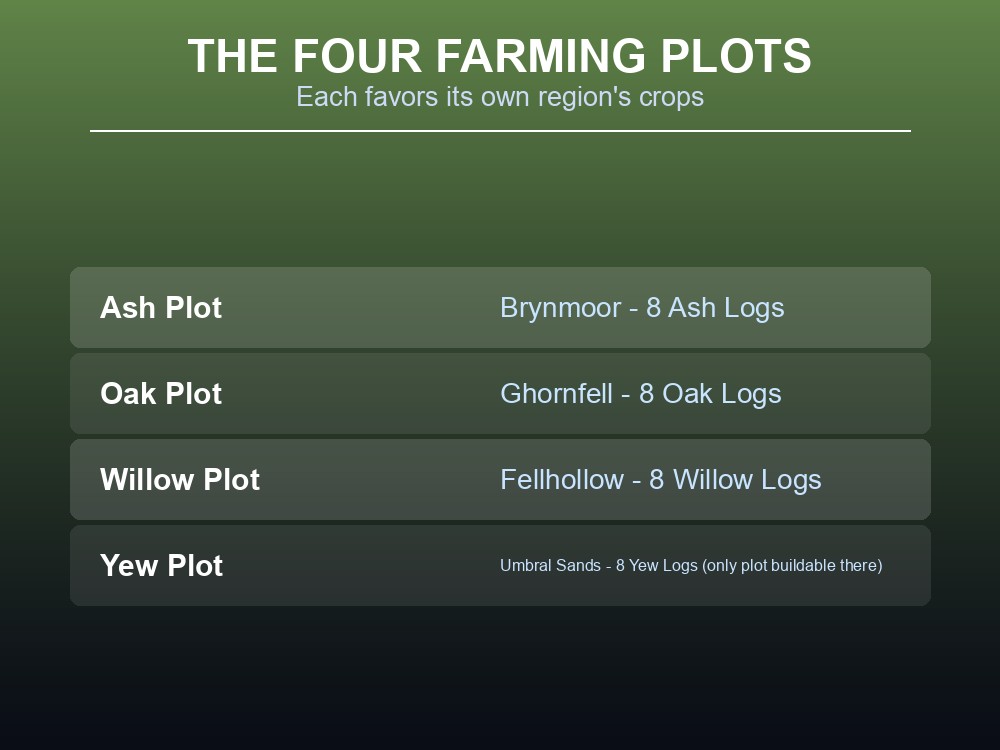
Farming plots can only be built once Growing Pains is complete. They come in four tiers, each tied to a specific region and built from that region's own logs:
| Plot | Region | Building cost | Preferred seeds |
|---|---|---|---|
| Ash Farming Plot | Brynmoor | 8 Ash Logs | Cabbage, flax, harralander, marrentil, potato, redberry, wheat |
| Oak Farming Plot | Ghornfell | 8 Oak Logs | Dwellberry, kwuarm, onion, snapdragon, swamp weed, toadflax, tomato |
| Willow Farming Plot | Fellhollow | 8 Willow Logs | Cadavaberry, corpse cotton, irit, pumpkin, watermelon, avantoe |
| Yew Farming Plot | Umbral Sands | 8 Yew Logs | Desert weed, barrel cactus, pipe cactus, bunny cactus |
Yew plots are the only type buildable in Umbral Sands — the other three tiers can't go up there. Each plot's description says crops from its matching region "grow better" in it, and higher-tier crops in a lower-tier plot visibly carry a higher disease rate. But the wiki is explicit that "it is unknown what the rate is" — a real bonus of unconfirmed size, not a number to build a plan around.
Seeds come from picking wild plants, looting chests and packs, or harvesting grown plants, and most need a plot to grow. The exception is trees: ash, oak, willow, maple, and yew seeds go straight into the ground once Tree Farming unlocks at level 20.
Growth, Disease, and Keeping Crops Alive
Every seed takes a flat two in-game days to grow, advancing a stage each day. Diseased crops can't be harvested and die the next day if untreated — the wiki documents no growth-time variation between crops beyond that flat rule.
Each crop has its own base disease chance:
| Base disease chance | Crops |
|---|---|
| 0.3 | Potato, tomato, pumpkin |
| 0.4 | Cabbage, flax, harralander, marrentil, dwellberry, onion, kwuarm, swamp weed, snapdragon, toadflax, watermelon, avantoe |
| 0.5 | Redberry, irit |
| 0.6 | Wheat, cadavaberry |
| 0.75 | Corpse cotton, desert weed, bunny cactus, barrel cactus, fibrous pipe cactus |
In the wiki's own words: "a potato has a base 30% chance of becoming diseased each growth cycle." Watering reduces that number without removing it:
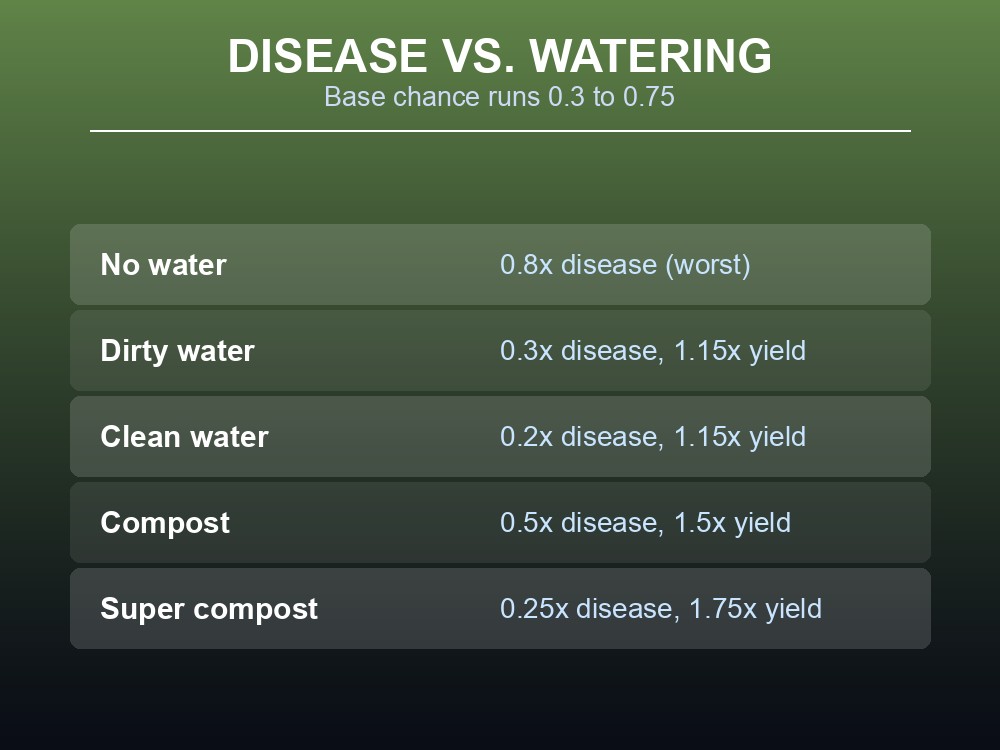
| Watering | Disease multiplier | Yield multiplier |
|---|---|---|
| No water | 0.8x (worst) | — |
| Dirty water | 0.3x | 1.15x |
| Clean water | 0.2x | 1.15x |
Plots can be watered once per day. Rain auto-waters with clean water, but the wiki notes it "will not provide XP or cure disease" the way manual watering does. Three documented cures exist: a crafted Plant Cure, casting Humidify once Cleansing Rain unlocks at level 50, or the Farming Cape, an infinite Plant Cure source. Curing resets a plant to its current growth stage, so one diseased on its final day can still be harvested that same day.
One more upkeep step: an unplanted plot grows up to three layers of weeds, one per day, and each must be cleared with a spade before anything can be sown.
Fertilizing, Water Infrastructure, and Harvest Yield
Fertilizer stacks a second multiplier on watering. A plot needs fertilizing once per cycle, via a Compost Bucket:
| Fertilizer | Disease multiplier | Yield multiplier | Made at |
|---|---|---|---|
| Compost | 0.5x | 1.5x | Compost Bin (8 Ash Logs, 4 Stone) |
| Super compost | 0.25x | 1.75x | Super Compost Bin (8 Willow Logs, 4 Sandstone) |
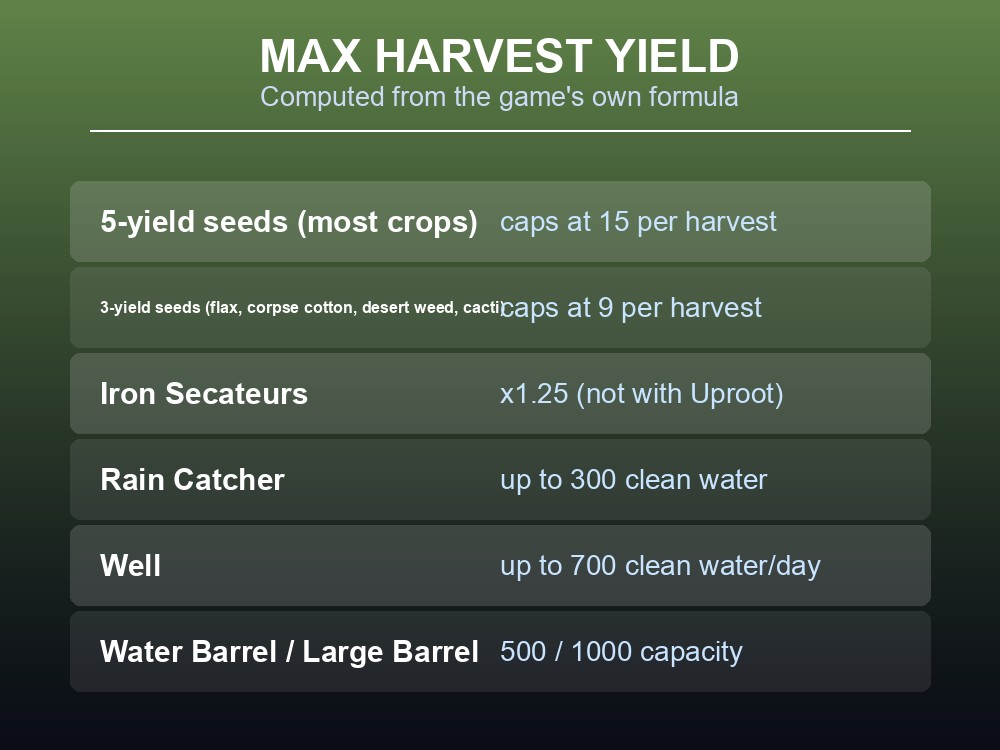
Water doesn't have to be hauled by hand forever. A Rain Catcher passively collects up to 300 clean water in the rain; a Well (needs a Vault Core) refills up to 700 clean water daily. Stored water sits in a Water Barrel (capacity 500) or Large Water Barrel (capacity 1000) until a can needs a refill.
Harvesting runs on a documented formula: Yield = ceil(ceil(ceil(BaseYield × SecateursMultiplier) × CompostMultiplier) × WaterMultiplier). BaseYield is 3 for flax, corpse cotton, desert weed, bunny cactus, barrel cactus, and fibrous pipe cactus, and 5 for every other seed. Iron Secateurs add 1.25x (not with Uproot), and the compost/water multipliers above apply again here.
The arithmetic for a 5-base crop, every buff stacked: 5 × 1.25 = 6.25 → 7; 7 × 1.75 (super compost) = 12.25 → 13; 13 × 1.15 (water) = 14.95 → 15. For a 3-base crop: 3 × 1.25 = 3.75 → 4; 4 × 1.75 = 7 → 7; 7 × 1.15 = 8.05 → 9. That matches the wiki's own maximums: 15 per harvest for most crops, 9 for the six 3-base ones. It's a real, computed gap — but only a yield number, not a verdict on which crop is "best": it says nothing about disease chance, region fit, or harvest XP, which runs far higher for higher-tier crops. Treat it as one input, not a final ranking.
Practical tips
- Complete Growing Pains before building any plot.
- Match crops to their region's plot — off-region growth has an unquantified disease penalty.
- Clean and dirty water both give 1.15x yield; the difference is disease resistance (0.2x vs 0.3x).
- Super compost (0.25x disease, 1.75x yield) beats compost (0.5x, 1.5x) whenever you have the materials.
- A maxed harvest caps at 15 for most crops, 9 for flax, corpse cotton, desert weed, and the three cacti.
- A Scarecrow guards crops from what the wiki calls "feathered annoyances."
Running your own Dragonwilds server
A farm this systems-heavy benefits from a world that runs whether anyone's online or not — growth days, weed layers, and well refills tick on the game's own clock. A gamever Dragonwilds server keeps that clock live on a group's schedule, splits plot tiers across a co-op crew, and takes one-click backups before a diseased crop wipes out a cycle's work.
Conclusion
Dragonwilds farming comes down to a quest, four region-locked plots, and a formula. Growing Pains unlocks the system; the Ash, Oak, Willow, and Yew plots each favor their own region, with an unquantified penalty off-region. Every crop carries a base disease chance from 0.3 to 0.75, which watering (to 0.2x) and fertilizing (to 0.25x) both reduce without removing. The harvest formula is documented in full: with Iron Secateurs, super compost, and clean water stacked, a maxed harvest computes to 15 for most crops and 9 for the six lower-base ones — real numbers, and one input among several.
Want a farm that keeps growing while your group is offline? Rent a RuneScape: Dragonwilds server at gamever.io — instant setup, one-click backups and updates, and 24/7 uptime. Start with a free trial and use promo code WELCOME.