
Every Tower Boss Health Figure in Palworld: 12,900 to 6,237,000
Palworld publishes 22 tower boss entries with exact health values, and the spread across them is the clearest map of the game's difficulty curve that exists. Zoe & Grizzbolt open at 12,900 health. Zenara & Astralym on Hard sit at 6,237,000 — the only level 100 content in the game, and more than ten times the next largest fight.
The Normal Ladder
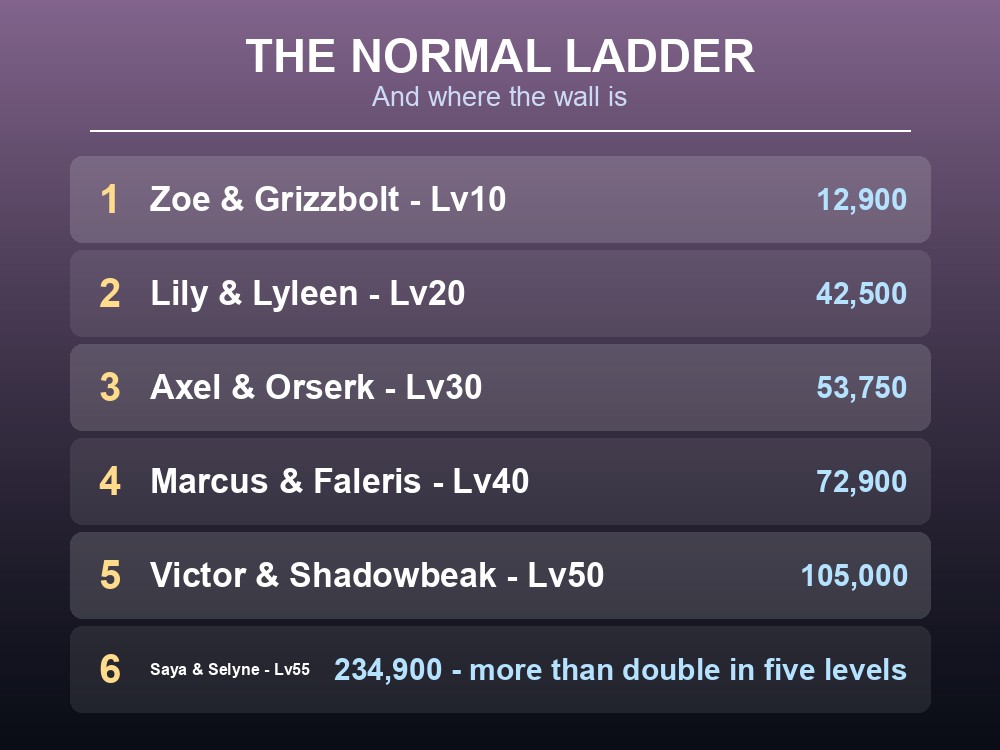
| Boss | Tower | Level | Health |
|---|---|---|---|
| Zoe & Grizzbolt | Rayne Syndicate | 10 | 12,900 |
| Lily & Lyleen | Free Pal Alliance | 20 | 42,500 |
| Axel & Orserk | Brothers of the Eternal Pyre | 30 | 53,750 |
| Marcus & Faleris | PIDF | 40 | 72,900 |
| Victor & Shadowbeak | PAL Genetic Research Unit | 50 | 105,000 |
| Saya & Selyne | Moonflower | 55 | 234,900 |
| Bjorn & Bastigor | Feybreak | 60 | 310,000 |
| Auri & Shaolong | Azure Covenant | 68 | 327,600 |
| Panthalus | (Legendary Ocean King) | 70 | 353,220 |
| Zenara & Astralym | (Nullstar Calamity) | 80 | 420,000 |
The curve is not smooth. From Zoe to Victor the steps are gentle — 12,900 to 105,000 across four bosses, roughly an eight-fold climb over forty levels. Then Saya & Selyne more than double Victor's health in five levels (105,000 → 234,900), and the back half of the list climbs slowly again.
That jump at level 55 is the real difficulty wall on Normal. If the first five towers felt like a ladder and the sixth felt like a cliff, that is why.
The Hard Ladder
| Boss | Level | Health |
|---|---|---|
| Bjorn & Bastigor | 80 | 487,500 |
| Auri & Shaolong | 80 | 501,600 |
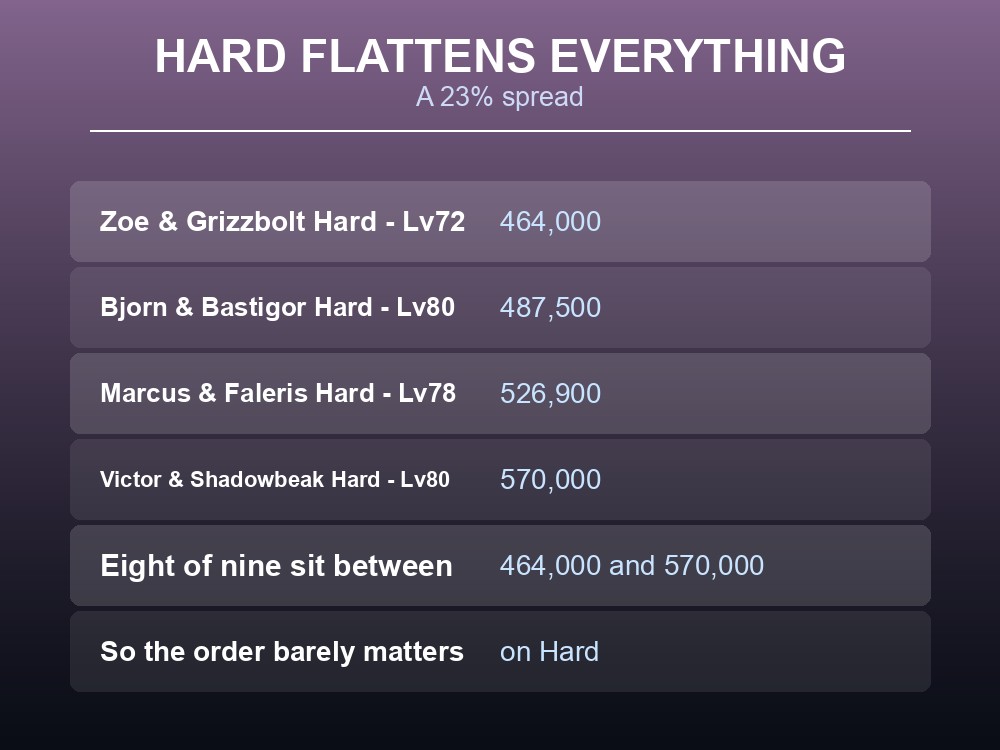
| Zoe & Grizzbolt | 72 | 464,000 |
| Lily & Lyleen | 74 | 494,000 |
| Axel & Orserk | 76 | 514,800 |
| Marcus & Faleris | 78 | 526,900 |
| Saya & Selyne | 80 | 567,300 |
| Victor & Shadowbeak | 80 | 570,000 |
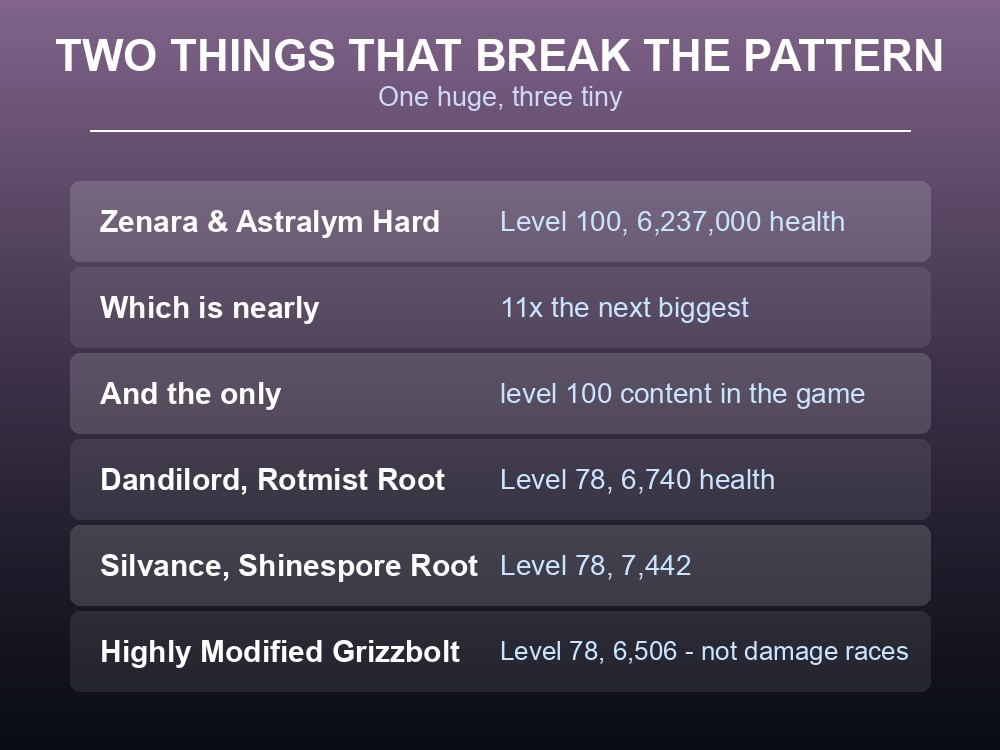
| Zenara & Astralym | 100 | 6,237,000 |
Eight of the nine Hard bosses sit between 464,000 and 570,000 — a spread of only 106,000, or about 23%. Hard mode flattens the entire game's difficulty curve into one band.
That means the order you fight them in barely matters on Hard. The Rayne Syndicate tower, which was the tutorial fight at 12,900, becomes a 464,000-health encounter — only 18% easier than the hardest ordinary Hard boss.
Zenara & Astralym is the exception and it is not close. At 6,237,000 health and level 100, it is:
- Nearly 11 times the next biggest Hard boss (570,000)
- The only level 100 content in the entire tower list
- Almost 15 times its own Normal version (420,000)
Every other tower boss roughly five to thirty-six times its Normal health on Hard. Zenara multiplies by fifteen and adds twenty levels.
The Three That Are Not Towers
Three entries sit in the tower list with health values that make no sense against the rest:
| Encounter | Location | Level | Health |
|---|---|---|---|
| Bewitching Lurker Dandilord | Rotmist Root | 78 | 6,740 |
| Immortal Shade Silvance | Shinespore Root | 78 | 7,442 |
| Highly Modified Grizzbolt | Forbidden Laboratory | 78 | 6,506 |
All three are level 78 with under 7,500 health — less than the level-10 Zoe & Grizzbolt fight at 12,900. These are not tower bosses in the ordinary sense; they are level-78 encounters with the health of an early-game creature, which strongly suggests they are objective-based or scripted rather than damage races.
Do not read their level as their difficulty. A level 78 enemy with 6,740 health dies to a fraction of the damage the number implies.
Reading the Ratios
| Boss | Normal | Hard | Multiplier |
|---|---|---|---|
| Zoe & Grizzbolt | 12,900 | 464,000 | ×36 |
| Lily & Lyleen | 42,500 | 494,000 | ×11.6 |
| Axel & Orserk | 53,750 | 514,800 | ×9.6 |
| Marcus & Faleris | 72,900 | 526,900 | ×7.2 |
| Victor & Shadowbeak | 105,000 | 570,000 | ×5.4 |
| Saya & Selyne | 234,900 | 567,300 | ×2.4 |
| Bjorn & Bastigor | 310,000 | 487,500 | ×1.6 |
The multiplier falls steadily as the Normal fight gets bigger — from ×36 on the first tower to ×1.6 on Feybreak. That is Hard mode pulling every fight up to roughly the same ceiling rather than scaling each one by a fixed amount.
The practical consequence: if you are working through Hard towers, do the late ones first. Feybreak Hard is only 1.6 times its Normal version, while Rayne Syndicate Hard is 36 times — so the tower you cleared at level 10 is the one that changed the most.
Running your own Palworld 1.0 server
A 6.2-million-health fight at level 100 is a raid by any other name, and raids need everyone in one world at the same time. A gamever Palworld server keeps it persistent with full crossplay, automatic updates and one-click backups.
Conclusion
Palworld's 22 tower boss entries run from Zoe & Grizzbolt at 12,900 health on level 10 to Zenara & Astralym at 6,237,000 on level 100 — the only level-100 content in the game and nearly eleven times the next biggest fight. On Normal, the curve is gentle to Victor & Shadowbeak's 105,000 and then jumps sharply: Saya & Selyne more than double it in five levels at 234,900, which is the real difficulty wall. On Hard, eight of nine bosses sit between 464,000 and 570,000 — a spread of only 23% — so the order barely matters and the tutorial tower becomes a 464,000-health fight. The Normal-to-Hard multiplier tells you where to start: it falls from ×36 on Rayne Syndicate to ×1.6 on Feybreak, so the late towers changed least and are the ones to clear first. And three entries in the list — Dandilord, Silvance and Highly Modified Grizzbolt, all level 78 with under 7,500 health — are not damage races at all, despite their level.
Want a raid the whole group can attend? Rent a Palworld server at gamever.io — instant setup, one-click backups and updates, full crossplay and 24/7 uptime. Start with a free trial and use promo code WELCOME.