
Every Battlestaff in Dragonwilds: All 14, and Which Ones Never Catch Up
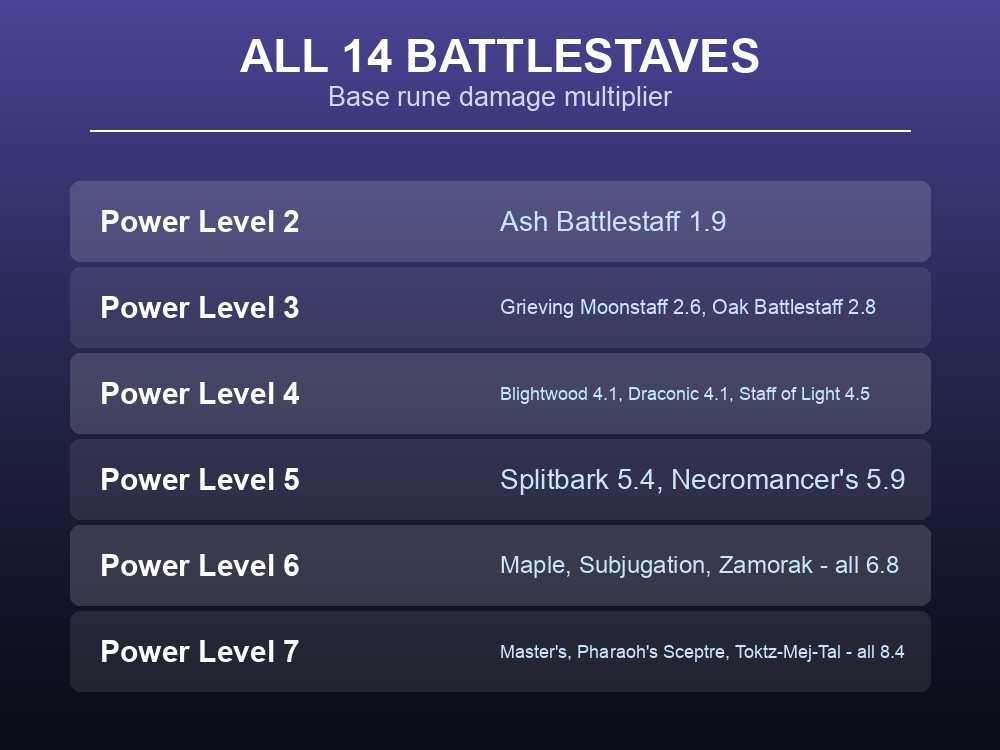
Magic in Dragonwilds runs entirely on battlestaves — there are fourteen of them, they all share the same four-hit attack combo, and the only number that separates their basic damage is the rune damage multiplier, which runs from 1.9 to 8.4. So far, so simple. The complication is ascension: a staff's listed power level is a starting point, and the ladders diverge. A Power Level 5 staff ascends to a higher final damage than any staff that starts at Power Level 7. That is the decision this guide is really about.
All 14 Battlestaves
Every staff, with the rune damage multiplier it is crafted at:
| Staff | Power Level | Rune damage | Where |
|---|---|---|---|
| Ash Battlestaff | 2 | 1.9 | Crafting Table |
| Grieving Moonstaff | 3 | 2.6 | Mystic Forge — vestige from Garou Druids |
| Oak Battlestaff | 3 | 2.8 | Mystic Forge |
| Blightwood Battlestaff | 4 | 4.1 | Mystic Forge |
| Draconic Staff | 4 | 4.1 | Mystic Forge — vestige in a Fractured Plains vault |
| Staff of Light | 4 | 4.5 | Mystic Forge — quest Highlighting the Problem |
| Splitbark Staff | 5 | 5.4 | Mystic Forge |
| Necromancer's Staff | 5 | 5.9 | Mystic Forge — effigy in Vekchenven Kara |
| Maple Battlestaff | 6 | 6.8 | Mystic Forge |
| Subjugation Staff | 6 | 6.8 | Mystic Forge — vestige from the Evil Emporium |
| Zamorak Staff | 6 | 6.8 | Mystic Forge — quest What's Theirs is Mine! |
| Master's Staff | 7 | 8.4 | Mystic Forge |
| Pharaoh's Sceptre | 7 | 8.4 | Mystic Forge — reward from Contact! |
| Toktz-Mej-Tal | 7 | 8.4 | Mystic Forge — vestige from KotHaar in Umbral Sands |
Only the Ash Battlestaff is made at a Crafting Table. Every other staff in the game comes out of the Mystic Forge, so unlocking that bench is the real gate on magic progression.
Notice how flat each tier is. The three Power Level 6 staves are all 6.8, and the three Power Level 7 staves are all 8.4. Within a tier, raw damage is identical — which means the choice inside a tier is made entirely on the special effect.
Base Power Level Does Not Decide the Endgame
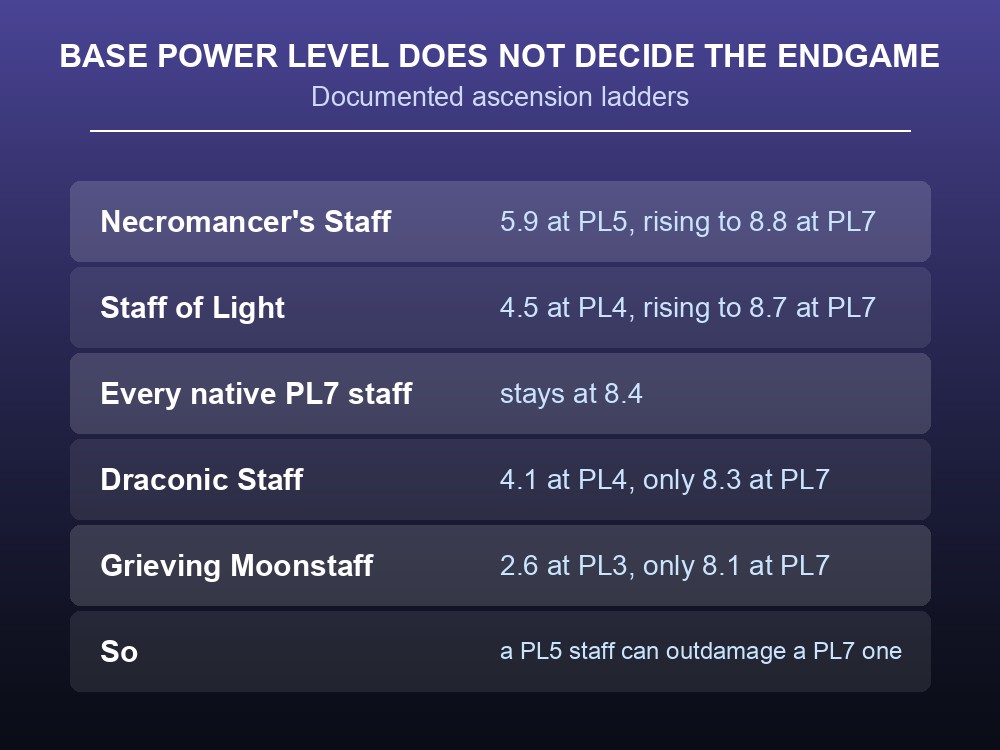
Staves ascend at the Mystic Forge using Ascension Cores, which come in Power Level 4, 5, 6 and 7 versions and lift masterwork weapons and vestiges one tier at a time. Four staves have their full ladder documented, and the results are not what the base table suggests:
| Staff | Base | PL4 | PL5 | PL6 | PL7 |
|---|---|---|---|---|---|
| Necromancer's Staff | PL5, 5.9 | — | 5.9 | 7.3 | 8.8 |
| Staff of Light | PL4, 4.5 | 4.5 | 5.8 | 7.2 | 8.7 |
| Any native PL7 staff | PL7, 8.4 | — | — | — | 8.4 |
| Draconic Staff | PL4, 4.1 | 4.1 | 5.4 | 6.8 | 8.3 |
| Grieving Moonstaff | PL3, 2.6 | 3.9 | 5.2 | 6.6 | 8.1 |
The Necromancer's Staff at 8.8 is the hardest-hitting staff documented in the game — ahead of the Master's Staff, Pharaoh's Sceptre and Toktz-Mej-Tal, all of which sit at 8.4 and cannot go higher. The Staff of Light at 8.7 is second, from a base of only 4.5.
And the ladders run the other way too. The Grieving Moonstaff tops out at 8.1 and the Draconic Staff at 8.3 — both permanently below the 8.4 baseline. These two carry a lower multiplier at every rung, not just at the bottom.
The practical rule: pick the staff you intend to ascend, not the staff that looks strongest today. Crafting a Power Level 5 Necromancer's Staff is a better long-term decision than crafting a Power Level 7 Master's Staff, because the ceiling is higher — and the cores you spend getting there are the same cores either way.
A caveat worth stating plainly. Only those four ladders are documented. The Splitbark, Maple, Subjugation, Zamorak, Blightwood and Oak staves have no published per-tier figures yet, so where they land at Power Level 7 is genuinely unknown. Do not assume they follow the 8.4 baseline.
The Crit and Durability Trades
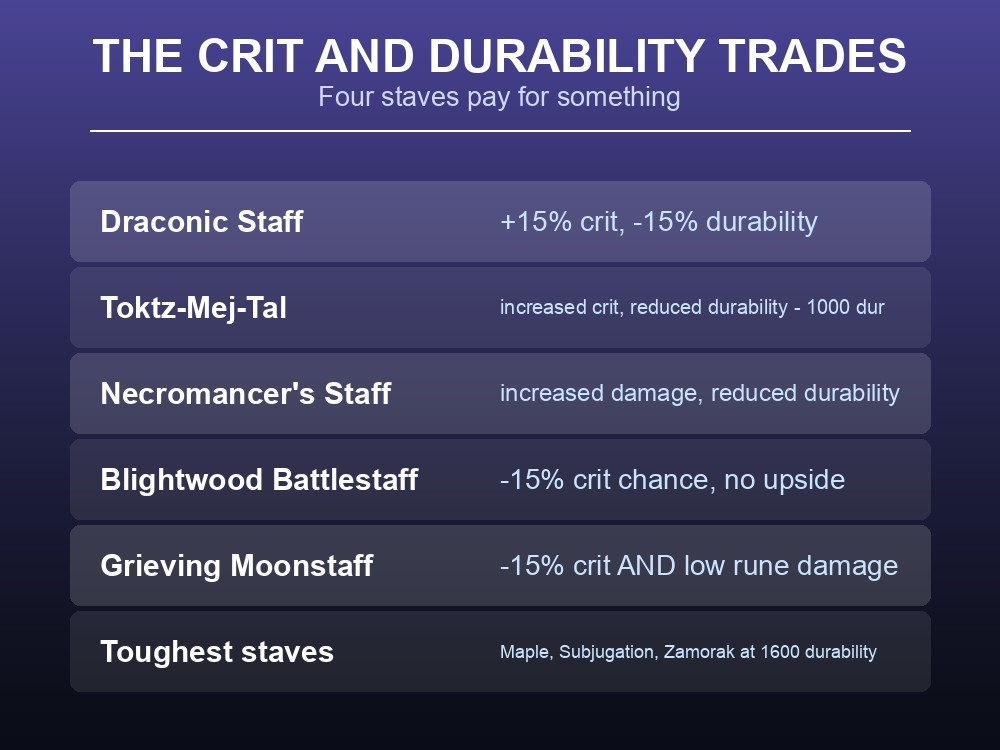
Five staves carry a stat modifier rather than a mechanic:
| Staff | Trade |
|---|---|
| Draconic Staff | +15% critical strike chance, −15% durability |
| Toktz-Mej-Tal | Increased critical hit chance, reduced durability — 1,000, the lowest in the game |
| Necromancer's Staff | Increased damage, reduced durability |
| Blightwood Battlestaff | −15% crit chance — with nothing given back |
| Grieving Moonstaff | −15% crit chance, and a below-par rune multiplier at every tier |
The first three are honest trades. You give up repair intervals and get damage or crits. The Draconic Staff in particular is a clean deal — a +15% crit swing for durability you can top up with a single repair.
The Grieving Moonstaff is the one to avoid ascending. It is the only staff in the game that carries a penalty with no offsetting bonus and a lower multiplier at every power level. The community wiki is blunt about it, calling it the weakest staff to ascend, and the numbers back that up: 8.1 at PL7 with −15% crit, against 8.8 with a damage bonus on the Necromancer's Staff. It remains perfectly fine as an early Power Level 3 staff — just do not spend cores on it.
Durability is worth a glance if you fight far from a repair bench. The Maple, Subjugation and Zamorak staves all carry 1,600 durability, the highest of any staff; the Staff of Light, Blightwood, Master's Staff and Pharaoh's Sceptre sit at 1,300; the Toktz-Mej-Tal at 1,000 is the shortest-lived by a wide margin.
The Three Specialists
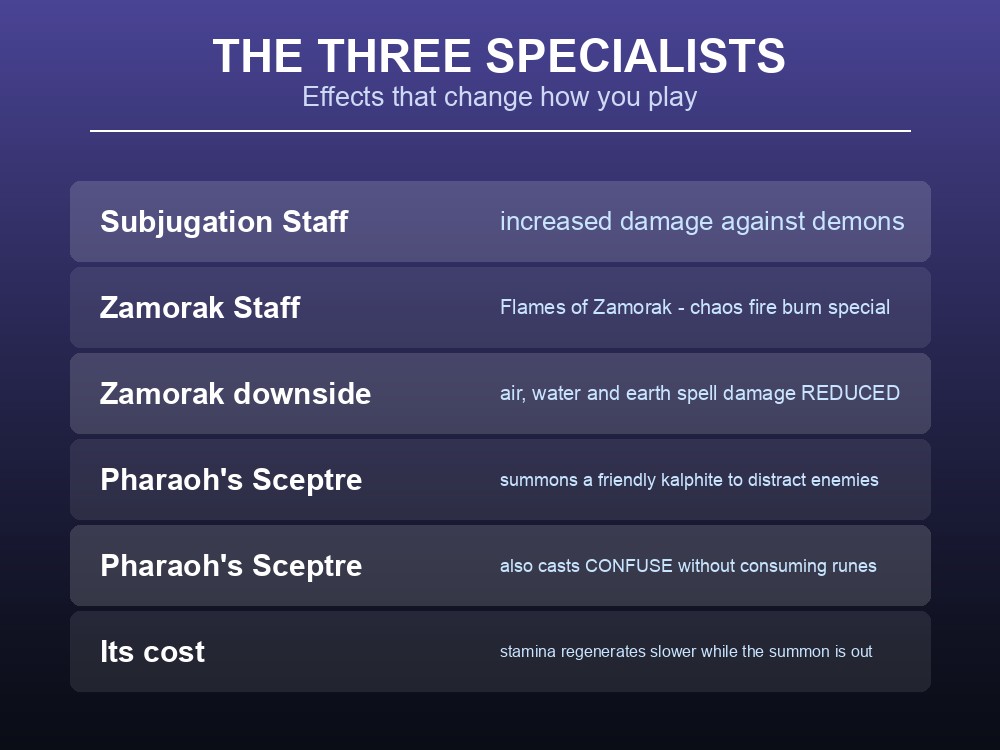
Three staves do something no stat line captures.
Subjugation Staff — increased damage against demons. A straightforward regional pick: it is the staff for Dowdun Reach, and its recipe comes from a vestige sold at the Evil Emporium. Outside demon content it is just another 6.8 staff, identical to the Maple Battlestaff.
Zamorak Staff — a fire specialist that actively weakens you elsewhere. Three effects stack on it:
- Flames of Zamorak — a special that burns enemies with chaos fire, damaging them and building Fire on everything around you
- Burning Ambition — increases burning damage from fire spells
- Elemental Imbalance — air, water and earth spell damage reduced
That third line makes it a commitment rather than an upgrade. If you run water magic for its slows, or air for the stun-and-knockback secondary, the Zamorak Staff actively costs you. It is a fire-only weapon, and it should be treated as a second staff you swap to rather than your main.
Pharaoh's Sceptre — the only staff with a summon. Also three effects:
- Sworn Servant — summons a friendly kalphite that attacks and distracts enemies. Resummoning while it is still alive brings it back at the HP it had when dispelled
- Royal Mandate — lets you cast Confuse without consuming runes while holding the Sceptre
- Hollow Vessel — stamina regenerates more slowly while the summon is active
The free Confuse is the underrated half. Runes are a consumable you actively manage, so an unlimited crowd-control spell changes how you open fights. The stamina penalty is the price, and in a game where dodging and parrying run on stamina that is a real cost, not a footnote.
How to Choose
- Early game: Ash Battlestaff. It is the only one you can make at a Crafting Table, at Power Level 2.
- Unlock the Mystic Forge as a priority. Thirteen of the fourteen staves need it.
- Do not ascend the Grieving Moonstaff. Lowest ladder in the game plus a −15% crit penalty.
- Commit your Ascension Cores to the Necromancer's Staff if you can reach Vekchenven Kara — 8.8 at Power Level 7 beats everything.
- Take the Staff of Light as the accessible alternative — 8.7, no downside, 1,300 durability, from a quest rather than a vault.
- Keep the Zamorak Staff as a swap, not a main — it reduces air, water and earth spell damage.
Practical tips
- Fourteen battlestaves, all with the same four-hit combo. Only the multiplier differs.
- Within a tier the damage is identical — three staves at 6.8, three at 8.4. Choose on effect.
- The Necromancer's Staff reaches 8.8 at Power Level 7, above every native PL7 staff.
- The Grieving Moonstaff only reaches 8.1 and has −15% crit. Never spend cores on it.
- Toktz-Mej-Tal has 1,000 durability, the lowest; Maple, Subjugation and Zamorak have 1,600.
- Pharaoh's Sceptre casts Confuse for free but slows stamina regeneration while its kalphite is out.
Running your own Dragonwilds server
Staff progression is a long chain — vestiges from vault interiors, quest rewards, and Ascension Cores gathered a tier at a time — and most of it is easier with a group splitting the routes. On a dedicated RuneScape: Dragonwilds server the world stays live between sessions, so a vault run does not depend on whoever hosted last time being online, and everyone's unlocks persist. One-click backups protect a character that represents dozens of hours of Artisan levels and hard-won recipes.
Conclusion
Dragonwilds has fourteen battlestaves across Power Levels 2 to 7, all sharing a four-hit combo and separated by a rune damage multiplier from 1.9 to 8.4. Within any tier that multiplier is identical, so the real choice is the special effect — and above that, the ascension ladder. Of the four ladders documented, the Necromancer's Staff reaches 8.8 and the Staff of Light 8.7 at Power Level 7, both above the 8.4 that every natively Power Level 7 staff is stuck at, while the Draconic Staff (8.3) and Grieving Moonstaff (8.1) never catch up. That makes base power level a poor guide to what to build. Add the specialists — Subjugation against demons, Zamorak for a fire-only build that weakens your other elements, and Pharaoh's Sceptre for a kalphite summon and free Confuse casts — and the sensible plan is to pick the staff you intend to live with, then spend every Ascension Core on that one.
Want your vault runs to survive between sessions? Rent a RuneScape: Dragonwilds server at gamever.io — instant setup, one-click backups and updates, and 24/7 uptime. Start with a free trial and use promo code WELCOME.