
Capture Rates in Palworld, Measured: Why Sphere Tier Beats Everything Else
Everyone knows the ritual: knock the Pal down, throw the sphere, watch it wiggle. What almost nobody knows is how much each part of that ritual is actually worth — and the answer is lopsided. Grinding a Pal from full health to 1% roughly triples your odds on a low-tier sphere. Moving up one sphere tier can multiply them by ten. Below are measured numbers, not estimates.
How Capture Resolves
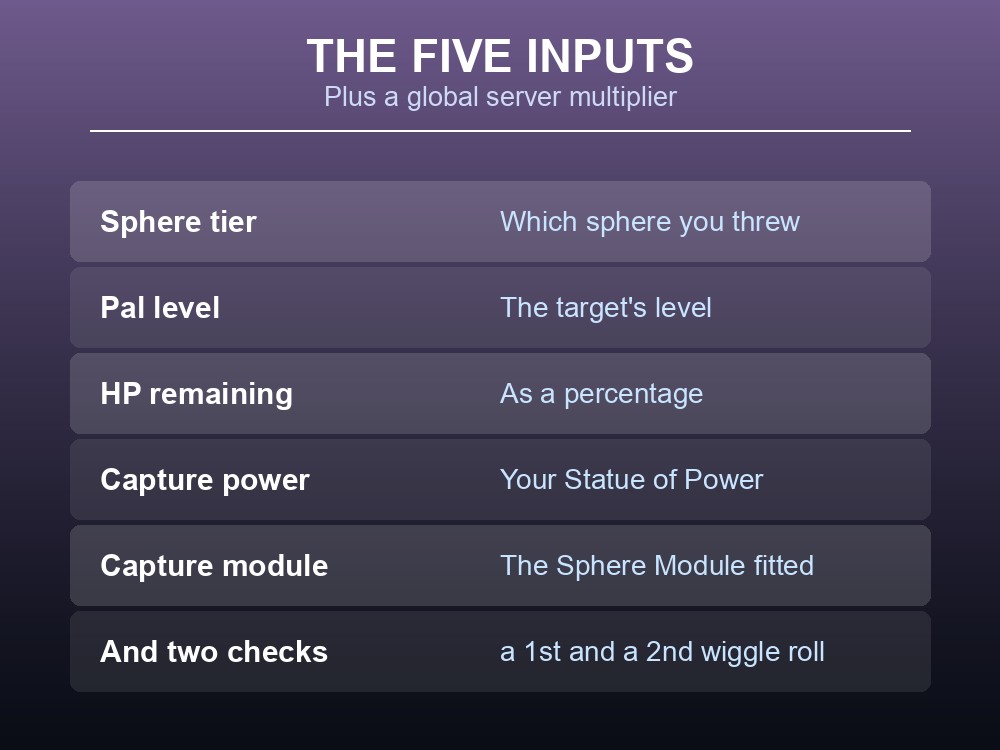
A capture attempt runs two separate checks — a first wiggle roll and a second wiggle roll — and the game feeds them from five inputs:
| Input | What it is |
|---|---|
| Sphere tier | Which sphere you threw |
| Pal level | The target's level |
| HP remaining | The target's health, as a percentage |
| Capture power | Your Statue of Power investment |
| Capture module | The Sphere Module fitted |
There is also a global capture-rate multiplier, which is the server setting, and Alpha Pals are computed on a separate, harsher track than ordinary ones.
Every figure below was measured on Lamball, whose published capture rate is 1.5 for the normal form and 1.05 as an Alpha — a 30% penalty just for being an Alpha, before anything else is applied.
Level Is the Wall
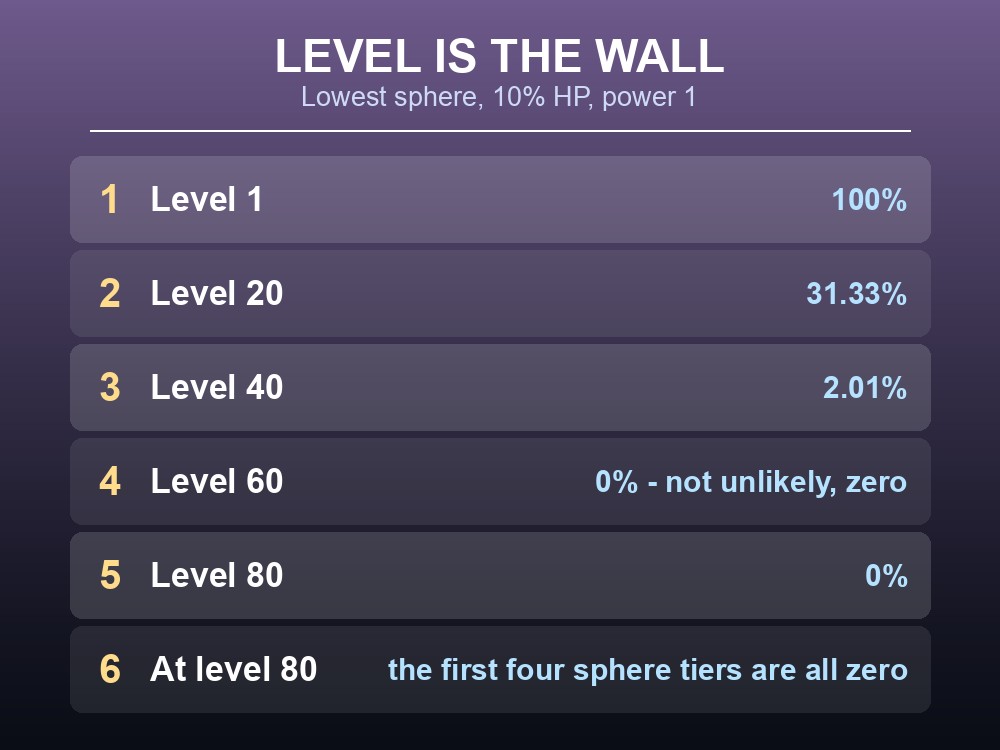
Holding everything else fixed — 10% HP, capture power 1, module 1 — and varying only the target's level, the first-tier sphere gives:
| Target level | 1st roll on the lowest sphere |
|---|---|
| Level 1 | 100% |
| Level 20 | 31.33% |
| Level 40 | 2.01% |
| Level 60 | 0% |
| Level 80 | 0% |
At level 60 and above, the basic sphere returns a flat zero. Not "unlikely" — zero. And at level 80 the first four sphere tiers are all zero, which means against a level 80 target nothing below the fifth tier can ever work, at any health, with any Statue investment.
This is the single most important thing on this page. Capture is gated first by level against sphere tier, and only then does anything else matter.
HP Grinding Matters Less Than You Think
At level 50, capture power 1, module 1, varying only the target's remaining health:
| HP remaining | Lowest sphere | 8th sphere |
|---|---|---|
| 100% | 0.04% | 94.02% |
| 75% | 0.06% | 100% |
| 50% | 0.07% | 100% |
| 25% | 0.09% | 100% |
| 10% | 0.11% | 100% |
| 1% | 0.12% | 100% |
Read the two columns against each other, because they tell opposite stories.
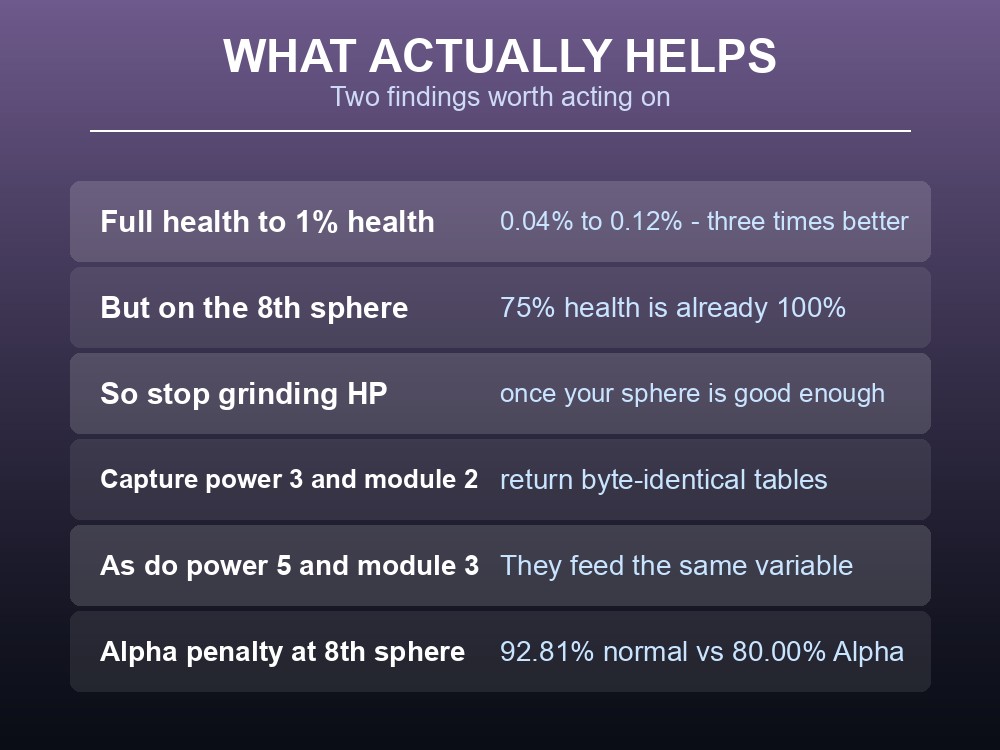
On the lowest sphere, grinding from 100% to 1% health takes you from 0.04% to 0.12% — three times better, and still hopeless. You have tripled a number that was never going to work.
On the eighth sphere, 75% health already gives you 100%. Beating the Pal down further buys you nothing at all, and every extra hit is a risk of killing it.
The practical rule: HP grinding only pays in the narrow band where your sphere is nearly good enough. If your sphere is far too weak, health does not save you; if it is strong enough, health is wasted effort.
Statue of Power and Sphere Modules Feed the Same Number
Here is a finding that is not obvious from either system's description. At level 50 and 10% HP, these two configurations return byte-identical results:
- Capture power 3, module 1
- Capture power 1, module 2
Both give 0.16, 1.4, 1.31, 5.55, 4.18, 12.04 … across the sphere ladder. The same holds for capture power 5 and module 3, which both give 0.24, 1.79, 1.63, 6.43 ….
The Statue of Power and the Sphere Module are pouring into the same variable. They are not two independent multipliers that stack in interesting ways — they are two ways of buying the same points. That matters for planning: if you have heavily invested in the Statue, an early Sphere Module adds less than its description suggests, and vice versa.
For scale, at level 50 and 10% HP the lowest sphere runs 0.11% at power 1 and 0.53% at power 10 — a five-fold improvement for maxing the Statue, which is real but still leaves you throwing a hopeless sphere.
The Alpha Penalty, Measured
Same Pal, same level 50, same 10% HP, same power and module — normal against Alpha across the sphere ladder:
| Sphere tier | Normal | Alpha |
|---|---|---|
| 1st | 0.11% | 0.09% |
| 4th | 10.14% | 8.74% |
| 6th | 34.49% | 29.73% |
| 7th | 58.61% | 50.52% |
| 8th | 92.81% | 80.00% |
| 9th | 100% | 98.01% |
The gap widens as the spheres get better. At the bottom of the ladder the difference is fractions of a percent because both are hopeless. At the seventh sphere it is eight points, at the eighth it is nearly thirteen, and the Alpha does not reach a guaranteed catch until a tier later than the normal Pal does.
That is the shape of the Alpha penalty: it does not make weak spheres weaker, it pushes back the tier at which you stop worrying.
What This Means in Practice
- Check the level first. Against level 60+, low-tier spheres are mathematically zero. Carrying them is dead weight.
- Upgrade spheres before anything else. One tier is worth more than maxing the Statue and fitting a module combined.
- Stop grinding health once your sphere is good. At the eighth tier, 75% health is already 100% — every further hit is pure risk.
- Do not double-invest in Statue and Module expecting them to stack. Power 3 and module 2 are the same number.
- Bring one tier extra for Alphas. The Alpha reaches certainty one sphere later than the normal form.
Running your own Palworld 1.0 server
The global capture-rate multiplier is a server setting, which means the whole table above shifts with one config line. A gamever Palworld server puts it in a panel with full crossplay, automatic updates and one-click backups.
Conclusion
Palworld resolves a capture with two wiggle rolls fed by sphere tier, Pal level, remaining HP, Statue of Power capture power, and the fitted Sphere Module, with Alphas computed on a separate harsher track. Measured on Lamball at fixed inputs, level is the wall: at level 60 the lowest sphere returns exactly 0%, and at level 80 the first four tiers are all zero, so nothing below the fifth can ever work regardless of health or Statue investment. HP grinding is far weaker than its reputation — from full health to 1% is roughly a three-fold improvement on a hopeless sphere and completely wasted on a good one, since the eighth sphere already hits 100% at 75% health. The Statue of Power and Sphere Modules feed the same variable — capture power 3 and module 2 return byte-identical tables, as do power 5 and module 3 — so they buy the same points rather than stacking independently. And the Alpha penalty widens with sphere quality: identical at the bottom, nearly thirteen points apart at the eighth tier, with certainty arriving one full tier later.
Want to tune the capture multiplier for your group? Rent a Palworld server at gamever.io — instant setup, one-click backups and updates, full crossplay and 24/7 uptime. Start with a free trial and use promo code WELCOME.